Wire Harness Kit For Trailers
Towing a trailer expands the utility of any vehicle, whether it's hauling a boat for a weekend getaway or transporting equipment for a job. But safely connecting a trailer involves more than just a hitch. The wire harness kit is the crucial link that integrates your vehicle's electrical system with the trailer's lighting, ensuring safe and legal operation on the road. This article delves into the intricacies of trailer wire harness kits, covering their components, installation, troubleshooting, and best practices for ensuring a reliable connection.
Understanding Trailer Wire Harness Kits
At its core, a trailer wire harness kit allows the towing vehicle to control the trailer's lights, including brake lights, turn signals, tail lights, and sometimes auxiliary functions like reverse lights or electric brakes. Without a properly functioning harness, your trailer is a safety hazard and a violation of traffic laws.
Components of a Typical Wire Harness Kit
A standard kit typically includes the following:
- Wiring: Color-coded wires of appropriate gauge (thickness) for carrying the required current.
- Connector: A standardized connector (usually a 4-way flat, 5-way flat, 6-way round, or 7-way round) that plugs into the trailer's corresponding connector.
- Converter (if needed): Converts the vehicle's separate brake and turn signal circuits into a combined signal required by many trailers (common in vehicles with separate turn signals and brake lights).
- Fuse Protection: In-line fuses or fuse blocks to protect the vehicle's electrical system from shorts or overloads in the trailer wiring.
- Hardware: Zip ties, connectors, and other small parts needed for secure and reliable installation.
- Instructions: Detailed instructions specific to the kit and often including vehicle-specific wiring diagrams.
Types of Connectors
The type of connector you need depends on the trailer and the functions it requires:
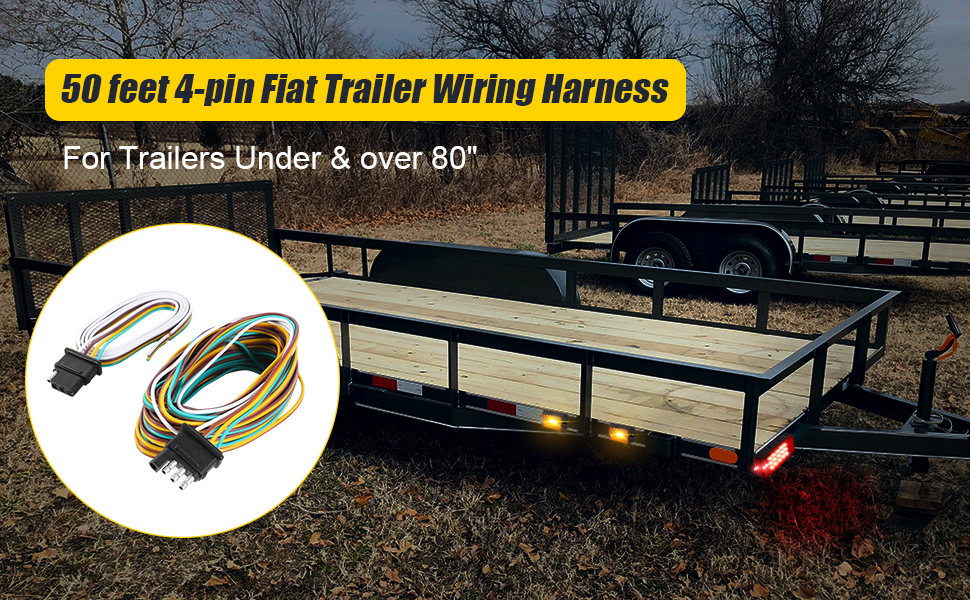
- 4-Way Flat Connector: The most basic type, providing connections for ground, tail lights, left turn/brake light, and right turn/brake light. Suitable for small trailers without electric brakes.
- 5-Way Flat Connector: Adds a wire for auxiliary functions, often used for surge brakes (hydraulic brakes activated by the trailer's momentum).
- 6-Way Round Connector: Used for trailers with electric brakes. Provides connections for ground, tail lights, left turn signal, right turn signal, electric brake control, and auxiliary power (often for a 12V battery on the trailer).
- 7-Way Round Connector (RV Blade): The most versatile type, commonly found on RVs and larger trailers. Includes connections for ground, tail lights, left turn signal, right turn signal, electric brake control, 12V power, and reverse lights. The 12V power can be used to charge a trailer battery or power interior lights.
Selecting the Right Wire Harness Kit
Choosing the correct wire harness kit is critical for a safe and trouble-free towing experience. Consider these factors:
- Vehicle Compatibility: The kit must be compatible with your specific vehicle make, model, and year. Some vehicles require custom wiring harnesses to integrate with their CAN bus (Controller Area Network) systems. Incorrectly wiring into a CAN bus system can cause serious electrical problems.
- Trailer Requirements: Determine the connector type and functions needed for your trailer. If your trailer has electric brakes or requires 12V power, you'll need a 6-way or 7-way connector.
- Wiring Method: Consider whether you prefer a 'T-connector' harness (plugs directly into the vehicle's existing wiring) or a more universal kit that requires splicing into the vehicle's wires. T-connectors are generally easier to install.
- Quality: Opt for a reputable brand with durable materials and reliable connectors. Skimping on quality can lead to corrosion, loose connections, and electrical failures.
Installation Process: A Step-by-Step Guide
Installing a trailer wire harness kit can range from a simple plug-and-play procedure to a more complex task involving wire splicing. Always consult the kit's instructions and your vehicle's wiring diagrams.
- Gather Tools and Materials: You'll typically need wire strippers, crimpers, a test light or multimeter, electrical tape or heat shrink tubing, zip ties, and possibly a drill for mounting the connector.
- Locate Vehicle Wiring: Identify the vehicle's tail light wiring harness, usually located near the tail lights or under the bumper. Consult your vehicle's repair manual or online resources for specific locations.
- Connect the Harness:
- T-Connector Harness: Simply plug the T-connectors into the corresponding connectors on the vehicle's tail light wiring harness.
- Universal Harness: Use wire strippers to expose the wires and crimp connectors to connect the harness wires to the vehicle's tail light wires, matching colors according to the wiring diagram.
- Ground Connection: Securely ground the harness to the vehicle's frame using a self-tapping screw or existing grounding point. A poor ground is a common cause of trailer wiring problems.
- Route and Secure Wires: Route the wires along the vehicle's frame, avoiding exhaust pipes and moving parts. Use zip ties to secure the wires and prevent them from dangling.
- Mount the Connector: Mount the trailer connector near the hitch using the provided bracket or a suitable mounting location.
- Test the Connections: Use a test light or multimeter to verify that each wire is functioning correctly (tail lights, brake lights, turn signals). Test with the vehicle running and the lights activated.
- Fuse Installation: Ensure all fuses are installed and of the correct amperage as specified by the kit instructions.
Troubleshooting Common Problems
Even with careful installation, trailer wiring problems can occur. Here are some common issues and troubleshooting tips:
- Lights Not Working:
- Check fuses in both the vehicle and the trailer.
- Inspect wiring for loose connections, corrosion, or damage.
- Verify the ground connection is secure.
- Use a test light or multimeter to check for voltage at the trailer connector.
- Dim Lights:
- Poor ground connection.
- Corroded connectors.
- Undersized wiring (not enough current carrying capacity).
- Blown Fuses:
- Short circuit in the trailer wiring.
- Overloaded circuit (too many lights or devices on the trailer).
- Faulty brake controller (if equipped).
- Turn Signals Not Working Correctly:
- Problem with the trailer turn signal bulbs or wiring.
- Faulty turn signal switch in the vehicle.
- Incorrect wiring of the trailer harness.
Using a Multimeter: A multimeter is an invaluable tool for diagnosing trailer wiring problems. It allows you to measure voltage, current, and resistance, helping you pinpoint the source of the issue. Knowing how to use a multimeter is essential for any serious DIY mechanic.
Advanced Considerations: CAN Bus Integration and Brake Controllers
Modern vehicles often use a CAN bus system to control various functions, including lighting. Installing a trailer wire harness on these vehicles requires special considerations. Some kits include a CAN bus interface module that allows the harness to communicate with the vehicle's computer system without disrupting its operation. These modules are often vehicle-specific and require careful programming.
Brake Controllers: If your trailer has electric brakes, you'll need a brake controller in addition to the wire harness. The brake controller allows you to adjust the braking force applied to the trailer, ensuring smooth and controlled stops. Brake controllers connect to the vehicle's wiring harness and require a dedicated circuit to the trailer connector. Different types of brake controllers exist, including proportional controllers (which apply braking force based on the vehicle's deceleration) and time-delayed controllers (which apply braking force after a set delay).
Maintenance and Best Practices
To ensure a long and reliable life for your trailer wire harness, follow these maintenance tips:
- Regular Inspection: Inspect the wiring and connectors regularly for signs of damage, corrosion, or loose connections.
- Clean Connectors: Clean the connectors with electrical contact cleaner to remove dirt and corrosion.
- Use Dielectric Grease: Apply dielectric grease to the connectors to prevent corrosion and improve conductivity.
- Secure Wiring: Ensure all wiring is securely fastened to prevent it from rubbing against the vehicle or trailer.
- Protective Covering: Consider using split loom tubing or other protective coverings to protect the wiring from abrasion and weather.
- Store Connector Properly: When not in use, store the trailer connector in a protected location to prevent damage and corrosion.
Investing in a high-quality trailer wire harness kit and following proper installation and maintenance procedures will ensure a safe and reliable towing experience for years to come. Ignoring the importance of a properly functioning electrical system can lead to dangerous situations on the road and costly repairs down the line. By understanding the principles and best practices outlined in this article, you can confidently tackle trailer wiring projects and enjoy the expanded capabilities that towing provides.