Xterra Leaf Spring Replacement
Leaf springs are a crucial component of the suspension system in many vehicles, including the Nissan Xterra. They provide support for the vehicle's weight, contribute to ride quality, and help maintain proper axle positioning. Over time, leaf springs can wear out, sag, or even break, leading to a rough ride, poor handling, and potential safety concerns. Replacing worn or damaged leaf springs is a necessary maintenance task to ensure the longevity and safe operation of your Xterra. This article provides a comprehensive guide to Xterra leaf spring replacement, covering when it's needed, how to choose the right springs, and a step-by-step overview of the replacement process.
When to Replace Your Xterra Leaf Springs
Knowing when to replace your Xterra's leaf springs is crucial for maintaining optimal performance and safety. Several signs indicate that replacement is necessary:
- Sagging: One of the most common indicators is visible sagging of the rear of the vehicle, especially when loaded. Measure the distance from the wheel well to the top of the tire on both sides. A significant difference indicates a problem.
- Rough Ride: Worn leaf springs can result in a noticeably harsher and less comfortable ride. You might feel every bump and imperfection in the road.
- Poor Handling: If your Xterra feels unstable when cornering or prone to swaying, worn leaf springs could be the culprit. They contribute to body roll and affect overall stability.
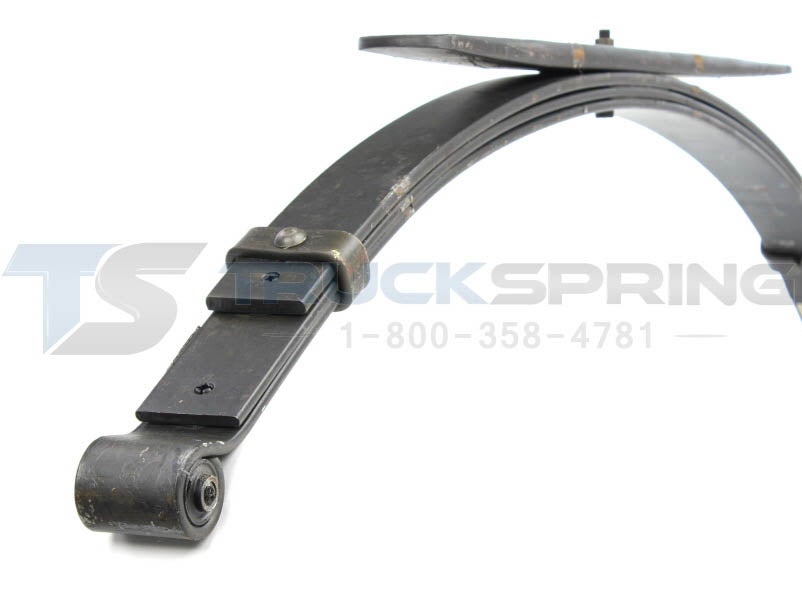
- Cracked or Broken Leaves: Visually inspect the leaf springs for any cracks, breaks, or excessive rust. Even a small crack can compromise the spring's integrity. Cracks are a serious safety concern.
- Excessive Noise: Squeaking, groaning, or clunking sounds coming from the rear suspension while driving over bumps can indicate worn or broken leaf spring components.
- Uneven Tire Wear: Though often related to alignment, uneven tire wear, particularly on the rear tires, can be exacerbated by failing leaf springs that allow for improper axle positioning.
- Decreased Load Capacity: If you frequently haul heavy loads, you may notice a reduced load capacity or increased bottoming out. This indicates that the leaf springs are no longer providing adequate support.
Regular inspections of your Xterra's leaf springs are essential, especially if you frequently use your vehicle for off-roading or heavy hauling. Addressing these issues promptly will improve the vehicle's handling, ride quality, and safety.
Choosing the Right Replacement Leaf Springs
Selecting the correct replacement leaf springs is critical for maintaining your Xterra's intended performance and ride characteristics. Consider the following factors:
- Original Equipment Manufacturer (OEM) vs. Aftermarket: OEM leaf springs are designed and manufactured to the exact specifications of the original parts. They are generally more expensive but offer guaranteed fit and performance. Aftermarket leaf springs can be more affordable and offer different levels of performance, such as increased load capacity or lift. Research aftermarket brands carefully to ensure quality and reliability.
- Load Capacity: Choose leaf springs with a load capacity that matches your Xterra's intended use. If you frequently haul heavy loads or plan to add aftermarket accessories, consider upgrading to a heavier-duty option. Be aware that increasing the load capacity can affect ride quality when the vehicle is unloaded.
- Lift Height: Leaf springs are available in various lift heights. If you want to lift your Xterra for off-roading or aesthetic purposes, select leaf springs with the desired lift height. Ensure that the lift height is compatible with other suspension components, such as shocks and brake lines.
- Number of Leaves: The number of leaves in a leaf spring pack affects its stiffness and load capacity. More leaves generally mean a stiffer spring and higher load capacity. However, it can also result in a harsher ride.
- Spring Rate: The spring rate determines how much weight the leaf spring can support for each inch of compression. A higher spring rate provides greater load capacity but a firmer ride.
- Bushings: Inspect the bushings in the leaf spring eyes. Worn or damaged bushings can contribute to noise and poor handling. Consider replacing the bushings when replacing the leaf springs. Urethane bushings are more durable than rubber bushings but can transmit more vibration.
Important Note: Always replace leaf springs in pairs (both sides) to ensure even suspension performance and prevent handling issues. Mixing old and new leaf springs can lead to uneven weight distribution and unpredictable handling.
Xterra Leaf Spring Replacement: A Step-by-Step Guide
Replacing leaf springs can be a challenging but manageable DIY project if you have the necessary tools and mechanical skills. Safety is paramount, so always use proper safety precautions. If you're not comfortable performing this task, it's best to consult a qualified mechanic.
Tools and Materials Needed:
- New leaf spring assembly (pair)
- Jack and jack stands
- Wheel chocks
- Sockets and wrenches (metric)
- Torque wrench
- Penetrating oil
- Hammer
- Punch
- Safety glasses
- Gloves
- Optional: Spring compressor (can be helpful but not always necessary)
- Optional: New U-bolts, shackle bolts, and bushings
Step-by-Step Instructions:
- Safety First: Park the Xterra on a level surface, engage the parking brake, and chock the front wheels to prevent movement.
- Loosen Lug Nuts: Loosen the lug nuts on the rear wheels, but don't remove them completely.
- Raise and Support the Vehicle: Use a jack to raise the rear of the Xterra and securely support it with jack stands placed under the frame rails. Never work under a vehicle supported only by a jack.
- Remove the Wheels: Remove the rear wheels.
- Spray Penetrating Oil: Liberally spray penetrating oil on all bolts and nuts associated with the leaf springs, including the U-bolts, shackle bolts, and leaf spring eye bolts. Let the oil soak for at least 30 minutes to help loosen corroded fasteners.
- Disconnect the Shock Absorber: Disconnect the lower shock absorber mount from the axle.
- Support the Axle: Place a jack under the rear axle to support its weight. This is crucial to prevent the axle from dropping unexpectedly when the leaf springs are disconnected.
- Remove the U-Bolts: Carefully remove the U-bolts that secure the leaf spring to the axle. These may be heavily corroded and difficult to remove. Use a breaker bar or impact wrench if necessary. Discard the old U-bolts, as they should not be reused.
- Remove the Shackle Bolts: Remove the shackle bolts that connect the leaf spring to the frame shackles. These bolts may also be corroded and require some effort to remove. Use a hammer and punch to tap them out if necessary.
- Remove the Front Leaf Spring Bolt: Remove the bolt that secures the front of the leaf spring to the frame. This is often the most difficult bolt to remove due to corrosion and tight space. Use penetrating oil and patience.
- Remove the Old Leaf Spring: Carefully remove the old leaf spring from the vehicle. Lower the axle jack slightly to create more space if needed.
- Prepare the New Leaf Spring: Install new bushings in the leaf spring eyes if necessary. Apply a thin layer of grease to the bushings to prevent squeaking.
- Install the New Leaf Spring: Position the new leaf spring in place, aligning the front eye with the mounting point on the frame. Install the front leaf spring bolt and tighten it loosely.
- Attach the Shackles: Connect the rear of the leaf spring to the frame shackles using new shackle bolts. Tighten the shackle bolts loosely.
- Align the Axle: Position the axle on top of the leaf spring, ensuring that the center pin on the leaf spring aligns with the hole in the axle perch.
- Install New U-Bolts: Install new U-bolts over the axle and tighten them evenly to the specified torque. Torque specifications are crucial for proper clamping force.
- Reconnect the Shock Absorber: Reconnect the lower shock absorber mount to the axle.
- Repeat on the Other Side: Repeat the process on the other side of the vehicle.
- Lower the Vehicle: Slowly lower the vehicle to the ground and remove the jack stands.
- Tighten All Bolts: With the vehicle's weight on the suspension, tighten all bolts (leaf spring eye bolts, shackle bolts, U-bolts, and shock absorber bolts) to the specified torque. Refer to your vehicle's service manual for torque specifications.
- Reinstall the Wheels: Reinstall the wheels and tighten the lug nuts to the specified torque.
- Test Drive: Take the Xterra for a test drive to check for any noises or handling issues.
- Alignment: After replacing leaf springs, it's highly recommended to have the vehicle's alignment checked and adjusted by a professional. This will ensure proper handling and prevent uneven tire wear.
Important Considerations:
- Rust and Corrosion: Working with old leaf springs often involves dealing with rust and corrosion. Be prepared to use penetrating oil, heat, and other methods to loosen stubborn fasteners.
- Spring Compressors: While not always necessary, spring compressors can be helpful for compressing the leaf spring pack, especially when dealing with heavy-duty springs or those with a significant arch.
- Torque Specifications: Always use a torque wrench to tighten all bolts to the specified torque. Overtightening can damage the bolts or the leaf springs, while undertightening can lead to loosening and safety issues.
- Professional Assistance: If you are not comfortable performing this task, it's best to consult a qualified mechanic. Incorrect installation can lead to serious safety problems.
Conclusion
Xterra leaf spring replacement is a critical maintenance task that can significantly improve your vehicle's ride quality, handling, and safety. By understanding the signs of worn leaf springs, choosing the right replacement springs, and following the step-by-step instructions outlined in this article, you can successfully complete this project and enjoy a smoother, more comfortable driving experience. Remember to always prioritize safety and consult a professional if you have any doubts or concerns. Investing in new leaf springs can help extend the life of your Xterra and ensure its continued reliability for years to come. Consider this a necessary investment to keep your vehicle in optimal condition.