Tail Light Assembly Replacement And Electrical Diagnostics
The tail light assembly. Often relegated to the background, literally and figuratively, it's a crucial safety system on any vehicle. More than just a red glow, it's a complex arrangement of lights, reflectors, and wiring, designed to communicate vital information to other drivers. When a bulb burns out, or the assembly itself is damaged, it's not just an inconvenience; it's a safety hazard. Replacing a tail light assembly, therefore, becomes a critical maintenance task, and understanding the process, coupled with basic electrical diagnostics, can empower any mechanically inclined individual to tackle the job with confidence.
Understanding the Tail Light Assembly
Before diving into the replacement procedure, let's break down the components of a typical tail light assembly. At its core, it's a plastic housing containing several bulbs or LEDs (Light Emitting Diodes), each serving a specific function. These functions generally include:
- Tail Lights: These illuminate whenever the headlights are switched on, indicating the vehicle's presence in low-light conditions.
- Brake Lights: These illuminate when the brake pedal is depressed, signaling the driver's intention to slow down or stop. They are significantly brighter than the tail lights to ensure clear visibility.
- Turn Signals: These flash intermittently to indicate the driver's intention to turn left or right.
- Reverse Lights: These illuminate when the vehicle is shifted into reverse, warning other drivers of the vehicle's intention to back up. These are usually white or clear.
- Side Marker Lights: These are smaller lights, usually amber in the front and red in the rear, located on the sides of the vehicle to improve visibility from angles.
The assembly also incorporates reflectors, often molded into the plastic housing itself. These reflectors are designed to bounce back light from other vehicles, making the vehicle visible even when the lights are not illuminated. Finally, the entire assembly is wired to the vehicle's electrical system, receiving power through a series of connectors and harnesses.
Tail Light Assembly Replacement: A Step-by-Step Guide
Replacing a tail light assembly is a relatively straightforward process that can typically be completed with basic tools. However, safety is paramount. Always disconnect the negative battery terminal before working on any electrical components. This will prevent accidental short circuits and potential injury.
Step 1: Gather Your Tools and Materials
You'll need the following:
- New tail light assembly (ensure it's the correct part for your vehicle's make, model, and year)
- Socket set with appropriate sizes for the assembly mounting bolts or nuts
- Screwdriver (usually Phillips head)
- Pliers
- Wire strippers/crimpers (potentially, if splicing is required)
- Electrical tape or heat-shrink tubing
- Multimeter (for troubleshooting, optional but recommended)
- Gloves
- Safety glasses
Step 2: Accessing the Tail Light Assembly
The location of the tail light assembly mounting points varies depending on the vehicle. Common locations include:
- Inside the Trunk/Hatch: Many assemblies are accessed from within the trunk or hatch area. You may need to remove interior trim panels or carpeting to gain access to the mounting bolts or nuts.
- Behind a Removable Panel: Some vehicles have a small, removable panel on the exterior of the vehicle that provides access to the assembly.
- Directly Exposed: In some cases, the mounting hardware is directly exposed on the exterior of the vehicle.
Consult your vehicle's repair manual for specific instructions on accessing the tail light assembly.
Step 3: Removing the Old Assembly
Once you have access to the assembly, carefully remove the mounting bolts or nuts. These may be tight, so use a wrench or socket with good leverage. Once the hardware is removed, gently pull the assembly away from the vehicle. It may be held in place by plastic clips or adhesive, so apply steady, even pressure. Avoid excessive force, as you could damage the surrounding body panels.
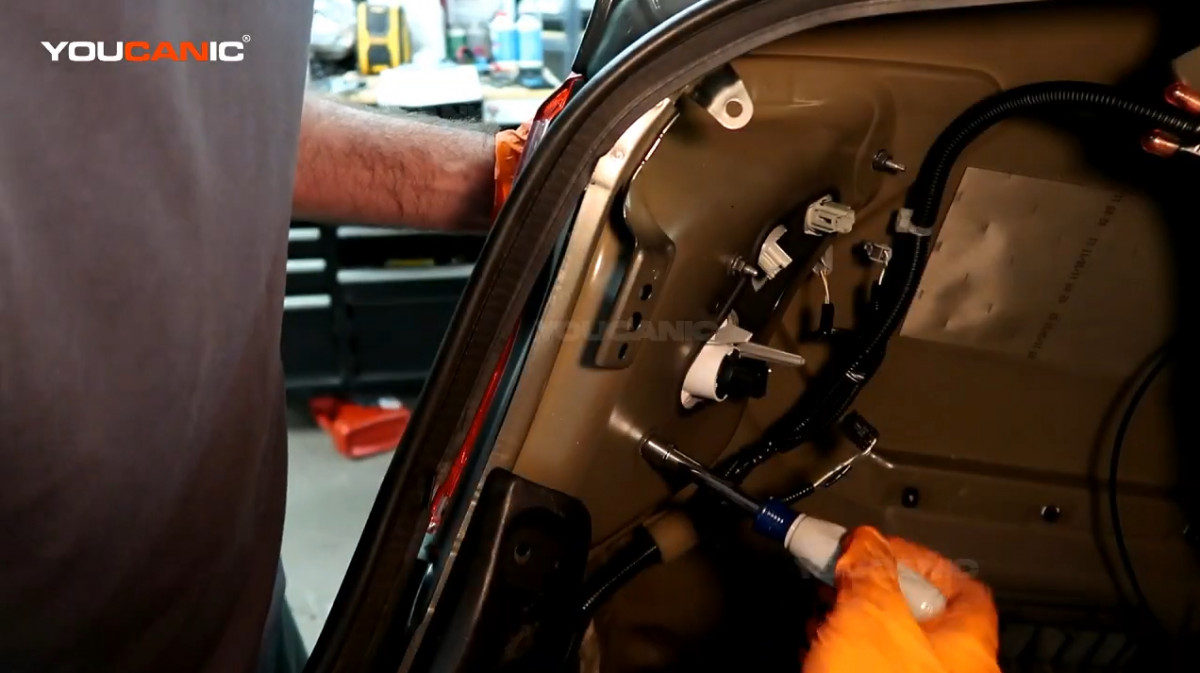
Step 4: Disconnecting the Electrical Connectors
Before completely removing the old assembly, disconnect the electrical connectors. These connectors typically have a locking mechanism that must be disengaged before they can be separated. Gently press the locking tab and pull the connector apart. Never pull on the wires themselves, as this can damage the connector or the wiring. Take note of the connector configuration, or even take a picture, to ensure you reconnect them correctly later.
Step 5: Installing the New Assembly
Connect the electrical connectors to the new tail light assembly, ensuring they are securely latched. Align the new assembly with the mounting holes and carefully push it into place. Secure the assembly with the mounting bolts or nuts, tightening them to the manufacturer's specified torque. Do not overtighten, as this could damage the plastic housing.
Step 6: Testing the New Assembly
Before reassembling the interior trim panels, reconnect the negative battery terminal and test all the lights: tail lights, brake lights, turn signals, and reverse lights. Ensure they are all functioning correctly. If any lights are not working, double-check the electrical connections and bulb installation. If problems persist, proceed to the electrical diagnostics section below.
Step 7: Reassembly
Once you have confirmed that all the lights are working correctly, reassemble the interior trim panels or exterior panels that you removed to access the tail light assembly.
Electrical Diagnostics: Troubleshooting Tail Light Issues
If the new tail light assembly is not functioning correctly, the problem may lie in the vehicle's electrical system. Here's a systematic approach to troubleshooting common issues:
1. Check the Fuses
The most common cause of tail light problems is a blown fuse. Consult your vehicle's owner's manual to locate the fuse box and identify the fuse(s) that control the tail lights. Use a fuse tester or a multimeter to check the continuity of the fuse. If the fuse is blown, replace it with a new fuse of the same amperage.
2. Inspect the Bulbs
Even if you've replaced the entire assembly, it's worth checking the individual bulbs, especially if using standard incandescent bulbs. Sometimes, a bulb can appear to be intact but have a broken filament. Use a multimeter to check the bulb's continuity. Place the probes on the bulb's terminals. If there is no continuity, the bulb is blown.
3. Check the Ground Connection
A poor ground connection can also cause tail light problems. The tail light assembly is typically grounded to the vehicle's chassis. Inspect the ground wire and the connection point for corrosion or looseness. Clean the connection point with sandpaper or a wire brush and ensure the ground wire is securely attached.
4. Test for Power and Ground
Use a multimeter to check for power and ground at the tail light connector. With the ignition on and the headlights switched on, you should have 12 volts at the tail light wire. With the multimeter set to measure resistance, check for continuity between the ground wire and the vehicle's chassis. There should be very little resistance (close to 0 ohms).
5. Check the Wiring
Inspect the wiring harness for any signs of damage, such as cuts, abrasions, or melted insulation. Use a multimeter to check the continuity of each wire in the harness. If you find a broken wire, repair it using wire strippers, crimpers, and electrical tape or heat-shrink tubing.
6. The Turn Signal Flasher Unit
If the turn signals are not working, the problem could be with the turn signal flasher unit. This unit is responsible for intermittently interrupting the power to the turn signal bulbs, causing them to flash. Locate the flasher unit (consult your vehicle's repair manual) and replace it with a new one.
7. Consult a Wiring Diagram
A wiring diagram is an invaluable tool for troubleshooting electrical problems. It shows the complete wiring schematic for the tail light system, including the location of all the wires, connectors, and components. Wiring diagrams can be found in your vehicle's repair manual or online.
Using a Multimeter
The multimeter is your best friend when diagnosing electrical issues. Here’s a quick rundown of its uses:
- Continuity Test: Checks if a circuit is complete. Set the multimeter to the continuity setting (often denoted by a diode symbol or a sound wave symbol). A beep or a reading close to zero indicates continuity.
- Voltage Test: Measures the voltage in a circuit. Set the multimeter to DC voltage (usually denoted by "V" with a straight line above it). Connect the black lead to ground and the red lead to the point you want to test.
- Resistance Test: Measures the resistance in a circuit. Set the multimeter to ohms (Ω). Use this to check the resistance of components like bulbs.
Important Safety Tip: Always exercise caution when working with electricity. Never work on a vehicle's electrical system with the ignition on or the battery connected, unless specifically instructed to do so by a repair manual or qualified technician.
Replacing a tail light assembly and performing basic electrical diagnostics can seem daunting at first, but with a systematic approach and a basic understanding of the components involved, it's a task that most mechanically inclined individuals can accomplish. By following these steps and using the right tools, you can ensure that your vehicle's tail lights are functioning properly, keeping you and other drivers safe on the road.