1990 Nissan 240sx Head Gasket: Replacement And Prevention
The Nissan 240SX, particularly those equipped with the KA24DE engine, is a beloved platform for modification and motorsports. However, one common issue that plagues these engines is head gasket failure. This article will provide a comprehensive guide to replacing the head gasket on a KA24DE, as well as discuss preventative measures to minimize the risk of future failures. We'll cover everything from diagnosis to torquing procedures, aimed at the intermediate DIY mechanic.
Diagnosing a Blown Head Gasket
Before diving into the replacement procedure, it's crucial to accurately diagnose a blown head gasket. Misdiagnosis can lead to wasted time and money. Here are some common symptoms:
- Overheating: This is a classic sign. A blown head gasket can allow combustion gases into the coolant system, or coolant into the combustion chamber, disrupting the engine's cooling efficiency. Pay close attention to the temperature gauge and any unusual behavior.
- Coolant Loss: A leaking head gasket can allow coolant to escape externally, usually noticeable as drips near the head/block junction, or internally, leading to coolant burning within the cylinders.
- White Smoke from Exhaust: This indicates coolant entering the combustion chamber and being vaporized. It's often accompanied by a sweet smell (antifreeze). Be cautious - a small amount of white smoke on cold starts is normal (condensation), but persistent smoke is a red flag.
- Milky Oil: Coolant mixing with the oil creates a milky, light-brown appearance. Check the dipstick and the oil filler cap. This is a serious sign indicating significant leakage.
- Bubbles in Coolant Overflow Tank: With the engine running and warm (exercise caution!), observe the coolant overflow tank. Bubbles, especially consistent ones, suggest combustion gases are entering the cooling system. A coolant combustion leak tester can positively confirm this.
- Loss of Power: Compression loss due to a blown head gasket can result in noticeable power reduction.
- Rough Idling: Misfires caused by coolant in the cylinders or compression loss can lead to a rough or unstable idle.
It's important to note that not all these symptoms will be present simultaneously. A combination of several symptoms is a strong indicator of a blown head gasket.
Preparation and Tools
Replacing a head gasket is a moderately complex task. Preparation is key. Gather all the necessary tools and parts before starting.
Tools Required:
- Socket set (metric) – A comprehensive set with deep sockets and extensions is essential. Pay particular attention to sizes needed for head bolts, exhaust manifold bolts, intake manifold bolts, and other components.
- Torque wrench – Critical for properly torquing the head bolts in the correct sequence.
- Breaker bar – For loosening stubborn bolts.
- Pliers – Various types (needle-nose, hose clamp pliers) will be needed.
- Screwdrivers (Phillips and flathead)
- Impact wrench (optional, but highly recommended for stubborn bolts)
- Coolant drain pan
- Oil drain pan
- Scrapers – For cleaning gasket surfaces.
- Razor blades – For delicate gasket surface cleaning.
- Rags and cleaning solvent – For general cleaning.
- Valve spring compressor – Needed if you plan to remove and inspect the valves.
- Feeler gauges – For checking valve clearances.
- Straight edge – To check the cylinder head and block for warping.
- Multimeter – For testing sensors (like coolant temperature sensor).
- Marking tools (permanent marker, masking tape) – For labeling hoses and wires.
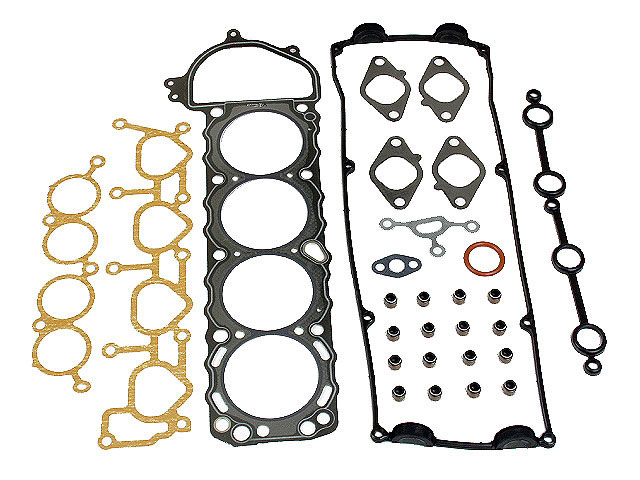
Parts Required:
- Head gasket – Use a quality replacement, preferably from a reputable brand like Fel-Pro or Cometic. Consider an upgraded gasket (thicker or multi-layer steel) if you're increasing boost.
- Head bolts – Do not reuse the old head bolts. They are torque-to-yield (TTY) bolts and are designed to stretch. Using them again can lead to improper clamping force and subsequent head gasket failure.
- Valve cover gasket
- Intake manifold gasket
- Exhaust manifold gasket
- Throttle body gasket
- Coolant
- Oil and oil filter
- Thermostat gasket (if replacing the thermostat)
- Distilled water (for flushing the cooling system)
- Vacuum hoses (replace any cracked or brittle hoses)
- Fuel injector O-rings (if removing the injectors)
Head Gasket Replacement Procedure
Important Safety Note: Disconnect the negative battery terminal before starting any work. Allow the engine to cool completely before beginning.
- Drain Fluids: Drain the coolant and engine oil. Dispose of properly.
- Disconnect Hoses and Wiring: Carefully disconnect all hoses and wiring connected to the engine. Label everything clearly to ensure proper reassembly. Take pictures for reference. Pay close attention to the wiring harness and the various sensors.
- Remove Intake and Exhaust Manifolds: Disconnect the intake and exhaust manifolds. Soak any stubborn bolts with penetrating oil.
- Remove Valve Cover: Remove the valve cover. Inspect the camshafts and rocker arms for wear.
- Remove Timing Chain: Carefully remove the timing chain. Pay close attention to the timing marks on the sprockets and the chain itself. Refer to the factory service manual for detailed instructions on timing chain removal and installation. Proper timing is critical for engine operation. Use zip ties to secure the chain to the sprockets to prevent it from slipping.
- Loosen and Remove Head Bolts: Loosen the head bolts in the reverse order of the tightening sequence. Gradually loosen each bolt in multiple steps to avoid warping the head. Once all bolts are loose, remove them.
- Remove Cylinder Head: Carefully lift the cylinder head off the engine block. It may be stuck due to the old gasket. Gently tap around the edges with a rubber mallet if necessary. Avoid prying with excessive force, as this can damage the head or block.
- Clean Gasket Surfaces: Thoroughly clean the gasket surfaces on both the cylinder head and the engine block. Use a scraper and razor blades to remove all traces of the old gasket. Be careful not to scratch the surfaces. Use cleaning solvent to degrease the surfaces.
- Inspect Cylinder Head and Block: Use a straight edge and feeler gauges to check the cylinder head and block for warping. Consult the factory service manual for acceptable tolerances. If the head or block is warped beyond specifications, it will need to be resurfaced by a machine shop. Also, inspect the cylinders for any signs of damage (scoring, cracks).
- Install New Head Gasket: Carefully install the new head gasket, ensuring it is properly aligned with the dowel pins. Refer to the gasket manufacturer's instructions for any specific installation requirements.
- Install Cylinder Head: Carefully lower the cylinder head onto the engine block, ensuring it is properly aligned.
- Install New Head Bolts: Install new head bolts, tightening them in the specified sequence and to the specified torque values. The KA24DE typically uses a torque-to-yield (TTY) procedure, which involves tightening the bolts to a specific torque, followed by a specific angle of rotation. Follow the manufacturer's instructions exactly!
- Reinstall Timing Chain: Reinstall the timing chain, ensuring the timing marks are properly aligned. Double-check the timing before proceeding.
- Reinstall Valve Cover: Install the valve cover with a new gasket.
- Reinstall Intake and Exhaust Manifolds: Reconnect the intake and exhaust manifolds with new gaskets.
- Reconnect Hoses and Wiring: Reconnect all hoses and wiring, referring to your labels and photographs.
- Refill Fluids: Refill the coolant and engine oil.
- Bleed Cooling System: Bleed the cooling system to remove any air pockets.
- Start Engine and Check for Leaks: Start the engine and allow it to warm up. Check for any leaks (coolant, oil, exhaust).
- Monitor Temperature: Closely monitor the engine temperature gauge to ensure the engine is not overheating.
- Check and Adjust Timing: Verify and adjust the ignition timing as needed.
Preventing Future Head Gasket Failures
Replacing the head gasket is one thing, but preventing future failures is just as important. Here are some preventative measures:
- Maintain Proper Cooling System: Ensure the cooling system is functioning optimally. This includes using the correct coolant mixture, flushing the system regularly, and replacing the thermostat as needed. A faulty radiator cap can also cause problems.
- Avoid Overheating: Overheating is the leading cause of head gasket failures. Address any cooling system issues promptly. If you notice the temperature gauge rising, pull over and let the engine cool down.
- Proper Torque: Using the correct torque sequence and values when installing the head bolts is absolutely critical. Invest in a quality torque wrench and follow the manufacturer's instructions precisely.
- Avoid Over-Boosting (for Turbocharged/Supercharged Engines): Excessive boost can put undue stress on the head gasket. Ensure the engine is properly tuned and the boost levels are within safe limits.
- Use a Quality Head Gasket: Don't skimp on the head gasket. Choose a reputable brand and consider an upgraded gasket if you're increasing performance.
- Check Head and Block Surfaces: Make sure both surfaces are flat. If they are not, take them to a machine shop to get them resurfaced.
- Monitor Engine Performance: Pay attention to any changes in engine performance, such as loss of power, rough idling, or unusual noises. These could be early warning signs of a potential head gasket issue.
- Regular Oil Changes: Change your engine oil at the recommended intervals. Clean oil helps keep the engine running cool and reduces the risk of overheating.
By following these steps and taking preventative measures, you can significantly reduce the risk of head gasket failure on your KA24DE-powered 240SX and keep it running reliably for years to come. Remember that consistent maintenance is key to long engine life.