1990 Nissan 240sx Header Design And Flow Characteristics
So, you're looking into headers for your 1990 Nissan 240SX? Excellent! These cars are fantastic platforms, but let's be honest, the factory exhaust manifold leaves a lot to be desired in terms of performance. Upgrading to an aftermarket header can unlock some serious horsepower and improve the overall driving experience. But choosing the right header and understanding its flow characteristics is key to getting the results you want. Let's dive into some common problems and potential solutions.
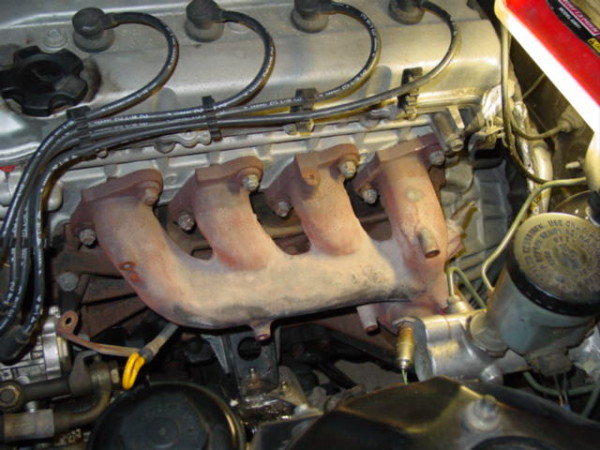
The Problem: Factory Manifold Restrictions
The stock exhaust manifold on the 1990 240SX (whether it has the KA24E or KA24DE engine) is notoriously restrictive. It's designed for cost-effectiveness and emissions compliance, not maximum performance. Several factors contribute to this:
- Small Diameter Primary Tubes: The individual tubes that collect exhaust gas from each cylinder are quite narrow. This restricts flow, especially at higher RPMs.
- Short Runner Lengths: The runners are relatively short, which hurts low-end torque and can create less-than-ideal scavenging effects.
- Crush Bends: In certain areas, the manifold uses crush bends instead of mandrel bends to save costs. Crush bends significantly restrict exhaust flow and create backpressure.
- Inefficient Collector Design: The point where the primary tubes merge (the collector) is often a bottleneck. Poorly designed collectors can cause turbulence and reduce exhaust velocity.
These restrictions mean your engine is working harder to expel exhaust gases, which reduces power output and fuel efficiency. You might notice a lack of responsiveness, particularly when accelerating from a stop or passing on the highway.
The Solution: Aftermarket Headers – Understanding Design and Flow
Aftermarket headers are designed to address the limitations of the factory manifold. They typically feature:
- Larger Diameter Primary Tubes: Larger tubes allow for a greater volume of exhaust gas to flow freely.
- Longer Runner Lengths: Longer runners can be tuned to optimize torque and horsepower production at specific RPM ranges.
- Mandrel Bends: Mandrel bends maintain a consistent diameter throughout the bend, minimizing flow restriction.
- Improved Collector Design: Well-designed collectors, often featuring merge collectors, create smoother exhaust flow and reduce turbulence.
However, not all headers are created equal. Here's a breakdown of different header designs and their flow characteristics:
4-2-1 Headers vs. 4-1 Headers
The two most common header designs for the 240SX are 4-2-1 and 4-1.
- 4-2-1 Headers (Tri-Y): In a 4-2-1 header, the four primary tubes merge into two secondary tubes, which then merge into a single collector. This design is often favored for its broad powerband, providing good torque in the low to mid-range RPMs. They tend to be quieter than 4-1 designs. If you're looking for streetability and a balanced performance improvement, a 4-2-1 header might be a good choice.
- 4-1 Headers: In a 4-1 header, all four primary tubes merge directly into a single collector. This design is generally geared towards maximizing horsepower at higher RPMs. They can be louder and sometimes sacrifice some low-end torque. If you're building a track car or prioritize top-end power, a 4-1 header might be more suitable.
The best choice depends on your driving style and the intended use of your 240SX. Think about where you want the performance gains to be. A 4-2-1 is great for daily driving, while a 4-1 shines on the track.
Material Matters: Stainless Steel vs. Mild Steel
The material used to construct the header also affects its performance and longevity.
- Stainless Steel Headers: Stainless steel is more durable and resistant to corrosion than mild steel. It's also less prone to cracking under high heat. Stainless steel headers typically last longer but are also more expensive.
- Mild Steel Headers: Mild steel headers are more affordable but are susceptible to rust and corrosion. They may also be more prone to cracking under extreme conditions. If you choose a mild steel header, consider applying a high-temperature coating to protect it from the elements.
While stainless steel is the superior material in terms of longevity and durability, a well-coated mild steel header can still provide excellent performance at a lower cost. The key is proper maintenance and protection.
Installation and Potential Problems
Installing a header on a 240SX is generally a straightforward process, but there are a few things to keep in mind:
- Tools Required: You'll need a basic set of hand tools, including sockets, wrenches, a ratchet, and possibly a breaker bar. A penetrating oil like PB Blaster can be helpful for loosening stubborn bolts. A torque wrench is essential for tightening the header bolts to the manufacturer's specified torque.
- Exhaust Gaskets: Always use new exhaust gaskets when installing a header. Old gaskets are likely to leak, which will result in a loss of power and an annoying exhaust leak.
- O2 Sensor Placement: Most aftermarket headers will have a bung for the O2 sensor. Make sure the sensor is properly installed and functioning correctly. You may need to extend the O2 sensor wiring harness if the header places the sensor in a different location than the stock manifold.
- Fitment Issues: Some aftermarket headers may have fitment issues, especially with the catalytic converter or other exhaust components. Be prepared to make minor adjustments, such as bending heat shields or using different exhaust hangers. It's always a good idea to research the header you're considering and read reviews from other 240SX owners to see if they've experienced any fitment problems.
- Header Wrap/Heat Shields: Consider wrapping the header or installing heat shields to reduce radiant heat. This can help lower engine bay temperatures and improve performance.
- Potential for Leaks: After installation, check for exhaust leaks by listening for hissing sounds or feeling for escaping exhaust gases around the header flanges. Retorque the header bolts after the first few heat cycles to ensure a tight seal.
Troubleshooting Common Issues
Even with a properly installed header, you might encounter some issues. Here are a few common problems and their solutions:
- Exhaust Leaks: As mentioned earlier, exhaust leaks can cause a loss of power and an annoying noise. Make sure the header bolts are properly tightened and that the exhaust gaskets are in good condition. If you suspect a leak, use a soapy water solution to check for bubbles around the flanges.
- O2 Sensor Problems: A faulty O2 sensor can cause poor fuel economy and drivability problems. If your check engine light comes on after installing a header, check the O2 sensor wiring and connections. You may need to replace the O2 sensor if it's damaged or malfunctioning.
- Catalytic Converter Problems: Some aftermarket headers may not be compatible with the stock catalytic converter. If you're running a high-flow catalytic converter, make sure it's properly matched to the header. A clogged or damaged catalytic converter can restrict exhaust flow and reduce performance.
- Increased Noise: Aftermarket headers can be louder than the stock manifold, especially 4-1 designs. If you're concerned about noise levels, consider adding a resonator or a larger muffler to your exhaust system.
- Check Engine Light (CEL): Installing a header *can* trigger a CEL, especially if the O2 sensor is relocated or if the exhaust flow is significantly changed. Sometimes, simply resetting the ECU can resolve the issue. In other cases, you might need an O2 sensor spacer or a tune to properly compensate for the changes.
Cost Considerations
The cost of upgrading to an aftermarket header can vary depending on the brand, material, and design. Here's a rough estimate:
- Header Price: $150 - $800+ (depending on brand and material)
- Exhaust Gaskets: $10 - $30
- O2 Sensor Extension (if needed): $20 - $50
- Installation (if done professionally): $150 - $400+ (labor rates vary)
- High-Temperature Coating (for mild steel headers): $50 - $150
- Tuning (if required): $300 - $700+
So, you're looking at anywhere from around $300 to over $1500 for the entire process, depending on your choices and whether you do the installation yourself. Remember to factor in potential tuning costs; a header, especially with other modifications, might benefit from a custom tune to optimize performance.
Final Thoughts
Upgrading the header on your 1990 Nissan 240SX can be a worthwhile investment, but it's important to do your research and choose the right header for your needs. Consider your driving style, the intended use of your car, and your budget. By understanding the different header designs and flow characteristics, you can make an informed decision and unlock the full potential of your 240SX's engine. Don't be afraid to ask questions and seek advice from experienced mechanics or other 240SX owners. Happy motoring!