1993 Body Kit Fitment And Aerodynamic Effects
Alright, let's talk about slapping a body kit on your '93. You’re thinking about aesthetics, sure, but let’s dig into the actual effects a body kit has, particularly on a car of that vintage. We'll cover fitment, aerodynamics, and what to watch out for. Remember, a poorly installed or designed kit can make your car handle worse than stock, not better.
Understanding Body Kit Components and Their Purpose
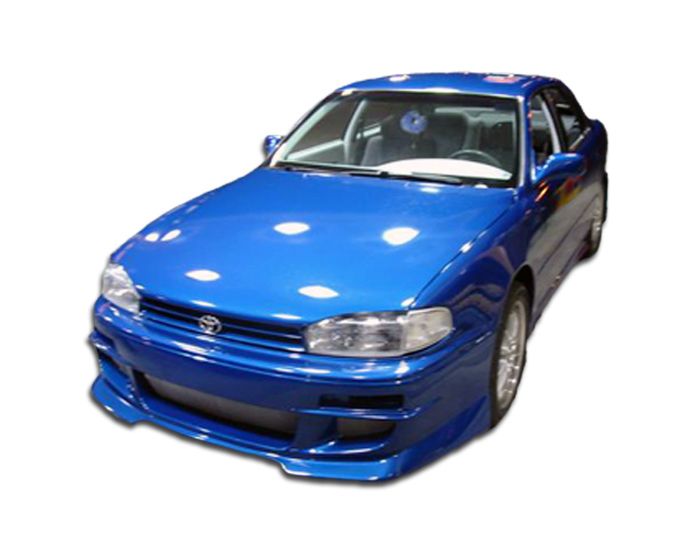
A typical 1993-era body kit usually consists of a front air dam (or spoiler), side skirts, and a rear valence (or bumper extension). Some kits will include a rear wing or spoiler as well. Each piece plays a role, theoretically at least, in modifying airflow around the vehicle.
- Front Air Dam/Spoiler: This is the piece that mounts below the front bumper. Its primary goal is to reduce airflow underneath the car. By doing so, it aims to create a pressure difference, with higher pressure above the car and lower pressure below. This pressure differential theoretically generates downforce, which helps keep the front tires planted, improving grip during cornering.
- Side Skirts: These run along the sides of the car, connecting the front and rear. They help to minimize air flowing around the sides of the car, reducing turbulence and aerodynamic drag. Think of them as smoothing out the airflow along the flanks.
- Rear Valence/Bumper Extension: This part modifies the airflow at the rear of the car. Similar to the front air dam, it can help reduce air turbulence behind the vehicle. Some designs incorporate a diffuser, which is designed to accelerate airflow under the car and create a low-pressure zone, further contributing to downforce.
- Rear Wing/Spoiler: Unlike a valence, a wing is designed to actively disrupt the airflow and create downforce. These generate downforce by redirecting airflow downward. A properly designed wing will feature an airfoil shape and the angle of attack is critical.
Fitment Challenges: A 1993 Perspective
Here's where things get real. For a '93, you're not dealing with the precision of modern manufacturing. Expect to do some tweaking. The age of the car and the kit can affect the fit. Here’s what you need to think about:
Material Matters
Body kits are typically made from fiberglass, polyurethane, or ABS plastic. Each has its pros and cons:
- Fiberglass: This is a common, relatively inexpensive material. However, it's brittle and prone to cracking, especially if it’s not properly reinforced. Fitment is often mediocre, requiring significant sanding, filling, and shaping. Older fiberglass kits are notorious for warping over time.
- Polyurethane: This is a flexible, durable material. It's more resistant to cracking than fiberglass, but it's also heavier and more expensive. Fitment is generally better than fiberglass, but still may require some adjustments. Polyurethane is more impact resistant.
- ABS Plastic: This is a lightweight, rigid plastic. It's more expensive than fiberglass but offers good durability and impact resistance. Fitment is typically the best of the three, but can still vary depending on the manufacturer.
When buying a kit, always ask about the material. Be wary of extremely cheap fiberglass kits; they often require a lot of work to get right. If possible, opt for polyurethane or ABS. Check if the material is UV-resistant, otherwise the kit will degrade under sunlight causing fading and cracking.
Preparation is Key
No matter what material you choose, proper preparation is essential for a good fit. This involves:
- Test Fitting: Before you even think about paint, mount each piece to the car using tape or clamps. Check for gaps, overlaps, and areas where the kit rubs against the body. This is crucial!
- Sanding and Filling: Identify any imperfections in the kit's surface, such as air bubbles, waves, or rough edges. Use sandpaper (various grits, starting coarse and finishing fine) to smooth out these areas. Use body filler (like Bondo) to fill in gaps or imperfections.
- Priming: Once you're satisfied with the surface finish, apply a primer coat. This will help the paint adhere properly and reveal any remaining imperfections.
Dealing with Imperfections
Expect imperfections. Here’s how to handle some common issues:
- Gaps: Use body filler to fill in gaps between the kit and the car's body. For larger gaps, you may need to use fiberglass cloth and resin to build up the area.
- Rubbing: If the kit rubs against the car's body, you may need to trim or grind down the offending area. Be careful not to remove too much material.
- Misalignment: If the kit doesn't line up properly with the car's body, you may need to modify the mounting points. This could involve drilling new holes or using shims to adjust the position.
Aerodynamic Considerations: Beyond the Looks
Okay, let's get into the aerodynamics. This is where a lot of body kits fall short. Simply bolting on a kit that looks cool doesn't guarantee improved performance. In fact, it can often worsen it.
The Importance of Wind Tunnel Testing
Ideally, a body kit should be designed and tested in a wind tunnel to ensure that it actually improves aerodynamic performance. Most aftermarket kits, especially those from smaller manufacturers, haven't undergone this type of testing. Therefore, you're often relying on the manufacturer's claims or subjective impressions.
Coefficient of drag (Cd) is a crucial measure here. A lower Cd indicates less aerodynamic drag, which translates to better fuel economy and higher top speed. Downforce, as mentioned earlier, improves grip. A good body kit will aim to lower the Cd while increasing downforce. Note that lowering Cd and increasing downforce are often conflicting goals!
Common Aerodynamic Pitfalls
Here are some common mistakes that can negatively impact a body kit's aerodynamic performance:
- Creating Turbulence: A poorly designed kit can create turbulence, which increases drag and reduces downforce. Sharp edges, abrupt changes in shape, and poorly integrated components can all contribute to turbulence.
- Increasing Lift: Instead of generating downforce, some kits can actually generate lift, which reduces grip and makes the car unstable at high speeds. This is especially true for poorly designed rear wings.
- Blocking Airflow: Some kits can block airflow to the engine or brakes, which can lead to overheating issues. Make sure that the kit doesn't obstruct any critical cooling components.
What to Look For
If you're serious about improving your car's aerodynamic performance, look for body kits that exhibit the following characteristics:
- Smooth, Rounded Edges: Sharp edges create turbulence. Look for kits with smooth, rounded edges that promote clean airflow.
- Well-Integrated Components: The different components of the kit should flow together seamlessly, without any abrupt transitions.
- Functional Design: Avoid purely aesthetic designs that have no apparent aerodynamic purpose. Look for kits that incorporate features like diffusers, splitters, and wings.
- Reputable Manufacturers: Stick with reputable manufacturers who have a proven track record of producing high-quality, aerodynamically effective body kits.
Installation Tips and Tricks
So, you've got your kit. Time to put it on. Here are some general tips:
- Read the Instructions: Seems obvious, but read the instructions carefully. If the kit doesn't come with instructions, search online for installation guides or videos.
- Use the Right Tools: Have the right tools on hand, including a socket set, wrench set, screwdrivers, drill, grinder, sandpaper, body filler, primer, and paint.
- Take Your Time: Don't rush the installation process. Take your time and pay attention to detail. The fit and finish are worth the effort.
- Seek Professional Help: If you're not comfortable with any aspect of the installation, don't hesitate to seek professional help. A body shop can ensure that the kit is installed properly and that the paint job is flawless.
Final Thoughts
Adding a body kit to your '93 can dramatically change its appearance. However, it's important to understand the potential challenges and pitfalls involved. Choose a high-quality kit, prepare it properly, and install it carefully. And remember, aerodynamics are complex. Don't expect massive performance gains from an off-the-shelf kit. If you’re really after optimized performance, consider doing your homework, and possibly seeking professional consultation on aerodynamic modifications to guarantee the changes you make have the intended impact.