1995 Nissan 240sx Ac Compressor
Alright, let's talk about the AC compressor in your 1995 Nissan 240SX (S14 chassis). These cars are getting on in years, and AC systems are often one of the first things to give up the ghost. Understanding how the compressor works, diagnosing problems, and potentially replacing it yourself can save you a good chunk of change. This article will cover the specifics for the 1995 240SX, but a lot of the principles apply to other vehicles as well.
Understanding the 240SX AC System and the Compressor's Role
Before diving into the compressor itself, it’s helpful to understand the overall AC system in your S14. It's a closed-loop system that uses refrigerant (typically R-134a these days, if it's been converted from R-12) to transfer heat from the inside of the cabin to the outside. Here's a simplified rundown:
- Compressor: This is the heart of the system. It pressurizes the refrigerant, which increases its temperature.
- Condenser: Located in front of the radiator, the condenser dissipates heat from the high-pressure refrigerant, causing it to condense into a high-pressure liquid. Think of it as a radiator for the AC system.
- Receiver Drier: This component filters the refrigerant and removes moisture. Moisture in the system is a killer, as it can combine with the refrigerant to form corrosive acids and ice, damaging internal components and reducing efficiency.
- Expansion Valve (or Orifice Tube): This creates a pressure drop, causing the high-pressure liquid refrigerant to expand into a low-pressure, low-temperature mist. The 240SX uses an expansion valve.
- Evaporator: Located inside the dashboard, the evaporator absorbs heat from the cabin air, causing the refrigerant to boil and change back into a gas. This is what cools the air blowing through your vents.
The refrigerant then returns to the compressor, and the cycle repeats. The compressor is driven by the engine via a belt and an electromagnetic clutch. When you turn on the AC, the clutch engages, connecting the compressor pulley to the compressor's internal components, allowing it to start compressing the refrigerant.
Specifics of the 1995 240SX AC Compressor
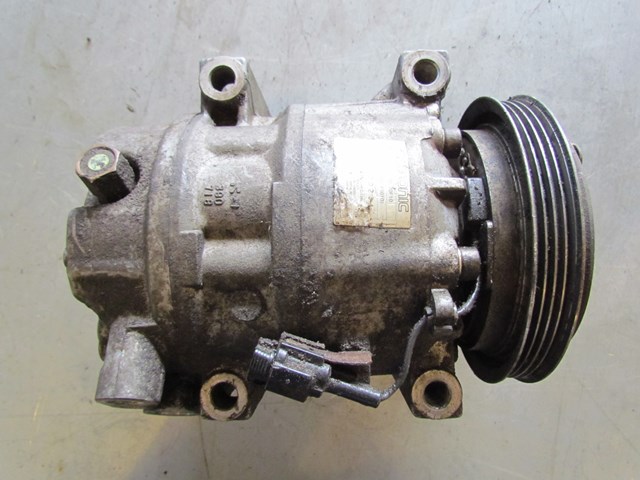
The 1995 240SX typically uses a rotary vane style compressor. These are generally reliable, but like any mechanical component, they are prone to wear and tear over time. Identifying the manufacturer and part number of your original compressor can be important for finding a suitable replacement. Check the compressor body itself for stamped markings. Common manufacturers for OEM Nissan compressors include Sanden and Calsonic Kansei. RockAuto is a good place to start researching part numbers for your specific model year and engine (KA24DE).
Important note: if you are converting from R-12 to R-134a, it is recommended to replace all o-rings with R-134a compatible ones. Furthermore, while technically the original compressor can be used, it's generally recommended to replace it with one designed for R-134a for optimal performance and longevity.
Troubleshooting a Faulty AC Compressor
Here are some common symptoms that could indicate a problem with your AC compressor:
- No Cold Air: This is the most obvious symptom. While it could be due to other issues (low refrigerant, faulty expansion valve, etc.), a bad compressor is a prime suspect.
- Loud Noises: Grinding, squealing, or rattling noises coming from the compressor are often signs of internal damage or a failing clutch bearing.
- Clutch Not Engaging: If the compressor clutch isn't engaging when you turn on the AC, the compressor won't be able to compress the refrigerant. This could be due to a faulty clutch, a blown fuse, a bad relay, or low refrigerant pressure (which triggers a low-pressure cutoff switch to protect the compressor).
- Compressor Clutch Slipping: This results in intermittent cooling or weak cooling performance. The clutch may engage, but it doesn't hold firmly, causing it to slip.
- Leaking Refrigerant: Visible leaks around the compressor are a clear indication of a problem. Use a UV dye leak detector kit to pinpoint the source of the leak.
- High-Pressure Readings: Abnormally high pressure readings on the high-pressure side of the system can indicate a blockage in the system or a faulty compressor.
Diagnosing the Compressor
Here's a step-by-step approach to diagnosing your AC compressor:
- Visual Inspection: Check for any visible signs of damage, leaks, or corrosion. Inspect the wiring harness and connectors for any loose connections or damaged wires.
- Check the Fuse and Relay: Locate the AC compressor fuse and relay in the fuse box (refer to your owner's manual for the location). Test the fuse with a multimeter to ensure it's not blown. You can also try swapping the AC compressor relay with a known good relay to see if that resolves the issue.
- Check Refrigerant Pressure: Use a set of AC manifold gauges to check the high-side and low-side pressure readings. Low refrigerant pressure will prevent the compressor from engaging. Note: Proper use of manifold gauges is critical and requires training. Incorrect readings can lead to misdiagnosis or even damage to the AC system.
- Check Clutch Engagement: With the engine running and the AC turned on, check if the compressor clutch is engaging. You should see the clutch plate on the front of the compressor pulling in towards the pulley. If it's not engaging, you can try applying 12V directly to the clutch connector (with the engine off!) to see if it engages. If it does, then the problem lies in the wiring or control circuit.
- Listen for Noises: Listen carefully for any unusual noises coming from the compressor while it's running.
- Voltage at the Compressor: Ensure you're getting proper voltage to the compressor clutch when the AC is turned on. A multimeter will be your friend here.
Replacing the AC Compressor
If you've determined that your AC compressor is faulty, you'll need to replace it. This is a moderate to advanced DIY project that requires some specialized tools and knowledge. If you're not comfortable working with refrigerant and high-pressure systems, it's best to take your car to a qualified mechanic.
Here's a general overview of the replacement process:
- Recover the Refrigerant: This is the most important step! Refrigerant is harmful to the environment and illegal to release into the atmosphere. You'll need to take your car to a shop that has the equipment to properly recover the refrigerant. They will evacuate the system with a vacuum pump.
- Disconnect the Battery: Disconnect the negative battery cable before starting any work on the electrical system.
- Remove the Drive Belt: Loosen the tensioner pulley and remove the drive belt that powers the AC compressor.
- Disconnect the Electrical Connector: Disconnect the electrical connector from the compressor clutch.
- Disconnect the Refrigerant Lines: Carefully disconnect the refrigerant lines from the compressor. These connections will likely be under pressure, even after evacuation, so be prepared for a small amount of oil and residual refrigerant to escape. Use appropriate line wrenches to avoid damaging the fittings. Replace the O-rings on the connections with new ones.
- Remove the Compressor: Unbolt the compressor from the engine bracket and carefully remove it from the engine bay.
- Install the New Compressor: Install the new compressor in the reverse order of removal. Make sure to properly torque the mounting bolts and refrigerant line fittings.
- Replace the Receiver Drier: It's strongly recommended to replace the receiver drier whenever you open up the AC system. This will ensure that any moisture or contaminants are removed from the system.
- Evacuate and Recharge the System: This is another step that requires specialized equipment. Take your car back to the shop to have them evacuate the system to remove any air and moisture, and then recharge it with the correct amount of refrigerant and oil. The proper refrigerant charge for your system will be indicated on a sticker in the engine bay, or in your service manual.
Important Considerations:
- Flush the System: If the old compressor failed catastrophically, it's a good idea to flush the entire AC system to remove any debris or contaminants that may have circulated through the system.
- Use the Correct Type of Oil: The AC system requires a specific type of oil (usually PAG or POE oil). Make sure to use the correct oil for your system. The shop performing the recharge can advise you on this.
- Vacuum Test: After evacuating the system, perform a vacuum test to check for leaks before recharging it with refrigerant. If the system doesn't hold a vacuum, there's a leak that needs to be found and repaired.
Choosing a Replacement Compressor
When choosing a replacement AC compressor, you have a few options:
- New OEM Compressor: This is the most expensive option, but it offers the best guarantee of quality and fitment.
- New Aftermarket Compressor: Aftermarket compressors are generally less expensive than OEM compressors. Look for reputable brands like Denso, Delphi, or Four Seasons.
- Remanufactured Compressor: Remanufactured compressors are rebuilt and tested. They can be a good compromise between price and quality.
- Used Compressor: Used compressors are the cheapest option, but they're also the riskiest. You don't know the history of the compressor, and it could fail prematurely.
Ultimately, the best choice for you will depend on your budget and your priorities. Weigh the pros and cons of each option carefully before making a decision.
Replacing your 240SX's AC compressor is a challenging but rewarding DIY project. By following these steps and taking the necessary precautions, you can save money and get your AC system working properly again. Remember, safety first and always consult a professional if you're unsure about any aspect of the repair.