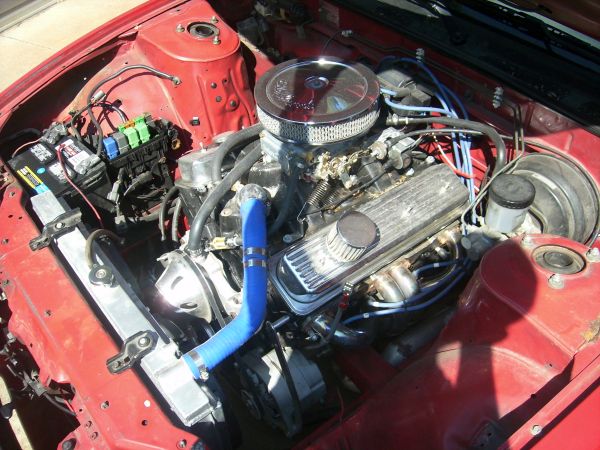
1995 Nissan 240sx Auto To Manual Swap
So, you're thinking about ditching that automatic transmission in your 1995 Nissan 240SX and going manual? Excellent choice! It's a popular upgrade, and for good reason. It'll breathe new life into the car, giving you more control and a more engaging driving experience. This guide will walk you through the process, assuming you have a decent amount of mechanical experience and the right tools. This isn't a beginner's project, but with patience and the right information, you can pull it off. Remember to always prioritize safety and disconnect the negative battery terminal before starting any work.
Planning and Parts Acquisition
Before you even touch a wrench, you need a solid plan and, more importantly, all the necessary parts. Hunting down the right components is half the battle. Here's a breakdown of what you'll need:
- Manual Transmission: Obvious, right? The SR20DET transmission is a popular choice, offering robust performance. You can also use a KA24DE transmission (from a manual 240SX), but it's generally considered weaker and less desirable if you plan on boosting the engine later. Be sure it comes with the bellhousing.
- Clutch Kit: Get a complete kit, including the clutch disc, pressure plate, throw-out bearing (also known as a release bearing), and pilot bushing. Consider your power goals when choosing the clutch. A basic organic clutch is fine for stock or near-stock power, but a performance clutch (e.g., sprung puck, multi-plate) is recommended for higher horsepower builds.
- Flywheel: You'll need a flywheel designed for a manual transmission. Again, consider your power goals. A lightweight flywheel can improve throttle response, but can make the car harder to drive smoothly at lower RPMs. Ensure the flywheel is compatible with your clutch and transmission.
- Manual Transmission Driveshaft: The automatic transmission driveshaft is a different length. You'll need one from a manual 240SX.
- Clutch Master Cylinder and Slave Cylinder: These are hydraulic cylinders that actuate the clutch. Ensure they are in good working order. Buying new is generally recommended to avoid future headaches.
- Clutch Lines: You'll need the hydraulic lines that connect the master and slave cylinders. Stainless steel braided lines are a popular upgrade.
- Manual Transmission Pedal Assembly: This includes the clutch pedal, brake pedal (which you may need to trim, see below), and mounting bracket.
- Center Console Trim: You'll need the trim piece that surrounds the shifter. A manual transmission trim will have the correct opening for the shifter.
- Shifter Assembly: Get a shifter that suits your preference. Short shifters are a popular upgrade.
- Transmission Mount: The automatic and manual transmissions use different mounts. Make sure you have the correct one.
- Neutral Safety Switch Wiring: The automatic transmission has a neutral safety switch that prevents the car from starting unless it's in Park or Neutral. You'll need to bypass this to allow the manual transmission car to start. This often involves simply connecting the correct wires together. Consult a wiring diagram for your specific year 240SX.
- Reverse Lights Wiring: You'll need to wire up the reverse light switch on the manual transmission so that your reverse lights work. Again, consult a wiring diagram.
- Bolts and Hardware: Gather new bolts for the flywheel, pressure plate, and transmission mount. Replace any rusted or damaged hardware.
- Pilot Bushing Installation Tool: This tool helps you install the pilot bushing into the crankshaft.
- Optional:
- New Rear Main Seal: Since you'll have the flywheel off, it's a good time to replace the rear main seal.
- Short Shifter: Upgrades the feel and throw of the shifter.
- Steel Braided Clutch Line: Improved pedal feel.
The Swap: Step-by-Step
Alright, with parts in hand, let's get to the actual swap. Remember, this is a general guide, and specific steps might vary slightly depending on the parts you're using.
1. Preparation and Removal of the Automatic Transmission
a. Disconnect the Battery: Crucial for safety. Disconnect the negative terminal.
b. Raise the Car: Securely raise the car using jack stands. Make sure the car is stable before getting underneath.
c. Drain the Automatic Transmission Fluid: Locate the drain plug on the automatic transmission pan and drain the fluid into a suitable container. Dispose of the old fluid properly.
d. Disconnect Wiring and Sensors: Disconnect all wiring and sensors connected to the automatic transmission. Label everything clearly to avoid confusion later.
e. Disconnect the Shift Linkage: Disconnect the shift linkage from the transmission.
f. Disconnect the Driveshaft: Unbolt the driveshaft from the rear differential and slide it out of the transmission. Be prepared for some fluid spillage.
g. Support the Engine: Use an engine support bar or a jack to support the engine from above. This is essential because the transmission supports the back of the engine.
h. Remove the Transmission Mount: Unbolt and remove the transmission mount.
i. Remove the Automatic Transmission: Unbolt the automatic transmission from the engine. This can be tricky, as the bolts can be tight. Lower the transmission carefully using a transmission jack. This is definitely a two-person job.
j. Remove the Flexplate: Remove the flexplate from the crankshaft. This is the equivalent of a flywheel in an automatic transmission car. You'll need to lock the engine from rotating to loosen the bolts.
2. Installing the Manual Transmission Components
a. Install the Pilot Bushing: Carefully install the pilot bushing into the crankshaft using the pilot bushing installation tool. It should be flush with the crankshaft.
b. Install the Flywheel: Install the flywheel onto the crankshaft. Use new flywheel bolts and torque them to the manufacturer's specifications. Use a torque wrench for accuracy.
c. Install the Clutch: Install the clutch disc and pressure plate onto the flywheel. Use a clutch alignment tool to center the clutch disc. Torque the pressure plate bolts to the manufacturer's specifications.
d. Install the Manual Transmission: Carefully raise the manual transmission into position using a transmission jack. Align the transmission with the engine and bolt it in place. Torque the bolts to the manufacturer's specifications.
e. Install the Transmission Mount: Install the manual transmission mount.
f. Install the Driveshaft: Install the manual transmission driveshaft.
g. Install the Clutch Master Cylinder: Install the clutch master cylinder in the engine bay. This usually involves drilling a hole in the firewall for the clutch pedal linkage. Use a template if available.
h. Install the Clutch Pedal Assembly: Install the clutch pedal assembly inside the car. The brake pedal may need to be trimmed slightly to provide clearance for the clutch pedal.
i. Install the Clutch Slave Cylinder: Install the clutch slave cylinder onto the transmission.
j. Connect the Clutch Lines: Connect the clutch lines between the master and slave cylinders. Bleed the clutch system to remove any air.
k. Wire Up the Neutral Safety Switch and Reverse Lights: Bypass the neutral safety switch and wire up the reverse lights. Consult a wiring diagram for your specific year 240SX. This is where attention to detail is crucial.
l. Install the Shifter Assembly: Install the shifter assembly and connect the shift linkage to the transmission.
m. Install the Center Console Trim: Install the center console trim.
3. Final Checks and Startup
a. Check All Connections: Double-check all connections, including wiring, bolts, and fluid lines.
b. Fill the Transmission with Fluid: Fill the manual transmission with the correct type and amount of fluid.
c. Reconnect the Battery: Reconnect the negative battery terminal.
d. Start the Engine: Start the engine and let it idle for a few minutes. Check for any leaks.
e. Test Drive: Take the car for a test drive. Check the clutch engagement, shifting, and braking. Listen for any unusual noises.
Important Considerations and Tips
Torque Specifications: Always use a torque wrench and torque all bolts to the manufacturer's specifications. Overtightening or undertightening bolts can lead to problems.
Wiring Diagrams: A wiring diagram for your specific year 240SX is essential for wiring up the neutral safety switch and reverse lights.
Bleeding the Clutch: Bleeding the clutch properly is crucial for proper clutch operation. Air in the system can cause poor pedal feel and difficulty shifting.
Rust: Be prepared to deal with rust. Old cars often have rusted bolts and components. Use penetrating oil and patience to avoid breaking bolts.
Professional Help: If you're not comfortable with any of these steps, don't hesitate to seek professional help. A qualified mechanic can ensure the swap is done correctly.
ECU: While not always strictly necessary, some people opt to swap to a manual transmission ECU. The automatic ECU may throw some minor codes, but this doesn't typically impact drivability. Going to a manual ECU will eliminate these potential codes, but it often isn't worth the cost and effort unless you're doing a full engine management system upgrade.
Be Patient and Organized: This is a time-consuming project. Take your time, stay organized, and don't be afraid to ask for help if you get stuck.
Congratulations! Once you've completed the swap, you'll have a much more engaging and enjoyable driving experience. Enjoy the feel of a manual transmission in your 240SX!
Disclaimer: This guide is for informational purposes only. I am not responsible for any damage or injury that may occur as a result of following these instructions. Perform this swap at your own risk.