1995 Nissan 240sx Clutch Kit: Everything You Need For A Replacement
So, your 240SX clutch is slipping, chattering, or just plain worn out? It's a common issue with these cars, especially if they've seen some spirited driving or have been modified. Replacing the clutch on an S13 or S14 240SX isn't the *most* straightforward job, but with the right tools, a good understanding of the components, and a bit of patience, it's definitely a doable DIY project. This article will walk you through everything you need to know about selecting and installing a new clutch kit for your 1995 Nissan 240SX.
Understanding Your Clutch System
Before diving into choosing a kit, let's quickly recap the components and their function. The clutch system is what connects (and disconnects) the engine's rotational power to the transmission. This allows you to shift gears smoothly and come to a stop without stalling the engine.
Key Components:
- Clutch Disc (Friction Disc): This is the heart of the system. It's a circular disc with friction material (similar to brake pads) that is splined to the transmission input shaft. When engaged, it's clamped between the flywheel and the pressure plate, transmitting power. Wear and tear on this disc is the primary reason for clutch replacement.
- Pressure Plate: This component applies pressure to the clutch disc, holding it against the flywheel. It's bolted to the flywheel and contains a diaphragm spring that provides the clamping force. A failing pressure plate can cause slipping or difficulty engaging gears.
- Flywheel: A heavy rotating disc connected to the engine's crankshaft. It provides a smooth surface for the clutch disc to grip against. Flywheels can be resurfaced (machined) to provide a fresh surface, or replaced if damaged beyond repair.
- Throwout Bearing (Release Bearing): This bearing is actuated by the clutch fork and pushes against the pressure plate's diaphragm spring to disengage the clutch. A worn throwout bearing can cause noise and contribute to clutch failure.
- Pilot Bushing/Bearing: A small bushing or bearing located in the center of the flywheel. It supports the transmission input shaft and helps prevent vibrations. A worn pilot bushing can cause noise and difficulty shifting.
- Clutch Fork: The lever that actuates the throwout bearing.
- Clutch Master Cylinder and Slave Cylinder: Hydraulic cylinders that transmit the force from the clutch pedal to the clutch fork. While not part of the clutch kit, their functionality is critical for proper clutch operation.
Choosing the Right Clutch Kit
Selecting the right clutch kit is crucial for performance and longevity. Several factors influence this decision, including your driving style, the amount of power your engine produces (especially if modified), and your budget.
Clutch Kit Types:
- OEM Replacement: Designed to match the original equipment specifications. These are a good choice for stock or mildly modified 240SXs that are used primarily for street driving. They offer a good balance of performance, comfort, and cost.
- Performance Clutch: Offers increased clamping force and potentially more durable friction materials compared to OEM clutches. These are suitable for modified 240SXs with increased horsepower and torque, or for drivers who frequently engage in spirited driving or track events. However, they can often have a heavier pedal feel and may be less forgiving during engagement.
- Stage 1, Stage 2, Stage 3, etc.: Performance clutches are often categorized into stages. Generally, higher stages offer greater torque capacity but also come with increased pedal effort and potential for increased wear on other drivetrain components. Research is key! Read reviews and understand the characteristics of each stage before committing. Avoid over-clutching. Using a clutch that's far beyond your engine's power output can lead to other problems.
- Puck Style Clutches: These clutches use smaller, individual "pucks" of friction material instead of a full disc. They offer very high torque capacity but are often very aggressive and not suitable for daily driving due to their abrupt engagement.
- Dual Disc Clutches: These clutches feature two clutch discs to increase surface area and torque capacity. They are typically used in high-horsepower applications.
Key Considerations When Choosing a Kit:
- Torque Capacity: This is the most important specification. Make sure the clutch kit is rated to handle the torque output of your engine. If you've made significant modifications, you'll need a clutch with a higher torque capacity than the stock clutch. Consult with your engine builder or tuner for recommendations.
- Friction Material: Organic, ceramic, and metallic are common friction material types. Organic clutches are generally quieter and smoother but have lower torque capacity. Ceramic and metallic clutches offer higher torque capacity but can be noisy and have a more aggressive engagement.
- Pedal Feel: Consider the pedal feel. A heavier pedal feel can be tiring during daily driving. Performance clutches often have a heavier pedal feel than OEM clutches.
- Flywheel Compatibility: Some clutch kits are designed to work with specific flywheels. If you're replacing your flywheel, make sure it's compatible with the clutch kit you choose.
- Price: Clutch kits can range in price from a few hundred dollars to over a thousand dollars. Set a budget and research kits that meet your needs within that budget.
What's Included in a Typical Clutch Kit?
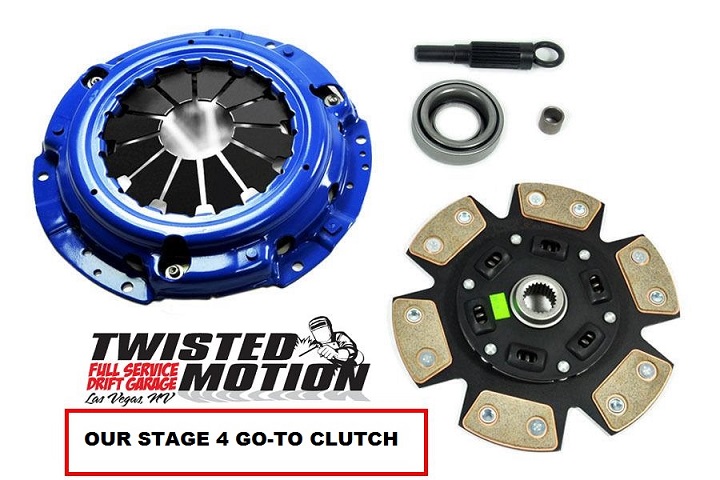
A complete clutch kit usually includes:
- Clutch Disc
- Pressure Plate
- Throwout Bearing
- Pilot Bushing/Bearing
- Alignment Tool: This is critical for centering the clutch disc during installation.
- Sometimes: Flywheel (Some kits are sold with a new flywheel)
Essential Tools and Supplies
Having the right tools will make the clutch replacement process much smoother. Here's a list of essential tools and supplies:
- Socket Set: Metric sockets and wrenches in various sizes. 10mm, 12mm, 14mm, 17mm, 19mm, and 22mm are commonly needed.
- Torque Wrench: Essential for properly tightening bolts to the manufacturer's specifications.
- Impact Wrench: Helpful for removing stubborn bolts.
- Breaker Bar: For breaking loose tough bolts.
- Jack and Jack Stands: To safely lift and support the vehicle. Never work under a vehicle supported only by a jack!
- Transmission Jack: Indispensable for safely lowering and raising the transmission.
- Clutch Alignment Tool: Usually included in the clutch kit.
- Flywheel Turning Tool: To hold the flywheel in place while removing and installing the flywheel bolts.
- Pry Bar: For separating the transmission from the engine.
- Penetrating Oil: To loosen rusted bolts.
- Threadlocker (e.g., Loctite): For securing bolts.
- Grease: For lubricating the throwout bearing and pilot bushing. Use a high-temperature grease.
- Brake Cleaner: For cleaning the flywheel and pressure plate surfaces.
- Shop Rags: For cleaning up spills and wiping down parts.
- Gloves: To protect your hands.
- Eye Protection: Safety glasses are essential.
Flywheel: Resurface or Replace?
The flywheel plays a crucial role in the clutch system. When replacing the clutch, you have the option of resurfacing the existing flywheel or replacing it with a new one.
- Resurfacing: Involves machining the flywheel surface to provide a fresh, smooth surface for the new clutch disc to grip against. This is generally a cost-effective option if the flywheel is in good condition and not excessively worn or damaged. However, only resurface a flywheel if it meets the minimum thickness specifications after machining. Consult the service manual for acceptable limits.
- Replacement: Recommended if the flywheel is severely damaged, cracked, or has deep grooves. A new flywheel ensures optimal performance and longevity of the clutch system. Lightweight flywheels are also a popular upgrade for improved engine response, but they can sometimes make the car harder to drive smoothly.
Important: Always use new flywheel bolts when installing a new or resurfaced flywheel. Flywheel bolts are typically torque-to-yield and should not be reused.
Installation Tips
While a complete step-by-step installation guide is beyond the scope of this article (consult your vehicle's repair manual), here are some key tips for a successful clutch replacement:
- Disconnect the Battery: Always disconnect the negative battery terminal before working on any electrical components.
- Thoroughly Inspect All Components: Before installing the new clutch, inspect all related components, such as the clutch fork, clutch master cylinder, and slave cylinder. Replace any worn or damaged parts.
- Properly Lubricate the Throwout Bearing and Pilot Bushing: Use a high-temperature grease to lubricate these components. This will ensure smooth operation and prevent premature wear.
- Use the Clutch Alignment Tool: This is crucial for centering the clutch disc. If the disc is not properly aligned, you will have difficulty installing the transmission.
- Torque Bolts to Specification: Use a torque wrench to tighten all bolts to the manufacturer's specified torque values. This is essential for ensuring proper clamping force and preventing premature failure.
- Bleed the Clutch Hydraulics: After installing the transmission, bleed the clutch hydraulics to remove any air from the system. This will ensure proper clutch engagement.
- Break-In the New Clutch: Avoid aggressive driving for the first few hundred miles to allow the clutch disc to properly mate with the flywheel and pressure plate.
Troubleshooting
Even with careful installation, problems can sometimes arise. Here are some common issues and potential solutions:
- Clutch Slipping: The engine revs up without a corresponding increase in speed. This could be due to a worn clutch disc, contaminated clutch disc (oil or grease), or a weak pressure plate.
- Clutch Chatter: A vibration or shaking during clutch engagement. This could be due to a warped flywheel, contaminated clutch disc, or worn engine mounts.
- Difficulty Shifting: Difficulty engaging or disengaging gears. This could be due to a dragging clutch (clutch not fully disengaging), a worn pilot bushing, or problems with the shift linkage.
- Clutch Noise: Unusual noises coming from the clutch area. This could be due to a worn throwout bearing, a worn pilot bushing, or a damaged pressure plate.
By following these guidelines and taking your time, you can successfully replace the clutch in your 1995 Nissan 240SX and get back on the road. Remember to consult your vehicle's repair manual for specific instructions and torque specifications. Good luck!