1995 Nissan 240sx Distributor: Troubleshooting And Replacement
The 1995 Nissan 240SX, particularly with the KA24DE engine, is a popular platform for both daily driving and modification. A crucial component for reliable engine operation is the distributor. This article dives deep into troubleshooting and replacing the distributor on a 1995 Nissan 240SX KA24DE, assuming a level of familiarity with automotive repair procedures.
Understanding the Distributor's Role
Before tackling any troubleshooting, it's essential to understand what the distributor does. In simple terms, the distributor's primary function is to distribute high-voltage electricity from the ignition coil to the correct spark plug at the precise moment for ignition. It achieves this through a rotating rotor arm inside the distributor cap, which aligns with each of the spark plug terminals in sequence. The distributor also houses components crucial for ignition timing control, which we'll discuss further.
Within the distributor, you'll typically find:
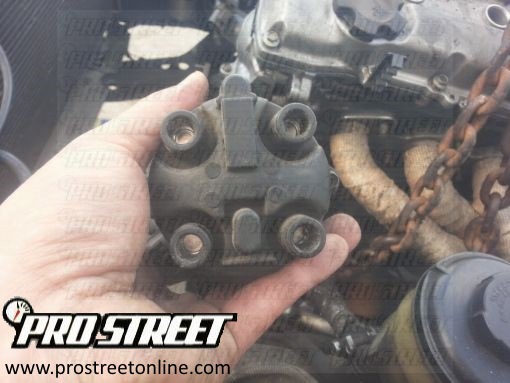
- Distributor Cap: This covers the distributor and has terminals connected to each spark plug.
- Rotor Arm: This rotates inside the cap, directing the high-voltage current.
- Ignition Control Module (ICM) or Igniter: Depending on the specific year and sub-model, the ICM might be located inside the distributor itself or remotely mounted. It controls the on/off switching of the primary ignition coil circuit.
- Pick-Up Coil (also known as a Crank Angle Sensor or CAS): This sensor sends a signal to the ECU (Engine Control Unit) indicating the crankshaft position. This is crucial for determining ignition timing.
- Vacuum Advance (on some models): A diaphragm that adjusts ignition timing based on engine vacuum, improving fuel efficiency and performance. The 1995 240SX KA24DE uses electronic advance controlled by the ECU based on the signal from the Crank Angle Sensor rather than a vacuum advance.
Troubleshooting Distributor-Related Issues
A failing distributor can manifest in various ways. Here are some common symptoms and troubleshooting steps:
1. No Spark or Weak Spark
This is a critical issue preventing the engine from starting. Start with the basics:
- Check the Spark Plugs: Are they fouled, worn, or damaged? Replace them if necessary.
- Inspect Spark Plug Wires: Look for cracks, burns, or loose connections. Use an ohmmeter to check the resistance of each wire. Excessive resistance indicates a faulty wire. A typical resistance range is a few thousand ohms per foot.
- Test the Ignition Coil: Use a multimeter to check the primary and secondary resistance of the ignition coil according to the factory service manual specifications. A failed coil won't deliver the necessary high voltage.
- Inspect the Distributor Cap and Rotor: Check for cracks, carbon tracking (black lines indicating arcing), corrosion, or damage. Replace these components if you find any issues. Carbon tracking is a common cause of misfires.
- Test the Ignition Control Module (ICM): This requires specific testing procedures using a multimeter or a specialized ICM tester. Consult the factory service manual for the correct procedure. A faulty ICM can prevent the ignition coil from firing. If the ICM is external and easily swapped, try replacing it with a known good unit.
- Check the Pick-Up Coil (CAS): Use an oscilloscope or multimeter to check the signal output from the pick-up coil while cranking the engine. An erratic or absent signal indicates a faulty pick-up coil. The factory service manual will have specific voltage ranges and waveforms to look for.
2. Engine Misfires
Misfires can be caused by several factors, including a faulty distributor. Here's how to investigate:
- Check for Vacuum Leaks: Vacuum leaks can disrupt the air-fuel mixture, leading to misfires. Inspect vacuum hoses and intake manifold gaskets. Use a vacuum gauge to assess engine vacuum.
- Inspect the Distributor Cap and Rotor: As mentioned earlier, cracks and carbon tracking can cause misfires.
- Check Spark Plug Wires: Again, damaged or high-resistance spark plug wires can cause misfires.
- Fuel System Issues: While not directly related to the distributor, misfires can also be caused by fuel delivery problems (e.g., clogged fuel injectors, weak fuel pump).
3. Poor Engine Performance and Fuel Economy
A worn distributor can lead to reduced engine power and increased fuel consumption:
- Check Ignition Timing: Use a timing light to verify that the ignition timing is within the factory specifications. Incorrect timing can significantly impact performance and fuel economy. You will need to disable any electronic timing advance features during the base timing adjustment procedure.
- Inspect the Distributor for Mechanical Wear: Over time, the distributor shaft and bearings can wear, leading to erratic timing and poor performance. Look for excessive play in the distributor shaft.
4. Difficulty Starting
Hard starting can also be related to the distributor:
- Check for a Weak Spark: As discussed earlier, a weak spark can prevent the engine from firing reliably.
- Verify Fuel Pressure: Ensure that the fuel system is providing adequate fuel pressure.
Distributor Replacement Procedure
If troubleshooting points to a faulty distributor, replacement is often the best course of action. Here's a step-by-step guide:
1. Preparation
- Gather Tools and Materials: You'll need a socket set, wrench set, screwdriver set, timing light, distributor wrench (often a specialized crowsfoot wrench), new distributor, distributor cap, rotor, spark plugs (optional but recommended), spark plug wires (optional but recommended), and a service manual.
- Disconnect the Battery: This is crucial for safety.
- Locate the Distributor: On the KA24DE engine, the distributor is typically located on the driver's side of the engine, near the back.
2. Removal
- Disconnect Electrical Connectors: Carefully disconnect all electrical connectors attached to the distributor, including the ICM connector (if applicable) and the pick-up coil connector.
- Remove the Distributor Cap: Unclip or unscrew the distributor cap and set it aside. Inspect the cap and rotor for wear or damage.
- Mark the Distributor Position: This is crucial! Before removing the distributor, mark the position of the distributor body relative to the engine block. This will help you install the new distributor in the correct orientation and avoid timing issues. You can use a paint marker or scribe to make a clear mark. It is also advisable to note the position of the rotor in relation to the distributor body and the engine.
- Remove the Hold-Down Bolt or Clamp: Loosen and remove the bolt or clamp that secures the distributor to the engine block. This might require a specialized distributor wrench.
- Carefully Remove the Distributor: Gently pull the distributor straight up and out of the engine block. Be careful not to damage the distributor gear or any other components.
3. Installation
- Install the New Distributor: Align the rotor on the new distributor with the mark you made on the old distributor (or approximate the orientation based on your notes). Also align the distributor body with the mark you made on the engine block. Carefully insert the distributor into the engine block. You may need to gently rotate the distributor shaft slightly to allow the distributor gear to mesh with the camshaft gear.
- Secure the Distributor: Install the hold-down bolt or clamp and tighten it snugly, but not fully. You'll need to adjust the timing later.
- Install the Distributor Cap and Rotor: Install the new distributor cap and rotor (if replacing them).
- Connect Electrical Connectors: Reconnect all electrical connectors to the distributor.
4. Ignition Timing Adjustment
- Warm Up the Engine: Start the engine and allow it to reach operating temperature.
- Locate the Timing Marks: Find the timing marks on the crankshaft pulley and the timing scale on the engine block.
- Connect the Timing Light: Connect the timing light to the number one spark plug wire (typically the frontmost cylinder).
- Set the Timing: Aim the timing light at the timing marks. Loosen the distributor hold-down bolt slightly and rotate the distributor body until the timing mark aligns with the factory specification. Tighten the hold-down bolt.
- Verify the Timing: Recheck the timing after tightening the hold-down bolt to ensure it hasn't changed.
- Fine-Tune (if necessary): After the base timing is set correctly, you may want to adjust it slightly for optimal performance, especially if you have made other modifications to the engine. Always consult with a qualified mechanic or tuner for advanced timing adjustments.
5. Final Checks
- Check for Leaks: Inspect the distributor area for any oil leaks.
- Test Drive: Take the vehicle for a test drive to ensure that it is running smoothly and that there are no misfires or other issues.
Important Note: This procedure assumes you are replacing the distributor with a new or remanufactured unit. If you are using a used distributor, inspect it carefully for wear or damage before installation.
Conclusion
The distributor is a critical component of the 1995 Nissan 240SX's ignition system. By understanding its function and following a systematic troubleshooting and replacement procedure, you can keep your 240SX running reliably. Remember to consult the factory service manual for specific torque specifications and other detailed information.