1995 Nissan 240sx Headlight Bulb
So, your 1995 Nissan 240sx headlight bulb has decided to call it quits, huh? Don't worry, it happens to the best of us, and especially to a car that's seen as much action as a 240sx. The good news is, replacing a headlight bulb on this classic isn't rocket science, and with a little know-how, you can get it done yourself, saving some money and feeling the satisfaction of a job well done. Let's dive into the common problems, the solutions, and a step-by-step guide to get you back on the road with a bright, clear beam.
Common 1995 Nissan 240sx Headlight Bulb Problems
Before we start replacing, it's good to understand what could be causing your headlight woes. Here are some of the most frequent issues we see in the shop:
- Burned Out Bulb: This is the most obvious and common culprit. Headlight bulbs have a limited lifespan, and eventually, the filament breaks, leaving you in the dark.
- Loose Connection: Sometimes, the bulb connector can become loose or corroded, preventing proper electrical contact. This can cause the headlight to flicker or not work at all.
- Faulty Wiring: Damaged or frayed wires leading to the headlight can also cause problems. Look for any signs of wear and tear, especially near the connector.
- Blown Fuse: A blown fuse can cut off power to the headlight. Check the fuse box to see if the headlight fuse is intact. The fuse box is typically located under the dashboard or in the engine compartment. Refer to your owner's manual for the exact location.
- Bad Headlight Relay: A relay controls the flow of electricity to the headlights. A faulty relay can prevent the headlights from turning on.
- Grounding Issue: A poor ground connection can also cause headlight problems. Make sure the headlight is properly grounded to the chassis.
Diagnosing the Problem: A Quick Checklist
Before you start tearing things apart, let's do some quick diagnostics:
- Check the Obvious: Is the headlight switch turned on? Sounds silly, but it happens!
- Visual Inspection: Look at the bulb itself. Can you see a broken filament inside?
- Test the Other Headlight: If the other headlight is working, you can rule out a blown fuse affecting both.
- Check the Fuse: Locate the headlight fuse in your fuse box (consult your owner's manual). If it's blown, replace it with a fuse of the same amperage.
- Inspect the Connector: Look for corrosion or damage to the bulb connector. Clean it with electrical contact cleaner if necessary.
If these simple checks don't reveal the problem, you might need to dig a little deeper.
The Solution: Replacing the Headlight Bulb (Step-by-Step)
Okay, let's get down to business. Here's how to replace the headlight bulb on your 1995 Nissan 240sx:
Tools You'll Need:
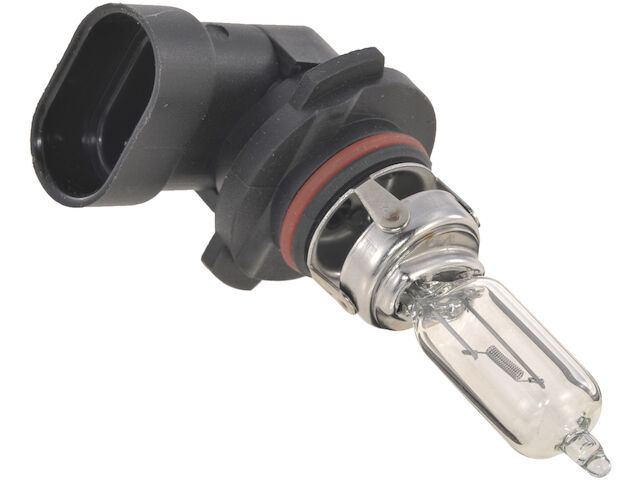
- New Headlight Bulb (Check your owner's manual for the correct type - usually an H4 bulb)
- Screwdriver (usually Phillips head)
- Gloves (to protect the bulb from oil and prevent burns if the old bulb is hot)
- Electrical Contact Cleaner (optional, but recommended for cleaning the connector)
- Patience! (always a good tool to have)
Step-by-Step Instructions:
- Safety First: Turn off the ignition and headlights. Allow the old bulb to cool down completely if it was recently on. Disconnect the negative terminal of the battery.
- Access the Headlight Assembly: Open the hood and locate the back of the headlight assembly. Depending on your 240sx, you might need to remove a plastic cover or access panel to reach the bulb. This is usually held in place by screws or clips.
- Disconnect the Electrical Connector: Carefully disconnect the electrical connector from the back of the bulb. There's usually a clip or tab you need to press or squeeze to release it. Do not pull on the wires!
- Remove the Old Bulb: The bulb is usually held in place by a retaining clip or wire. Unclip or unhook it to release the bulb. Pay attention to how the clip is oriented so you can reinstall it correctly. Some assemblies might require you to twist the bulb to remove it.
- Install the New Bulb: Carefully insert the new bulb into the headlight assembly. Make sure it's properly seated and aligned. Avoid touching the glass part of the bulb with your bare fingers, as the oil from your skin can shorten its lifespan. If you accidentally touch it, clean it with a clean cloth and rubbing alcohol.
- Secure the Bulb: Reattach the retaining clip or wire to secure the new bulb in place. Make sure it's properly locked to prevent the bulb from moving.
- Reconnect the Electrical Connector: Reconnect the electrical connector to the back of the bulb. Make sure it clicks into place securely.
- Test the Headlight: Reconnect the negative terminal of the battery. Turn on the headlights to test the new bulb. If it doesn't work, double-check all connections and make sure the bulb is properly seated.
- Reassemble: Replace any access panels or covers you removed earlier.
- Admire Your Work: You did it! Now you have a bright, new headlight.
Important Tips and Considerations:
- Always replace headlight bulbs in pairs: If one bulb has burned out, the other is likely to follow suit soon. Replacing both at the same time ensures consistent brightness and avoids having to repeat the process again in the near future.
- Use the correct bulb type: Using the wrong bulb type can damage the headlight assembly or even cause a fire. Consult your owner's manual or a parts store to find the correct bulb for your 1995 Nissan 240sx.
- Handle the bulb with care: Headlight bulbs are fragile and can be easily damaged. Avoid dropping them or handling them roughly.
- Clean the connector: If the connector is corroded or dirty, clean it with electrical contact cleaner to ensure a good connection.
- Check the headlight alignment: After replacing the headlight bulb, check the headlight alignment to ensure that the headlights are properly aimed. Misaligned headlights can reduce visibility and even blind other drivers.
Troubleshooting: What if the New Bulb Doesn't Work?
Sometimes, even after replacing the bulb, you might still have issues. Here's what to check:
- Double-Check the Connections: Make sure all connections are secure and clean.
- Check the Fuse Again: Even if you replaced it earlier, a short circuit could have blown it again.
- Test the Bulb: If you have a multimeter, you can test the bulb for continuity.
- Inspect the Wiring: Look for any obvious signs of damage to the wiring harness.
- Consider the Relay: A faulty headlight relay can prevent power from reaching the bulb. You can usually test the relay by swapping it with a known good relay (like the horn relay) or by using a multimeter.
Estimated Cost: DIY vs. Professional
Here's a rough estimate of what you can expect to pay, depending on whether you do it yourself or take it to a mechanic:
- DIY:
- Headlight Bulb: $10 - $30 (depending on the type and brand)
- Electrical Contact Cleaner: $5 - $10
- Total: $15 - $40
- Professional:
- Headlight Bulb: $10 - $30
- Labor: $50 - $100 (depending on the shop and complexity)
- Total: $60 - $130
As you can see, doing it yourself can save you a significant amount of money. However, if you're not comfortable working on your car or if you're unsure about any of the steps, it's always best to take it to a qualified mechanic.
When to Seek Professional Help
While replacing a headlight bulb is usually a straightforward task, there are times when it's best to seek professional help:
- If you're not comfortable working on your car: It's always better to be safe than sorry. If you're not confident in your ability to replace the headlight bulb, take it to a mechanic.
- If you're having trouble accessing the headlight assembly: Some headlight assemblies are more difficult to access than others. If you're struggling to reach the bulb, it's best to let a professional handle it.
- If you suspect a more serious electrical problem: If you've checked the fuse, the bulb, and the connections, and the headlight still doesn't work, there may be a more serious electrical problem. In this case, it's best to take your car to a mechanic for diagnosis and repair.
- If you're unsure about any of the steps: If you're unsure about any of the steps involved in replacing the headlight bulb, don't hesitate to ask a mechanic for help.
Replacing your 1995 Nissan 240sx headlight bulb is a manageable task. By following these steps and taking the necessary precautions, you can get back on the road with a clear and safe view. Remember to always prioritize safety and don't hesitate to seek professional help if needed. Happy motoring!