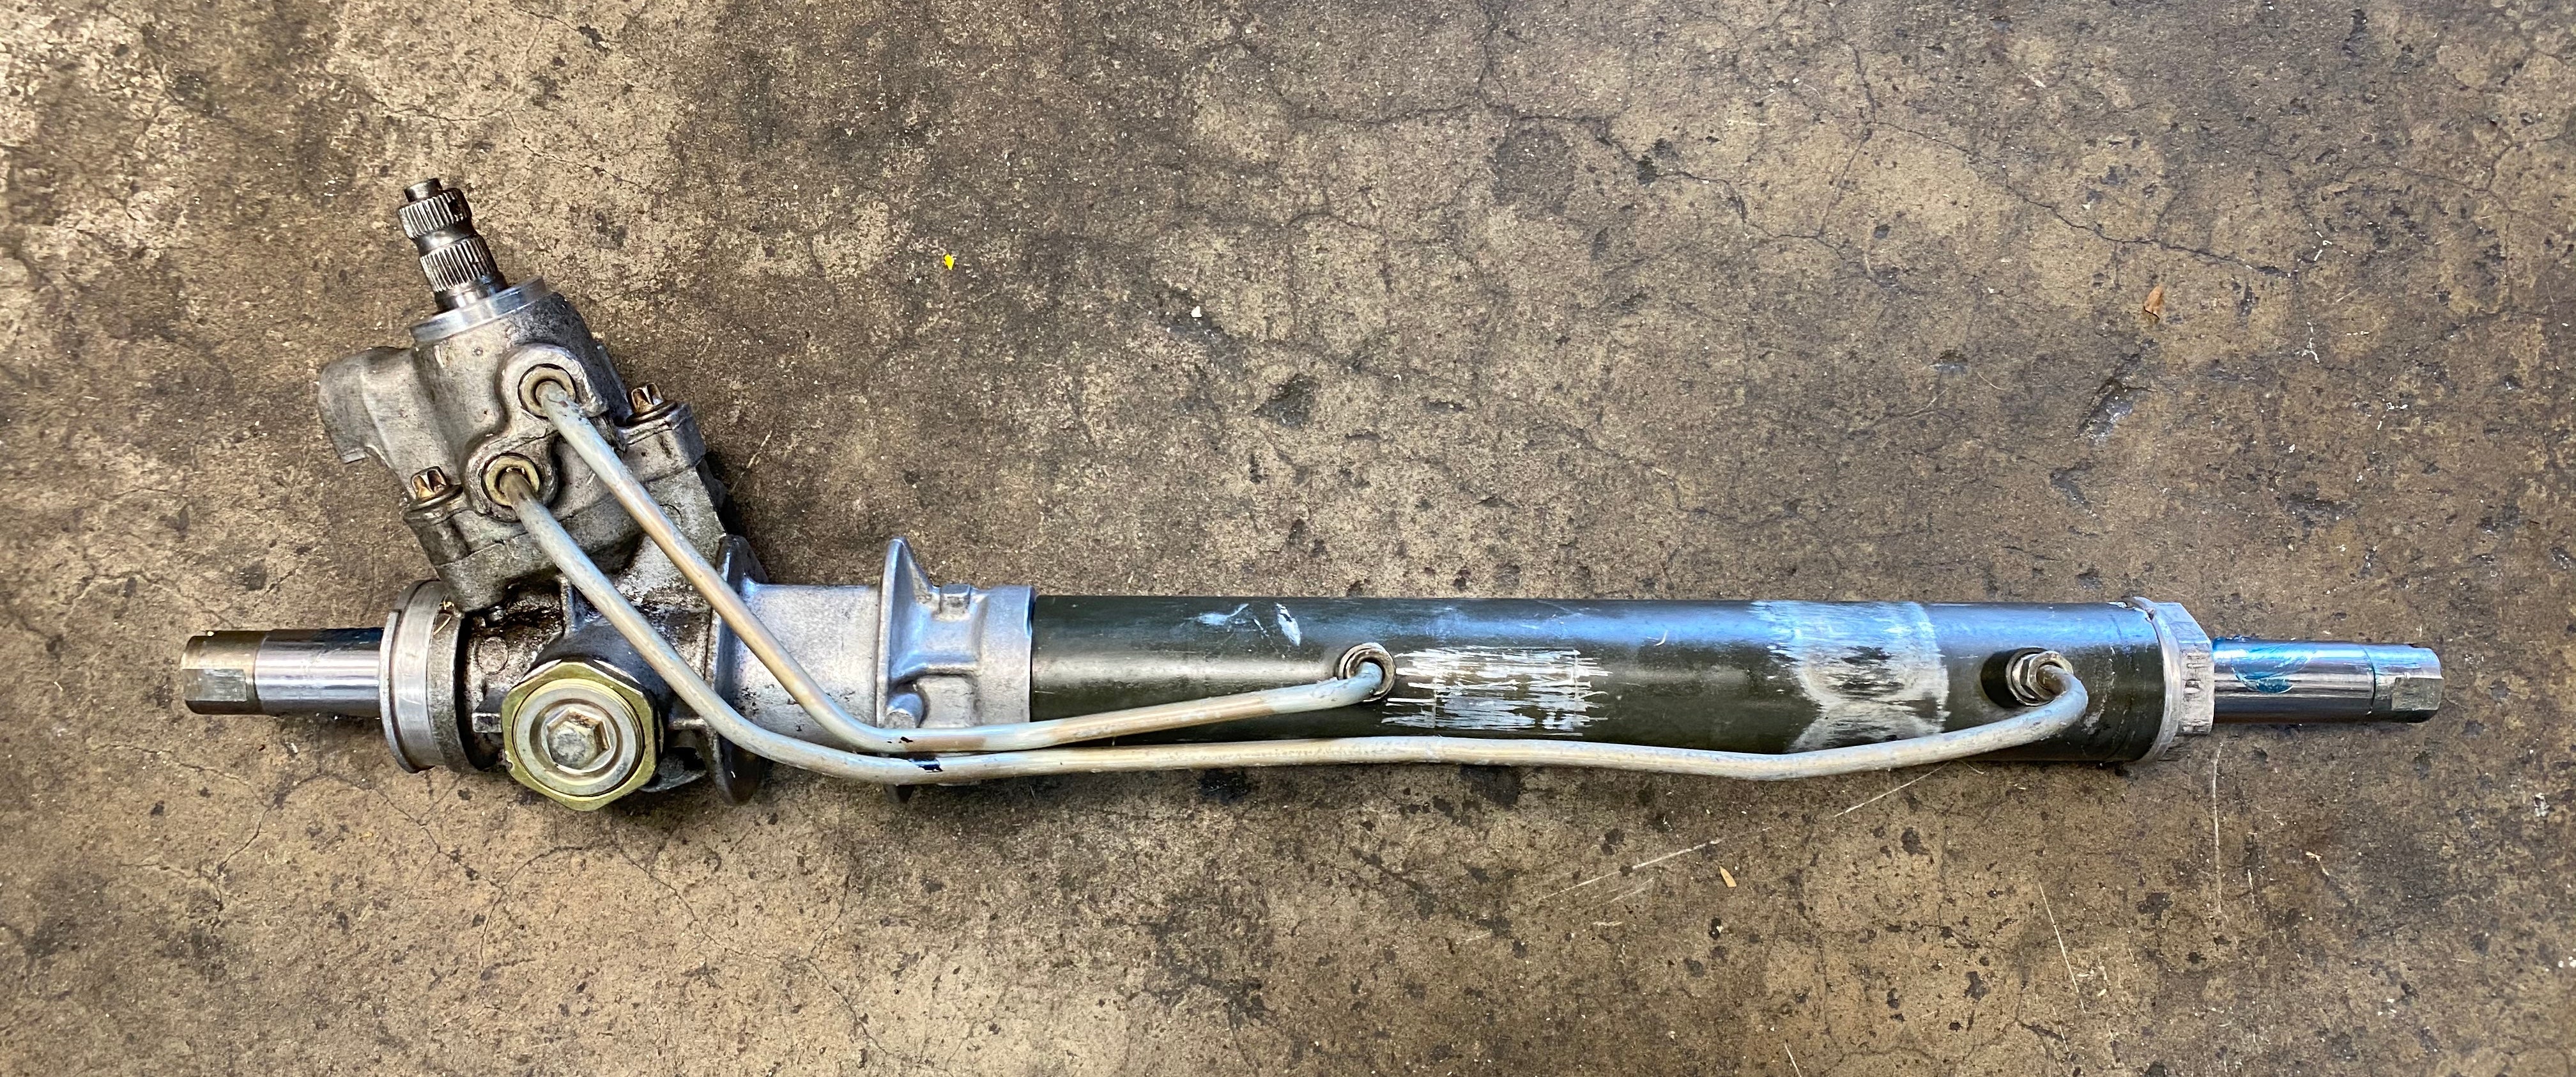
1995 Nissan 240sx Steering Rack
Alright, let's dive deep into the steering rack of the 1995 Nissan 240sx. It's a critical component responsible for translating the rotation of your steering wheel into the linear movement that turns your wheels. A well-functioning rack is essential for precise handling and safe driving. Whether you're experiencing play in your steering, a leaky rack, or just looking to upgrade, understanding its intricacies is key.
Understanding the 240sx Steering System
The 240sx uses a power-assisted rack and pinion steering system. This means you have a mechanical connection between your steering wheel and the wheels, enhanced by hydraulic assistance to reduce the effort required to turn the wheel. Let's break down the key parts:
- Steering Wheel: The input device, converting your movements into rotational force.
- Steering Column: Connects the steering wheel to the steering rack. Universal joints (U-joints) allow for angular misalignment, compensating for the angle between the wheel and the rack.
- Steering Rack (aka Rack and Pinion): The heart of the system. It converts rotational motion into linear motion.
- Power Steering Pump: Provides hydraulic pressure to assist steering. Driven by the engine, it circulates power steering fluid.
- Power Steering Fluid Reservoir: Holds the power steering fluid.
- High-Pressure and Low-Pressure Hoses: Carry the power steering fluid between the pump, reservoir, and rack.
- Tie Rods (Inner and Outer): Connect the steering rack to the steering knuckles on each wheel, translating the rack's movement into wheel turning.
The Rack and Pinion Mechanism
The rack and pinion mechanism is relatively simple in principle, but precisely engineered. A pinion gear, connected to the steering column, meshes with a toothed rack. When you turn the steering wheel, the pinion rotates, causing the rack to move laterally (left or right). This linear movement, transmitted through the tie rods, steers the wheels.
The '95 240sx uses a power-assisted system, meaning hydraulic pressure helps move the rack. Here's how that works:
- The Valve Body: Located on the steering rack housing, the valve body directs hydraulic fluid to either side of the rack piston. It contains a rotary valve that is sensitive to the amount of torque you are putting on the steering wheel. If no torque is applied it blocks the oil flow to the rack.
- The Rack Piston: A piston is integrated within the rack itself. Hydraulic pressure applied to either side of this piston assists in moving the rack, making steering easier.
- Hydraulic Lines: High-pressure lines carry fluid from the power steering pump to the rack, and return lines carry the fluid back to the reservoir.
Common 240sx Steering Rack Issues
Several common problems can plague the 240sx steering rack, impacting handling and safety. Here are the most frequent culprits:
- Play in the Steering: This manifests as excessive free movement of the steering wheel before the wheels respond. Causes include worn tie rod ends (inner or outer), worn ball joints, or excessive wear within the steering rack itself. A small amount of play is normal, but excessive play indicates a problem.
- Leaking Power Steering Fluid: Leaks can occur at the rack seals, hose connections, or even the pump itself. Low fluid levels result in reduced power assist, making steering difficult, especially at low speeds. Fluid leaks also indicate imminent rack failure.
- Stiff Steering: Often caused by a failing power steering pump, low fluid levels, or a clogged power steering system. It can also be caused by internal damage or corrosion within the rack.
- Noisy Steering: Whining or groaning sounds, especially when turning the wheel, can indicate a failing power steering pump or air in the system. This is often accompanied by foamy power steering fluid.
- Uneven Tire Wear: While many suspension components can cause this, problems within the steering rack, particularly worn tie rod ends, can contribute to uneven tire wear patterns.
Diagnosing Steering Rack Problems
Pinpointing the exact source of a steering problem requires careful inspection. Here's a step-by-step approach:
- Visual Inspection: Start by checking for leaks around the steering rack, hoses, and pump. Inspect the power steering fluid level and condition. Look for bubbles or a burnt smell.
- Checking for Play: With the engine off, grab the steering wheel and gently rock it back and forth. Note how much free play there is before the wheels begin to move. Then, have a friend observe the tie rod ends and ball joints while you move the steering wheel. Look for any visible play or looseness.
- Listen for Noises: With the engine running, listen for any unusual noises from the power steering pump or rack while turning the wheel.
- Test Drive: Pay attention to how the car handles. Does it feel loose or wander? Is the steering effort consistent and smooth? Does it pull to one side?
- Professional Inspection: If you're unsure about the diagnosis, take your car to a qualified mechanic for a professional inspection. They can use specialized tools and experience to accurately identify the problem.
Repairing or Replacing the Steering Rack
Depending on the severity of the problem, you have two primary options: repairing or replacing the steering rack. Repairing might be feasible for minor leaks or worn seals, but it's often more cost-effective to replace the entire unit, especially for older cars like the 240sx. A remanufactured steering rack is a good choice if you're on a budget.
Replacing the Steering Rack: A DIY Guide (Experienced DIYers Only)
Disclaimer: Replacing a steering rack is a complex procedure that requires mechanical skill and specialized tools. If you are not comfortable with this type of work, it is best to leave it to a professional.
Here's a general overview of the replacement process. Always consult your vehicle's repair manual for specific instructions and torque specifications.
- Preparation: Gather all necessary tools: wrenches, sockets, a torque wrench, a flare nut wrench (for the hydraulic lines), jack stands, and safety glasses. Have a new steering rack, power steering fluid, and potentially new tie rod ends on hand. Disconnect the negative battery cable.
- Raise and Secure the Vehicle: Safely lift the front of the car using a jack and secure it with jack stands.
- Remove the Wheels: Remove both front wheels for better access.
- Disconnect the Tie Rod Ends: Use a tie rod end separator tool (pickle fork or ball joint separator) to disconnect the outer tie rod ends from the steering knuckles. You may need to loosen the jam nuts before separating them.
- Disconnect the Hydraulic Lines: Use a flare nut wrench to carefully disconnect the high-pressure and low-pressure hydraulic lines from the steering rack. Be prepared for fluid spillage. Plug the lines to prevent excessive leakage and contamination.
- Disconnect the Steering Column: Locate the universal joint (U-joint) connecting the steering column to the steering rack. Loosen the bolt clamping the U-joint to the rack input shaft and carefully separate the two.
- Remove the Steering Rack Mounting Bolts: Locate and remove the bolts securing the steering rack to the vehicle's frame. These bolts can be very tight.
- Remove the Old Steering Rack: Carefully maneuver the old steering rack out of the vehicle. This may require some wiggling and patience.
- Install the New Steering Rack: Install the new steering rack in the reverse order of removal. Ensure all bolts are properly aligned and torqued to the manufacturer's specifications.
- Reconnect the Hydraulic Lines: Reconnect the high-pressure and low-pressure hydraulic lines to the new steering rack. Ensure the connections are tight to prevent leaks.
- Reconnect the Steering Column: Reconnect the steering column to the new steering rack, ensuring the U-joint is properly seated and the bolt is tightened to the correct torque.
- Reconnect the Tie Rod Ends: Reconnect the outer tie rod ends to the steering knuckles and tighten the jam nuts. It is critical to have the alignment checked and adjusted after replacing the steering rack and tie rod ends.
- Reinstall the Wheels: Reinstall the front wheels and tighten the lug nuts to the correct torque.
- Lower the Vehicle: Carefully lower the vehicle back to the ground.
- Bleed the Power Steering System: Fill the power steering fluid reservoir to the proper level. Start the engine and slowly turn the steering wheel from lock to lock several times to bleed any air from the system. Check the fluid level and add more as needed.
- Test Drive and Inspect: Take the car for a test drive and check for any leaks, noises, or unusual handling characteristics. If everything seems okay, have the wheel alignment professionally checked and adjusted.
Upgrading Your 240sx Steering Rack
Many 240sx owners opt to upgrade their steering rack for improved performance. Common upgrades include:
- Quicker Ratio Racks: These racks have a shorter travel distance, meaning less steering wheel movement is required to achieve the same amount of wheel turning. This results in quicker steering response and improved handling.
- Solid Steering Rack Bushings: Replacing the soft rubber steering rack bushings with solid bushings (urethane or aluminum) reduces flex and improves steering feel and precision.
- Power Steering Cooler: Adding a power steering cooler can help prevent overheating of the power steering fluid, especially during demanding driving conditions like track days. This extends the life of the power steering pump and rack.
Choosing the right upgrade depends on your driving style and goals. Consider factors like budget, intended use (street, track, drift), and overall vehicle setup before making a decision.
Hopefully, this gives you a solid understanding of the 1995 Nissan 240sx steering rack. Remember to prioritize safety and consult your vehicle's repair manual when performing any repairs or modifications. Good luck!