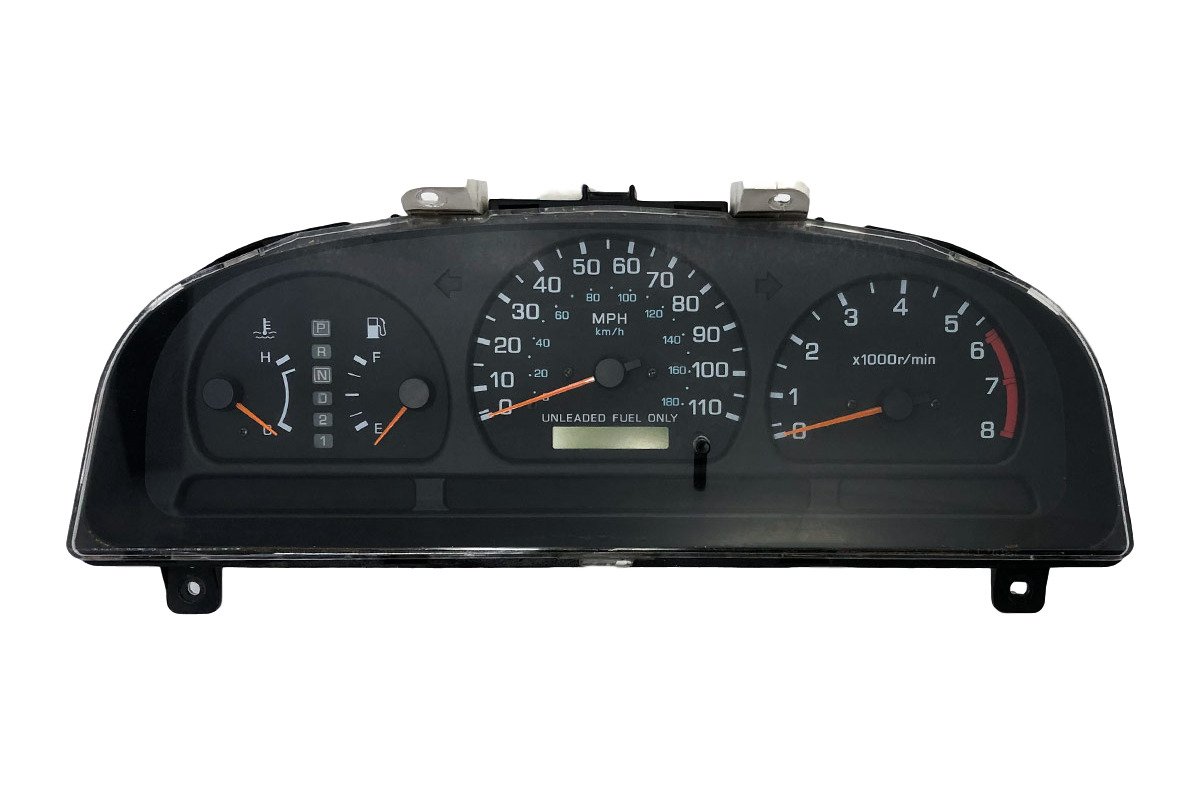
1998 Nissan Frontier Instrument Cluster
Okay, let's talk about the instrument cluster in your 1998 Nissan Frontier. It's a common area for problems to crop up in these reliable trucks, and knowing what to look for can save you time, money, and a whole lot of frustration. We're going to cover some of the common issues, potential causes, and, most importantly, solutions to get you back on the road with a fully functional dashboard.
Common 1998 Nissan Frontier Instrument Cluster Issues
The instrument cluster, that central hub of information, can act up in a few different ways. Here are the most frequently reported problems we see:
- Dead Gauges: This could mean your speedometer, tachometer, fuel gauge, temperature gauge, or any combination of them just stop working. They might stick at zero, read incorrectly, or flicker erratically.
- Dim or Non-Functional Backlighting: You might find it hard to see the gauges at night, or the lights might be completely out. This affects visibility and safety.
- Intermittent Operation: The cluster might work fine one day and then decide to take a vacation the next. This sporadic behavior can be particularly annoying to diagnose.
- Erratic Readings: Gauges jump around wildly or provide obviously inaccurate information. Imagine your fuel gauge swinging from full to empty in a matter of seconds – that's a classic sign of a problem.
- Complete Failure: In the worst-case scenario, the entire instrument cluster goes dark and stops functioning.
Troubleshooting: Pinpointing the Problem
Before you start tearing into your dashboard, let's try to narrow down the cause of the issue. Here's a step-by-step approach:
Step 1: Check the Fuses
This is the simplest and often overlooked fix. Locate the fuse box (usually under the dashboard on the driver's side or under the hood). Consult your owner's manual to identify the fuse(s) associated with the instrument cluster. Use a fuse tester or a multimeter to check for continuity. If a fuse is blown, replace it with a fuse of the exact same amperage. Using a higher amperage fuse can create a fire hazard.
Tools needed: Fuse puller (often located in the fuse box), fuse tester or multimeter.
Step 2: Inspect the Wiring Harness
The wiring harness that connects to the back of the instrument cluster can sometimes become loose, corroded, or damaged. Gently wiggle the harness while the ignition is on (but the engine off) to see if you can trigger any changes in the cluster's behavior. Look for any signs of corrosion on the connectors. If you find corrosion, clean it with electrical contact cleaner.
Tools needed: Electrical contact cleaner, small brush.
Step 3: Test the Ground Connection
A poor ground connection can cause all sorts of electrical gremlins. Locate the ground wire(s) for the instrument cluster (again, your owner's manual or a wiring diagram will be helpful). Make sure the ground connection is clean, tight, and free of corrosion. You can use a multimeter to test the ground connection. Set the multimeter to measure resistance (ohms) and connect one probe to the ground wire and the other probe to a known good ground point on the vehicle's chassis. The resistance should be very close to zero.
Tools needed: Multimeter, wrench or socket to tighten the ground connection.
Step 4: Check for Fault Codes (OBD-II Scanner)
While the instrument cluster itself might not directly trigger a check engine light, related sensors or systems could be throwing codes that indirectly affect the cluster's operation. Use an OBD-II scanner to check for any stored trouble codes. Even if you don't see a check engine light, there might be pending codes related to vehicle speed, engine temperature, or other parameters that influence the gauges.
Tools needed: OBD-II scanner.
Possible Solutions: Getting Your Cluster Working Again
Once you've identified the most likely cause, it's time to explore your options for fixing the problem.
Solution 1: Replace a Blown Fuse
As mentioned earlier, a blown fuse is the easiest fix. Just make sure you replace it with the correct amperage fuse. This is often the answer if the backlighting is completely out, or if multiple gauges have failed simultaneously.
Approximate cost: $5-$10 for a pack of fuses.
Solution 2: Clean and Secure Wiring Connections
If you find corrosion on the wiring connectors, clean them thoroughly with electrical contact cleaner. Make sure the connectors are securely plugged into the back of the instrument cluster. Sometimes simply unplugging and re-plugging the connectors can improve the connection.
Approximate cost: $5-$10 for electrical contact cleaner.
Solution 3: Repair or Replace Damaged Wiring
If you find damaged wiring, you'll need to repair it. This might involve splicing in new wires, using heat shrink tubing to protect the connections, or replacing the entire wiring harness section. If you're not comfortable with electrical work, it's best to leave this to a professional.
Approximate cost: Varies greatly depending on the extent of the damage and whether you do it yourself or hire a mechanic. Parts could range from $10-$50, and labor could be several hundred dollars.
Solution 4: Replace the Instrument Cluster Bulbs
If the backlighting is dim or only partially working, it's possible that some of the instrument cluster bulbs have burned out. You'll need to remove the instrument cluster from the dashboard to access the bulbs. The type of bulbs used in the cluster can vary, so consult your owner's manual or an online parts catalog to find the correct replacements. Make sure to handle the new bulbs with clean gloves or a cloth to avoid getting oil from your skin on them, which can shorten their lifespan.
Tools needed: Screwdrivers, socket set (for removing the cluster), replacement bulbs.
Approximate cost: $10-$30 for replacement bulbs.
Solution 5: Replace the Instrument Cluster
If all other troubleshooting steps fail, the instrument cluster itself may be faulty. You have two main options: replace it with a new unit or find a used one. A new instrument cluster can be expensive, but it comes with the peace of mind of knowing it's in perfect working order. A used instrument cluster is a more affordable option, but you'll need to make sure it's compatible with your vehicle (same year, model, and trim level). You'll also want to verify that it's in good working condition before purchasing it. Regardless of the option you choose, consider the mileage shown on the replacement unit. It may need to be programmed by a professional to match your vehicle's actual mileage.
Tools needed: Screwdrivers, socket set (for removing the cluster).
Approximate cost: New instrument cluster: $300-$600. Used instrument cluster: $100-$300. Programming (if needed): $50-$150.
Solution 6: Professional Diagnosis and Repair
If you're not comfortable working on your vehicle's electrical system, or if you've tried the above steps and still haven't resolved the problem, it's best to take your Frontier to a qualified mechanic. They have the tools, experience, and diagnostic equipment to accurately pinpoint the cause of the issue and perform the necessary repairs.
Approximate cost: Diagnostic fee: $80-$150. Repair costs will vary depending on the problem.
Important Considerations and Final Thoughts
- Safety First: Always disconnect the negative battery cable before working on any electrical components in your vehicle.
- Consult a Wiring Diagram: A wiring diagram can be invaluable for troubleshooting electrical problems. You can often find them in your vehicle's repair manual or online.
- Take Pictures: Before disconnecting any wiring, take pictures so you can remember how everything goes back together.
- Don't Force Anything: If something doesn't seem to be fitting correctly, don't force it. You could damage the component or the wiring.
- Seek Professional Help When Needed: If you're unsure about any aspect of the repair, don't hesitate to consult a qualified mechanic.
The instrument cluster is a vital part of your 1998 Nissan Frontier, providing critical information about your vehicle's operation. By following these troubleshooting steps and repair solutions, you can hopefully get your instrument cluster working properly again and enjoy many more miles of trouble-free driving. Good luck, and happy wrenching!