1999 Nissan Altima Radiator Replacement
Alright, let's tackle a radiator replacement on a 1999 Nissan Altima. This is a fairly straightforward job for the experienced DIYer, but proper procedure is crucial to avoid damage and ensure long-term cooling system health. We'll go through each step methodically, covering the necessary tools, safety precautions, and potential pitfalls to watch out for.
Preparation and Safety
Before you even think about touching a wrench, safety is paramount. Here’s what you need to consider:
- Coolant is toxic: Ethylene glycol, the main ingredient in most coolants, is poisonous. Avoid skin contact and never ingest it. Clean up any spills immediately and dispose of used coolant responsibly at a recycling center.
- Hot engine: Never work on the cooling system while the engine is hot. Allow ample time for the engine to cool completely. Hot coolant under pressure can cause severe burns. I cannot stress this enough.
- Battery Disconnect: Disconnect the negative (-) battery terminal. This prevents accidental electrical shorts during the process. Use a wrench and carefully loosen the nut on the terminal clamp. Then, gently wiggle the clamp off the terminal. Tuck the cable away to prevent it from accidentally contacting the terminal.
Tools and Materials You'll Need:
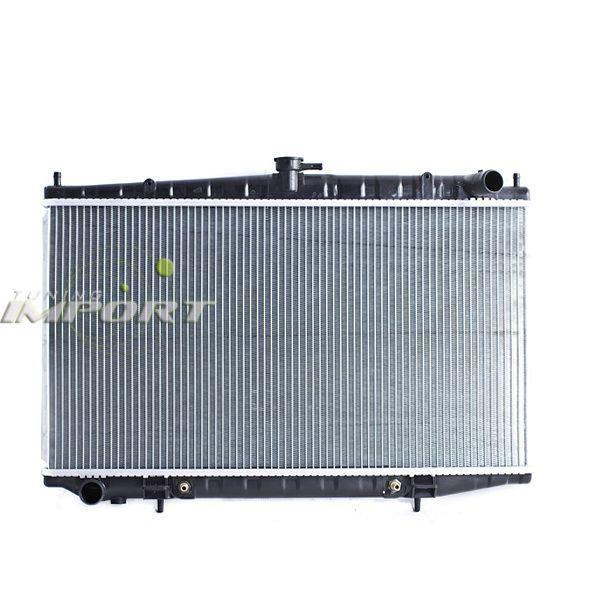
- New radiator (ensure it's the correct part for your 1999 Altima – check engine size and transmission type)
- New radiator cap (a good idea to replace it along with the radiator)
- New upper and lower radiator hoses (again, a worthwhile investment to prevent future failures)
- Hose clamps (if replacing hoses)
- Coolant (compatible with your Nissan – check your owner's manual)
- Distilled water
- Drain pan (large enough to hold all the coolant)
- Wrenches (metric – various sizes, typically 10mm, 12mm, 14mm)
- Socket set (metric – various sizes)
- Screwdrivers (Phillips and flathead)
- Pliers (hose clamp pliers are very helpful)
- Funnel
- Rags or shop towels
- Gloves
- Safety glasses
- Penetrating oil (like WD-40 or similar)
Step-by-Step Radiator Removal
Now, let's get to the nitty-gritty.
1. Drain the Coolant
Locate the radiator drain cock (also called a petcock) at the bottom of the radiator. It's usually on the driver's side. Place the drain pan directly underneath. Gently open the drain cock. It's usually made of plastic and can break easily if you force it. You might need a screwdriver or pliers to turn it. To speed up the draining process, carefully remove the radiator cap. This will relieve any pressure inside the system and allow the coolant to flow out more quickly. Be patient – it can take a while for all the coolant to drain. Once the flow slows to a trickle, you can proceed.
2. Disconnect the Hoses
Once the coolant is drained, disconnect the upper and lower radiator hoses. Use pliers to loosen the hose clamps. If the hoses are stuck, carefully twist them back and forth to break the seal. You can also use a hose removal tool or a flathead screwdriver to gently pry them off. Be careful not to damage the radiator nipples (the outlets where the hoses connect). Some coolant will inevitably spill, so have rags handy. If you're replacing the hoses (which you should consider), you can simply cut them off if they're stubborn.
3. Disconnect Transmission Cooler Lines (If Applicable)
If your Altima has an automatic transmission, it will have transmission cooler lines connected to the radiator. These lines carry transmission fluid to the radiator for cooling. These lines are usually connected with banjo bolts or quick-connect fittings. Be extremely careful when disconnecting these lines. Use a flare nut wrench of the appropriate size to loosen the fittings. Have rags ready to catch any transmission fluid that spills. Carefully disconnect the lines and plug them with appropriate plugs or caps to prevent fluid loss and contamination. Label the lines so you know which goes where when you reinstall them.
4. Disconnect Electrical Connectors
Inspect the radiator for any electrical connectors attached to it. This might include a connector for a cooling fan switch or a temperature sensor. Disconnect these connectors by pressing the release tab and pulling them straight out. Be careful not to damage the connectors or wiring.
5. Remove the Cooling Fan(s)
Most Altimas have electric cooling fans mounted to the radiator. You'll need to remove these before you can remove the radiator. Depending on the design, the fans might be mounted individually or in a shroud that covers the entire radiator. Unbolt the fan assembly from the radiator support. Carefully lift the fan(s) out of the engine compartment. Disconnect any remaining electrical connectors.
6. Remove the Radiator
Now that everything is disconnected, you can finally remove the radiator. The radiator is typically held in place by brackets or clamps at the top and bottom. Unbolt these brackets. Carefully lift the radiator straight up and out of the engine compartment. Be careful not to bump or damage any other components. Inspect the radiator mounting brackets and rubber bushings. Replace them if they are worn or damaged.
Radiator Installation
Installation is essentially the reverse of removal. But here are some key points to keep in mind:
1. Prepare the New Radiator
Before installing the new radiator, inspect it for any damage. Make sure all the fittings are tight. If you removed the transmission cooler fittings from the old radiator, install them on the new radiator, using new crush washers if required. Make sure they are properly tightened.
2. Install the Radiator
Carefully lower the new radiator into the engine compartment. Align it with the mounting brackets and bolt it in place. Make sure the radiator is securely mounted and does not move.
3. Install the Cooling Fan(s)
Reinstall the cooling fan(s) to the radiator. Make sure the fan(s) are properly aligned and securely bolted in place. Reconnect any electrical connectors.
4. Connect Transmission Cooler Lines (If Applicable)
Reconnect the transmission cooler lines to the radiator. Make sure the fittings are properly tightened. Use new crush washers if required. Double-check that the lines are connected to the correct ports.
5. Connect the Hoses
Install the upper and lower radiator hoses onto the radiator nipples. Make sure the hoses are fully seated and securely clamped in place. If you're using new hoses, make sure they are the correct length and shape.
6. Connect Electrical Connectors
Reconnect any electrical connectors to the radiator. Make sure the connectors are securely attached.
7. Refill the Coolant
Before refilling the coolant, make sure the radiator drain cock is closed tightly. Use a funnel to pour the coolant into the radiator. Fill the radiator until it is full. Then, fill the coolant reservoir to the "full" mark. Use a 50/50 mixture of coolant and distilled water. Never use tap water, as it contains minerals that can corrode the cooling system.
8. Bleed the Cooling System
Bleeding the cooling system is crucial to remove any air pockets that may have formed during the process. Air pockets can cause the engine to overheat. Start the engine and let it run for a few minutes. Watch the coolant level in the radiator. If the level drops, add more coolant. Locate the bleeder valve on the engine (usually on the thermostat housing or near the highest point of the cooling system). Open the bleeder valve and let any air escape. Close the bleeder valve when coolant starts to flow out. Repeat this process until no more air comes out of the bleeder valve. Continue to monitor the coolant level in the radiator and reservoir. Add more coolant as needed. Let the engine run until it reaches operating temperature. Check for leaks. Turn off the engine and let it cool completely. Check the coolant level again and add more if needed.
9. Check for Leaks
After the engine has cooled, carefully inspect all the connections for leaks. Pay close attention to the hose clamps, transmission cooler line fittings, and radiator drain cock. If you find any leaks, tighten the connections or replace the affected parts. Road test the vehicle and monitor the temperature gauge to ensure the engine is not overheating.
Final Thoughts
Replacing a radiator on a 1999 Nissan Altima is a manageable task for a competent DIYer. Just remember to be patient, work safely, and double-check your work. Taking your time and following these steps will ensure a successful radiator replacement and keep your Altima running cool for years to come. Remember to properly dispose of the old radiator and used coolant at a recycling center. Happy wrenching!