2000 Nissan Maxima Brake Light Switch
Hey there, Maxima owners! Experiencing brake light issues with your 2000 Nissan Maxima? It's a common problem, and more often than not, the culprit is a faulty brake light switch. Don't worry; it's usually a relatively straightforward fix. Let's dive into the symptoms, causes, and how to get your brake lights working properly again.
Recognizing the Problem: Symptoms of a Faulty Brake Light Switch
The brake light switch is a small but crucial component. When it fails, you'll typically notice one or more of these symptoms:
- No Brake Lights: This is the most obvious sign. Press the brake pedal, and the brake lights simply don't illuminate. This is a serious safety issue and needs immediate attention.
- Brake Lights Stuck On: Conversely, the brake lights might stay illuminated even when you're not pressing the brake pedal. This can drain your battery and confuse other drivers.
- Cruise Control Issues: The cruise control system often relies on the brake light switch to disengage when you tap the brakes. A faulty switch can prevent the cruise control from engaging or, more concerningly, from disengaging when you need it to.
- Difficulty Shifting Out of Park: On automatic transmission vehicles, the brake light switch also signals the shift interlock solenoid. If the switch is bad, you might struggle to move the gear selector out of the "Park" position. This can feel like your car is stuck.
- ABS Warning Light: In some cases, a faulty brake light switch can trigger the ABS (Anti-lock Braking System) warning light on your dashboard. While less common, it's something to consider.
Understanding the Cause: How the Brake Light Switch Works (and Fails)
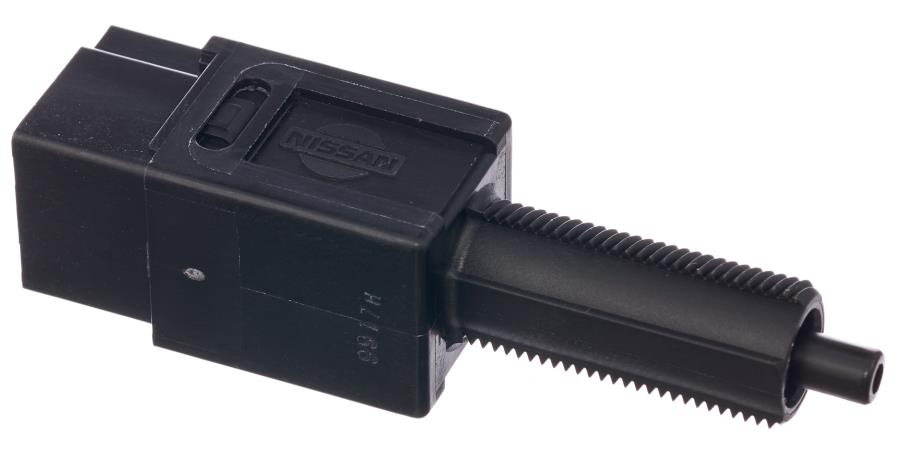
The brake light switch is a simple electromechanical device. It's usually located near the brake pedal arm, under the dashboard. When you press the brake pedal, it pushes against the switch, closing an electrical circuit. This circuit then sends power to the brake lights, causing them to illuminate.
So, what causes these switches to fail? Here are a few common reasons:
- Wear and Tear: Like any mechanical part, brake light switches are subject to wear and tear over time. The constant pressing and releasing of the brake pedal can eventually cause the internal components to fail.
- Contamination: Dirt, dust, and moisture can infiltrate the switch, corroding the electrical contacts and causing it to malfunction.
- Physical Damage: While less common, the switch can be physically damaged if something bumps into it or during other under-dash repairs.
- Electrical Issues: Sometimes, a problem with the car's electrical system, such as a voltage spike, can damage the switch.
The Solution: Replacing the Brake Light Switch
Replacing the brake light switch on a 2000 Nissan Maxima is generally a DIY-friendly project. However, if you're not comfortable working on your car's electrical system, it's best to take it to a qualified mechanic.
Tools You'll Need:
- New Brake Light Switch (Make sure it's the correct part for your 2000 Maxima!)
- Wrench or Socket Set (Typically metric)
- Screwdriver (Phillips and/or flathead, depending on the switch design)
- Multimeter (Optional, for testing the new and old switches)
- Work Light (Essential for seeing under the dash)
- Gloves (To protect your hands)
- Eye Protection (Safety glasses)
Step-by-Step Replacement Guide:
- Disconnect the Negative Battery Cable: Safety first! This prevents any accidental electrical shocks during the repair. Locate the negative terminal on your car battery (it's usually marked with a "-" symbol) and use a wrench to loosen and disconnect the cable. Tuck the cable away from the terminal.
- Locate the Brake Light Switch: Crawl under the dashboard on the driver's side. You'll find the brake light switch mounted near the top of the brake pedal arm. It's typically a small, plastic component with wires connected to it.
- Disconnect the Electrical Connector: Carefully disconnect the electrical connector from the switch. There might be a clip or tab that you need to press to release it. Be gentle to avoid damaging the connector.
- Remove the Old Switch: The switch is usually held in place by a threaded body and a nut, or sometimes by a clip or bracket. Use a wrench or socket to loosen the nut (if applicable) and unscrew the switch. If it's held by a clip, carefully pry the clip open and slide the switch out. Pay attention to how the old switch is oriented.
- Install the New Switch: Install the new brake light switch in the reverse order of removal. Make sure it's properly aligned and securely fastened. If there's a nut, tighten it snugly, but don't overtighten it. Ensure the switch plunger (the part that contacts the brake pedal arm) is in the correct position. Some switches require adjustment. Refer to the instructions that came with your new switch for specific adjustment procedures.
- Reconnect the Electrical Connector: Plug the electrical connector back into the new switch. Make sure it clicks into place and is securely connected.
- Reconnect the Negative Battery Cable: Reconnect the negative battery cable to the battery terminal and tighten the clamp.
- Test the Brake Lights: Have someone stand behind the car while you press the brake pedal. Verify that the brake lights illuminate correctly. Also, check that the cruise control works and that you can shift out of "Park" easily.
- Verify Functionality and Clear Codes (If Necessary): If your ABS warning light was on, it may turn off automatically after replacing the switch. However, some vehicles require you to clear the code using an OBD-II scanner. If you don't have a scanner, you can take your car to a local auto parts store, and they can often clear the code for you for free.
Important Considerations:
- Switch Adjustment: Some brake light switches require precise adjustment to ensure proper operation. If the switch is not adjusted correctly, the brake lights might stay on or not come on at all. Consult your vehicle's repair manual or the instructions that came with the new switch for the correct adjustment procedure.
- Genuine vs. Aftermarket: While aftermarket brake light switches are often cheaper, it's generally recommended to use a genuine Nissan part or a high-quality aftermarket part from a reputable brand. This will ensure proper fit, function, and reliability.
- Double-Check Your Work: Before driving your car, double-check that all connections are secure and that the brake lights are working correctly. It's better to be safe than sorry!
Cost Breakdown: DIY vs. Professional Repair
Here's a rough estimate of the costs involved:
- DIY Repair: The cost of a brake light switch for a 2000 Nissan Maxima typically ranges from $15 to $50, depending on the brand and quality. Add in the cost of any tools you might need, and the total cost could be around $30 to $75.
- Professional Repair: If you take your car to a mechanic, you can expect to pay for the part (which will likely be marked up) plus labor. Labor rates vary depending on your location, but you can generally expect to pay between $75 and $150 for labor. So, the total cost of a professional repair could be between $100 and $200.
Final Thoughts
A faulty brake light switch can be a frustrating and potentially dangerous problem. Fortunately, it's often a relatively simple repair that you can do yourself. By following these steps, you can get your 2000 Nissan Maxima's brake lights working properly again and keep yourself and other drivers safe on the road.
Disclaimer: This guide is intended for informational purposes only and should not be considered a substitute for professional advice. If you're not comfortable working on your car, it's always best to consult a qualified mechanic.