2002 Nissan Sentra Clutch Replacement
The 2002 Nissan Sentra, a stalwart of reliable transportation, often requires clutch replacement as part of its routine maintenance. Understanding the mechanics and procedures involved in this process provides valuable insight into automotive engineering principles. This guide delves into the intricacies of replacing the clutch on a 2002 Sentra, focusing on the why's and how's behind each step.
Understanding the Clutch System
Before diving into the replacement procedure, it's crucial to understand the function of the clutch. The clutch system acts as a bridge between the engine and the transmission. It allows the engine to spin independently of the drivetrain, enabling smooth gear changes. Essentially, it disconnects the engine's power from the wheels when shifting or idling.
The key components are:
- Clutch Disc: A friction plate splined to the transmission input shaft. It's pressed against the flywheel by the pressure plate.
- Pressure Plate: A spring-loaded mechanism that clamps the clutch disc against the flywheel. It's bolted to the flywheel.
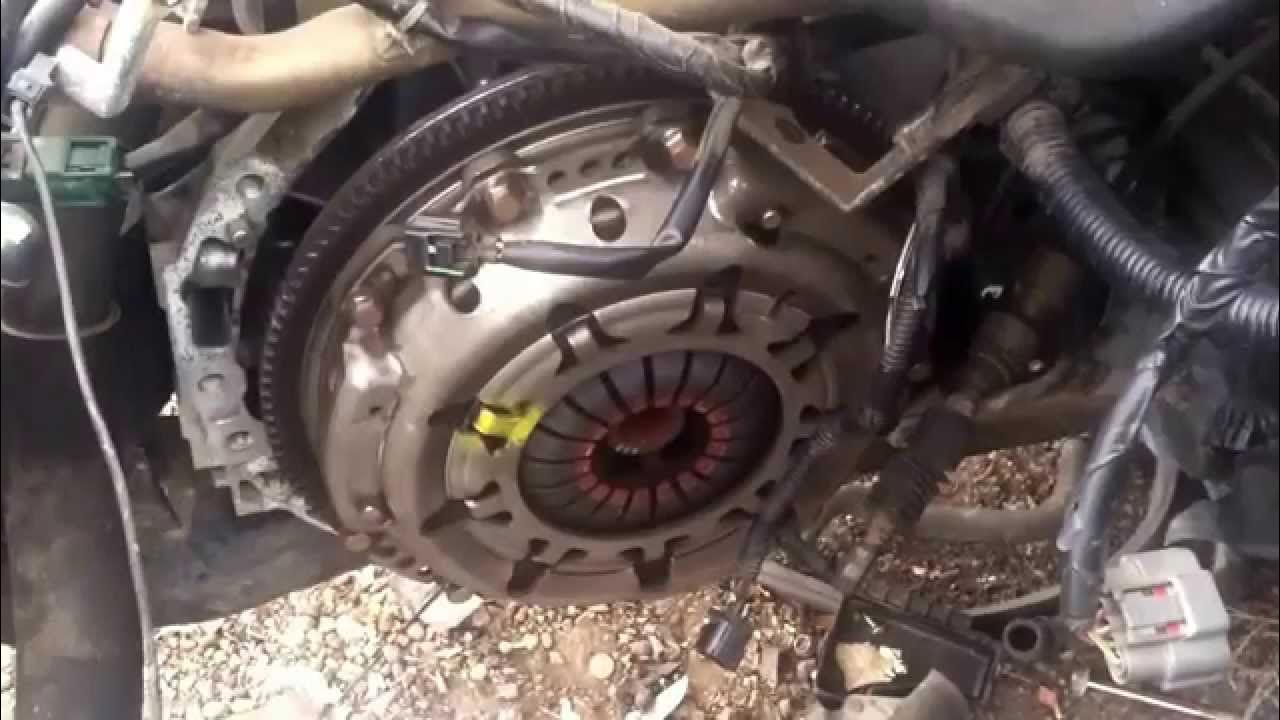
- Flywheel: A heavy disc bolted to the engine's crankshaft. It provides a smooth surface for the clutch disc to engage against and helps maintain engine momentum.
- Throw-out Bearing (Release Bearing): Activated by the clutch fork, it presses against the pressure plate fingers to release the clutch.
- Clutch Fork: A lever that pivots to move the throw-out bearing.
- Clutch Master Cylinder and Slave Cylinder: A hydraulic system (in most Sentras) that transmits the driver's pedal input to the clutch fork.
Wear and tear on these components, especially the clutch disc, necessitates eventual replacement. Signs of a worn clutch include slippage (engine revs high without corresponding speed increase), difficulty shifting gears, a high clutch pedal engagement point, and a burning smell.
Preparation and Safety
Safety is paramount when working on any vehicle. Always:
- Disconnect the negative battery terminal to prevent electrical shocks and accidental activation of components.
- Use jack stands to securely support the vehicle. Never rely solely on a jack.
- Wear safety glasses to protect your eyes.
- Use appropriate tools and wear gloves to protect your hands.
Tools and Materials Required:
- Socket set (metric)
- Wrench set (metric)
- Torque wrench
- Jack and jack stands
- Wheel chocks
- Clutch alignment tool
- Penetrating oil
- New clutch kit (clutch disc, pressure plate, throw-out bearing, pilot bearing)
- Brake cleaner
- Grease (high-temperature)
- Transmission jack (optional but highly recommended)
- Drain pan
- New transmission fluid
- Gloves
- Safety Glasses
Step-by-Step Clutch Replacement Procedure
1. Disconnecting the Shift Linkage and Cables
Begin by disconnecting the shift linkage or cables from the transmission. Carefully observe how they are connected and take pictures if necessary. This will help with reassembly. Penetrating oil can be helpful to loosen any stuck components. For cable linkages, typically a retaining clip needs to be removed. For rod linkages, bolts will need to be removed from the rod ends.
2. Disconnecting Electrical Connectors and Hoses
Identify and disconnect any electrical connectors attached to the transmission, such as the reverse light switch and vehicle speed sensor. Also, disconnect any hoses, such as the clutch slave cylinder hose (if applicable). Be prepared for fluid spillage and have a drain pan ready. Label everything clearly to avoid confusion during reassembly.
3. Removing the Starter
The starter motor is typically located near the top of the transmission. Disconnect the electrical connections to the starter (remember to disconnect the negative battery cable first!). Remove the bolts holding the starter in place and carefully remove it. Note the position of any shims that may be present.
4. Supporting the Engine
With the transmission removed, the engine will need to be supported. An engine support bar that spans across the engine bay is the preferred method. Alternatively, a floor jack with a piece of wood placed under the oil pan can be used, but exercise extreme caution to avoid damaging the oil pan. Loosen (but do not remove) the rear transmission mount bolts to allow the engine to pivot slightly when the transmission is removed.
5. Disconnecting the Driveshafts
On a front-wheel-drive vehicle like the Sentra, the driveshafts must be disconnected from the transmission. This typically involves removing bolts from the inner CV joint flanges. Be prepared for some transmission fluid to leak out. Carefully pull the driveshafts out of the transmission. Be extremely careful not to damage the CV joints.
6. Supporting the Transmission
A transmission jack is highly recommended for this step. If one is not available, a floor jack with a wide platform can be used, but the procedure becomes significantly more difficult and dangerous. Secure the transmission to the jack. Ensure the transmission is stable before proceeding.
7. Removing the Transmission Mounts
Remove the bolts securing the transmission mounts to the chassis. With the engine and transmission both supported, the mounts can be safely removed. Note their orientation for reinstallation.
8. Removing the Transmission
Carefully lower the transmission jack while wiggling the transmission. You may need to gently pry the transmission away from the engine. Ensure that no wires or hoses are being stretched or pinched. Once the transmission is clear of the engine bay, lower it completely and move it out of the way.
9. Inspecting the Flywheel
With the transmission removed, the flywheel is now exposed. Inspect the flywheel surface for wear, cracks, or excessive heat damage (blueing). If the flywheel is significantly worn or damaged, it should be resurfaced or replaced. A light scoring is normal and can be addressed with a light sanding.
10. Removing the Pressure Plate and Clutch Disc
Loosen the pressure plate bolts in a star pattern to evenly distribute the pressure and prevent warping. Once all the bolts are loose, remove them completely. The pressure plate and clutch disc can now be removed. Note the orientation of the clutch disc; it must be reinstalled in the same direction.
11. Installing the New Clutch Disc and Pressure Plate
Using the clutch alignment tool, center the clutch disc against the flywheel. Install the pressure plate, aligning it with the dowel pins (if present). Tighten the pressure plate bolts in a star pattern to the manufacturer's specified torque. Removing the alignment tool can confirm the clutch disk is installed correctly.
12. Replacing the Throw-Out Bearing and Pilot Bearing
Remove the old throw-out bearing from the clutch fork. Apply a small amount of high-temperature grease to the contact points on the clutch fork and install the new throw-out bearing. The pilot bearing is located in the center of the flywheel. Remove the old pilot bearing using a pilot bearing puller or a suitable punch. Install the new pilot bearing using a bearing installation tool.
13. Reinstalling the Transmission
Carefully raise the transmission back into position using the transmission jack. Align the transmission input shaft with the clutch disc and pilot bearing. You may need to wiggle the transmission and rotate the input shaft slightly to get it to engage. Once the transmission is fully seated against the engine, install the transmission mount bolts and tighten them to the specified torque.
14. Reconnecting Components
Reverse the removal process, reconnecting all electrical connectors, hoses, shift linkages, driveshafts, and the starter motor. Double-check all connections to ensure they are secure.
15. Refilling Transmission Fluid
With the driveshafts reconnected, refill the transmission with the correct type and amount of transmission fluid. Consult your vehicle's owner's manual for specifications.
16. Bleeding the Clutch (if applicable)
If your Sentra has a hydraulic clutch, you will need to bleed the clutch system to remove any air bubbles. This is typically done by opening a bleeder valve on the slave cylinder while someone pumps the clutch pedal. Consult your vehicle's repair manual for the specific procedure.
17. Final Checks
Reconnect the negative battery cable. Start the engine and check for any leaks or unusual noises. Test the clutch engagement and shifting. Drive the vehicle a short distance to ensure that the clutch is functioning properly. The clutch may feel slightly different than the old one as it breaks in.
Torque Specifications
It is crucial to torque all bolts to the manufacturer's specified torque. Consult a repair manual specific to your 2002 Nissan Sentra for these specifications. Common torque specifications include:
- Pressure Plate Bolts: Refer to manual
- Flywheel Bolts: Refer to manual
- Transmission Mount Bolts: Refer to manual
- Starter Bolts: Refer to manual
- Driveshaft Bolts: Refer to manual
Post-Installation Notes
A new clutch typically requires a break-in period. Avoid aggressive driving and hard shifting for the first few hundred miles. The clutch pedal may feel slightly different initially, but it should settle in after the break-in period. Regularly check the transmission fluid level to ensure proper lubrication.
Disclaimer: This guide provides general information and should not be considered a substitute for professional advice. If you are not comfortable performing this procedure, it is recommended to seek the assistance of a qualified mechanic. Incorrect installation can lead to serious damage to your vehicle.