2004 Nissan Frontier Brake Light Switch
Alright, let's dive into the 2004 Nissan Frontier brake light switch. This is a common component that, when it fails, can cause a whole host of frustrating issues, from non-functional brake lights (a safety hazard, obviously) to problems with your cruise control and even your shift interlock system. We’ll cover troubleshooting, replacement, and some tips to help you get the job done right.
Understanding the Brake Light Switch
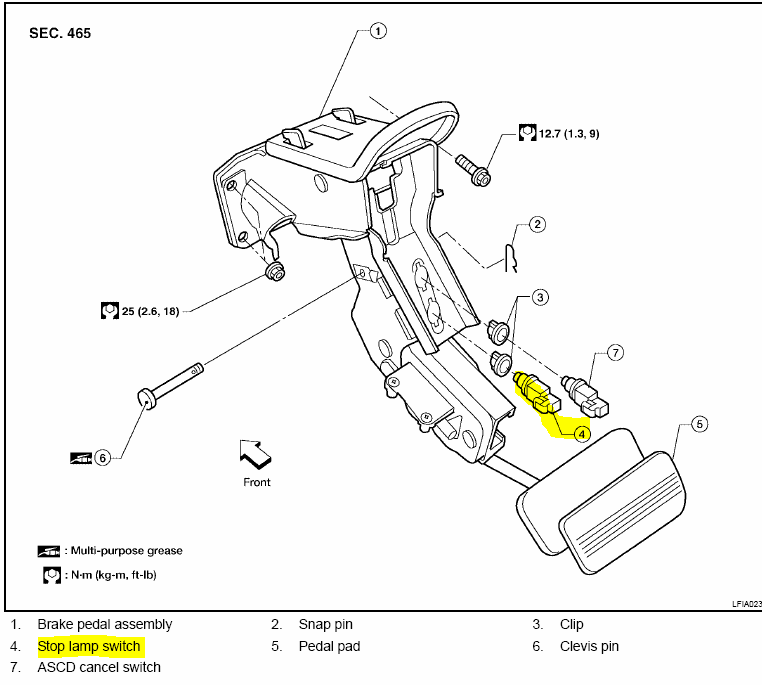
The brake light switch, as the name suggests, is responsible for activating your brake lights when you press the brake pedal. However, its function extends beyond just illuminating those rear lights. It's a crucial input for several vehicle systems. Think of it as a simple but vital electrical gatekeeper. It's typically mounted near the top of the brake pedal arm, usually up under the dash.
How it Works
The brake light switch is essentially a momentary switch. When the brake pedal is at rest, the switch is typically either normally open (NO) or normally closed (NC), depending on the design. When you depress the pedal, the switch changes state. This triggers the following actions:
- Brake Light Activation: The primary function, sending power to the brake light bulbs.
- Cruise Control Deactivation: Signals the cruise control module to disengage, preventing acceleration while braking.
- Shift Interlock Release: Allows you to shift out of Park (P) by signaling the solenoid that releases the gear shift lever. This is a safety feature to prevent accidental gear changes.
- ECM Input (Engine Control Module): In some vehicles, including the 2004 Frontier, the ECM uses the brake switch signal for various purposes, such as idle control or fuel cut-off during deceleration.
The 2004 Frontier's brake light switch is a relatively simple design. It generally consists of a plunger that is either depressed or released by the brake pedal arm. This movement opens or closes the electrical circuit, completing the path for power to flow to the brake lights and other affected systems.
Troubleshooting the Brake Light Switch
Before you immediately condemn the switch, it’s a good idea to perform some basic checks. Start with the simplest things first:
- Check the Bulbs: Make sure all your brake light bulbs are functioning correctly. A blown bulb can sometimes mimic a switch problem, especially if you're only noticing one side isn't working. Use a multimeter in continuity mode to test if the filament inside the bulb is broken.
- Check the Fuses: Consult your owner's manual for the location of the brake light fuse and any associated fuses (e.g., cruise control). A blown fuse is a common cause of brake light problems. Replace the fuse with the correct amperage rating. If it blows again immediately, you have a short circuit somewhere in the system.
If the bulbs and fuses are good, then it's time to focus on the switch itself.
Symptoms of a Faulty Brake Light Switch
Here are some common symptoms of a failing brake light switch:
- Brake Lights Don't Work: The most obvious symptom. No brake lights illuminate when the brake pedal is pressed.
- Brake Lights Stay On: Brake lights remain illuminated even when the brake pedal is released. This can drain your battery.
- Cruise Control Malfunctions: Cruise control will not engage or disengages intermittently.
- Shift Interlock Problems: You can't shift out of Park (P) unless you use the shift lock override button (usually a small button near the shifter). This indicates the shift interlock solenoid isn't receiving the signal from the brake light switch.
- ABS/Traction Control Light: In some cases, a faulty brake light switch can trigger the ABS or traction control light. This is because the ECM may be using the brake switch signal for these systems.
- Intermittent Issues: The problem may only occur sporadically, making diagnosis more challenging. This can be due to a worn or dirty switch contact.
Testing the Brake Light Switch with a Multimeter
The most reliable way to diagnose a brake light switch is to test it with a multimeter. You'll need to identify the terminals on the switch. A wiring diagram for your 2004 Nissan Frontier will be invaluable here. You can usually find these online or in a repair manual.
- Disconnect the Switch: Disconnect the electrical connector from the brake light switch. This prevents any other circuits from interfering with your readings.
- Set Your Multimeter: Set your multimeter to measure resistance (Ohms - Ω) or continuity.
- Identify the Terminals: Use your wiring diagram to determine which terminals are for the brake lights, cruise control, etc. Usually, the brake light circuit will involve two terminals.
- Test for Continuity:
For Normally Open (NO) Switches: When the switch is *not* activated (brake pedal released), there should be *no* continuity between the terminals connected to the brake light circuit. When you manually depress the switch plunger (simulating pressing the brake pedal), you should see continuity (the multimeter will show a reading close to 0 ohms or beep if in continuity mode).
For Normally Closed (NC) Switches: When the switch is *not* activated (brake pedal released), there *should* be continuity between the terminals connected to the brake light circuit. When you manually depress the switch plunger (simulating pressing the brake pedal), the continuity should *break* (the multimeter will show infinite resistance or stop beeping). - Repeat for Other Circuits: Test the other circuits connected to the switch (e.g., cruise control) in a similar manner.
If the switch doesn't behave as expected during these tests, it's likely faulty and needs to be replaced. Pay close attention to whether the switch is normally open or normally closed before drawing any conclusions. Referring to a wiring diagram is crucial.
Replacing the Brake Light Switch
Replacing the brake light switch is generally a straightforward task, but attention to detail is important.
Tools Needed
- New Brake Light Switch (specifically for a 2004 Nissan Frontier)
- Wrench or Socket Set (to remove any mounting hardware)
- Screwdriver (Phillips or Flathead, depending on mounting)
- Multimeter (optional, for verifying operation after installation)
- Work Light
- Gloves
Step-by-Step Replacement
- Disconnect the Battery: This is a crucial safety step. Disconnect the negative (-) terminal of the battery to prevent any electrical shorts during the process.
- Locate the Brake Light Switch: As mentioned earlier, the switch is usually located near the top of the brake pedal arm, under the dashboard. You may need to contort yourself to get a good view. A work light will be helpful.
- Disconnect the Electrical Connector: Carefully disconnect the electrical connector from the brake light switch. There may be a retaining clip that needs to be pressed or released. Do not pull on the wires!
- Remove the Old Switch: The switch is typically held in place by a threaded body that screws into a bracket, or by a retaining clip. If it's threaded, you may need a wrench to loosen it. If it's a clip, carefully pry it off (being careful not to break it). Take note of the switch's orientation before removing it.
- Install the New Switch: Install the new brake light switch in the reverse order of removal. If it's threaded, screw it in until it's snug. Do not overtighten! If it's a clip, make sure it's securely fastened.
- Adjust the Switch (if necessary): Some brake light switches require adjustment to ensure proper operation. This usually involves adjusting the position of the switch body relative to the brake pedal arm. Consult the repair manual or online resources for specific instructions for your 2004 Frontier. Improper adjustment can lead to the brake lights staying on or not coming on at all. A common method is to have the pedal fully at rest, then gently pull the plunger out to contact the brake pedal arm. Some switches self adjust with the first press of the brake pedal after installation.
- Reconnect the Electrical Connector: Reconnect the electrical connector to the new brake light switch. Make sure it's securely fastened.
- Reconnect the Battery: Reconnect the negative (-) terminal of the battery.
- Test the Brake Lights: Have someone stand behind the vehicle while you press the brake pedal. Verify that the brake lights illuminate correctly. Also, check that they turn off completely when the pedal is released.
- Test Other Systems: Test the cruise control and shift interlock to ensure they are functioning properly.
Important Considerations and Tips
- Use the Correct Part: Make sure you purchase a brake light switch that is specifically designed for a 2004 Nissan Frontier. Using the wrong part can lead to compatibility issues and potentially damage other components.
- Wiring Diagrams are Essential: A wiring diagram will be your best friend when troubleshooting and replacing the brake light switch. It will help you identify the correct terminals and circuits.
- Adjusting the Switch is Critical: Properly adjusting the brake light switch is essential for its correct operation. Failing to do so can result in brake lights staying on, not coming on at all, or causing other system malfunctions.
- Inspect the Connector: While you have the connector disconnected, inspect the terminals for corrosion or damage. Clean or repair the connector as needed. A corroded connector can cause intermittent issues.
- Safety First: Always disconnect the battery before working on any electrical components in your vehicle. This will prevent accidental shorts and potential injuries.
- If in Doubt, Seek Professional Help: If you're not comfortable performing this repair yourself, it's best to take your vehicle to a qualified mechanic.
By following these steps and tips, you should be able to successfully diagnose and replace the brake light switch on your 2004 Nissan Frontier. Remember to prioritize safety and take your time to ensure the job is done correctly. A properly functioning brake light switch is crucial for both your safety and the proper operation of your vehicle's systems.