2005 Nissan Altima Clutch Replacement
Alright, let's talk clutch replacement on your 2005 Nissan Altima. This is a pretty common job, and while it's not exactly beginner-level, a moderately experienced DIYer with the right tools and information can definitely tackle it. We're going to go through the whole process step-by-step, covering the necessary tools, precautions, and potential pitfalls you might encounter.
Preparation & Safety
Before you even think about touching a wrench, safety is paramount. You're going to be working under the car, dealing with heavy components, and manipulating potentially hazardous fluids. Here's a crucial checklist:
- Safety Glasses: Protect your eyes from flying debris.
- Gloves: Protect your hands from sharp edges and harsh chemicals.
- Jack Stands: Never work under a car supported only by a jack. Invest in a good set of jack stands that can handle the weight of your Altima. Place them on designated jacking points on the frame.
- Wheel Chocks: Secure the rear wheels (or front if working on the rear).
- Drain Pan: You'll likely need to drain the transmission fluid.
- Torque Wrench: Absolutely essential for properly tightening bolts to the correct specifications.
- Penetrating Oil: For stubborn bolts and rusted components. PB Blaster or similar works well.
Beyond the safety gear, you'll also need a good set of tools. Consider this your shopping list:
- Socket Set: Metric sockets are a must, including deep sockets.
- Wrench Set: Again, metric.
- Extensions: Various lengths of socket extensions will be needed to reach recessed bolts.
- Breaker Bar: For breaking loose stubborn nuts and bolts.
- Torx Bit Set: Some components may use Torx fasteners.
- Pry Bar: For separating components. Use carefully to avoid damage.
- Transmission Jack: This is highly recommended. Trying to wrestle the transmission out without one is dangerous and difficult. A floor jack can be used with extreme caution and proper supporting structures, but a transmission jack is the safer and more efficient option.
- Clutch Alignment Tool: Essential for centering the clutch disc during installation. A universal plastic tool is generally sufficient.
- Flywheel Locking Tool (optional): This tool holds the flywheel in place while you remove and install the pressure plate bolts. You can also use other methods to lock the flywheel, such as a screwdriver wedged against the starter ring gear (with appropriate caution).
- Service Manual (highly recommended): A service manual specific to your 2005 Nissan Altima will provide torque specifications and detailed diagrams.
Finally, don't forget the parts! You'll need:
- Clutch Kit: This typically includes the clutch disc, pressure plate, and throw-out bearing (release bearing).
- Pilot Bushing/Bearing: Located in the end of the crankshaft. It's good practice to replace this while you're in there.
- Transmission Fluid: Use the correct type specified for your Altima's transmission.
- Flywheel Bolts (optional): If your old flywheel bolts are stretched or damaged, replace them. Use new bolts if you're resurfacing the flywheel.
- Rear Main Seal (optional): While the transmission is out, it's a good opportunity to inspect and replace the rear main seal if it shows signs of leakage.
Disassembly
Okay, let's get to work. Here's a general outline of the disassembly process. Always refer to your service manual for specific instructions and torque specifications for your vehicle.
- Disconnect the Battery: Start by disconnecting the negative battery terminal.
- Remove the Air Intake: Clear the area around the transmission for easier access.
- Disconnect Shift Linkage/Cables: Disconnect the shift linkage or cables from the transmission. Be careful not to damage them.
- Disconnect Electrical Connectors: Disconnect all electrical connectors attached to the transmission, including the speed sensor and any other sensors.
- Remove the Starter: Disconnect the electrical connections to the starter and remove the starter bolts.
- Support the Engine: Use an engine support bar or jack to support the engine from above. This is crucial because you'll be removing the transmission mount.
- Drain the Transmission Fluid: Locate the drain plug on the transmission and drain the fluid into your drain pan.
- Remove the Drive Shafts (CV Axles): This is where things can get a bit messy. Disconnect the drive shafts from the transmission. Be prepared for some transmission fluid spillage, even after draining. You might need a slide hammer or pry bar to get them out. Be very careful not to damage the seals in the transmission.
- Remove the Exhaust Components (if necessary): Some exhaust components may need to be removed to provide clearance for the transmission.
- Remove the Transmission Mount: Support the transmission with the transmission jack before removing the transmission mount.
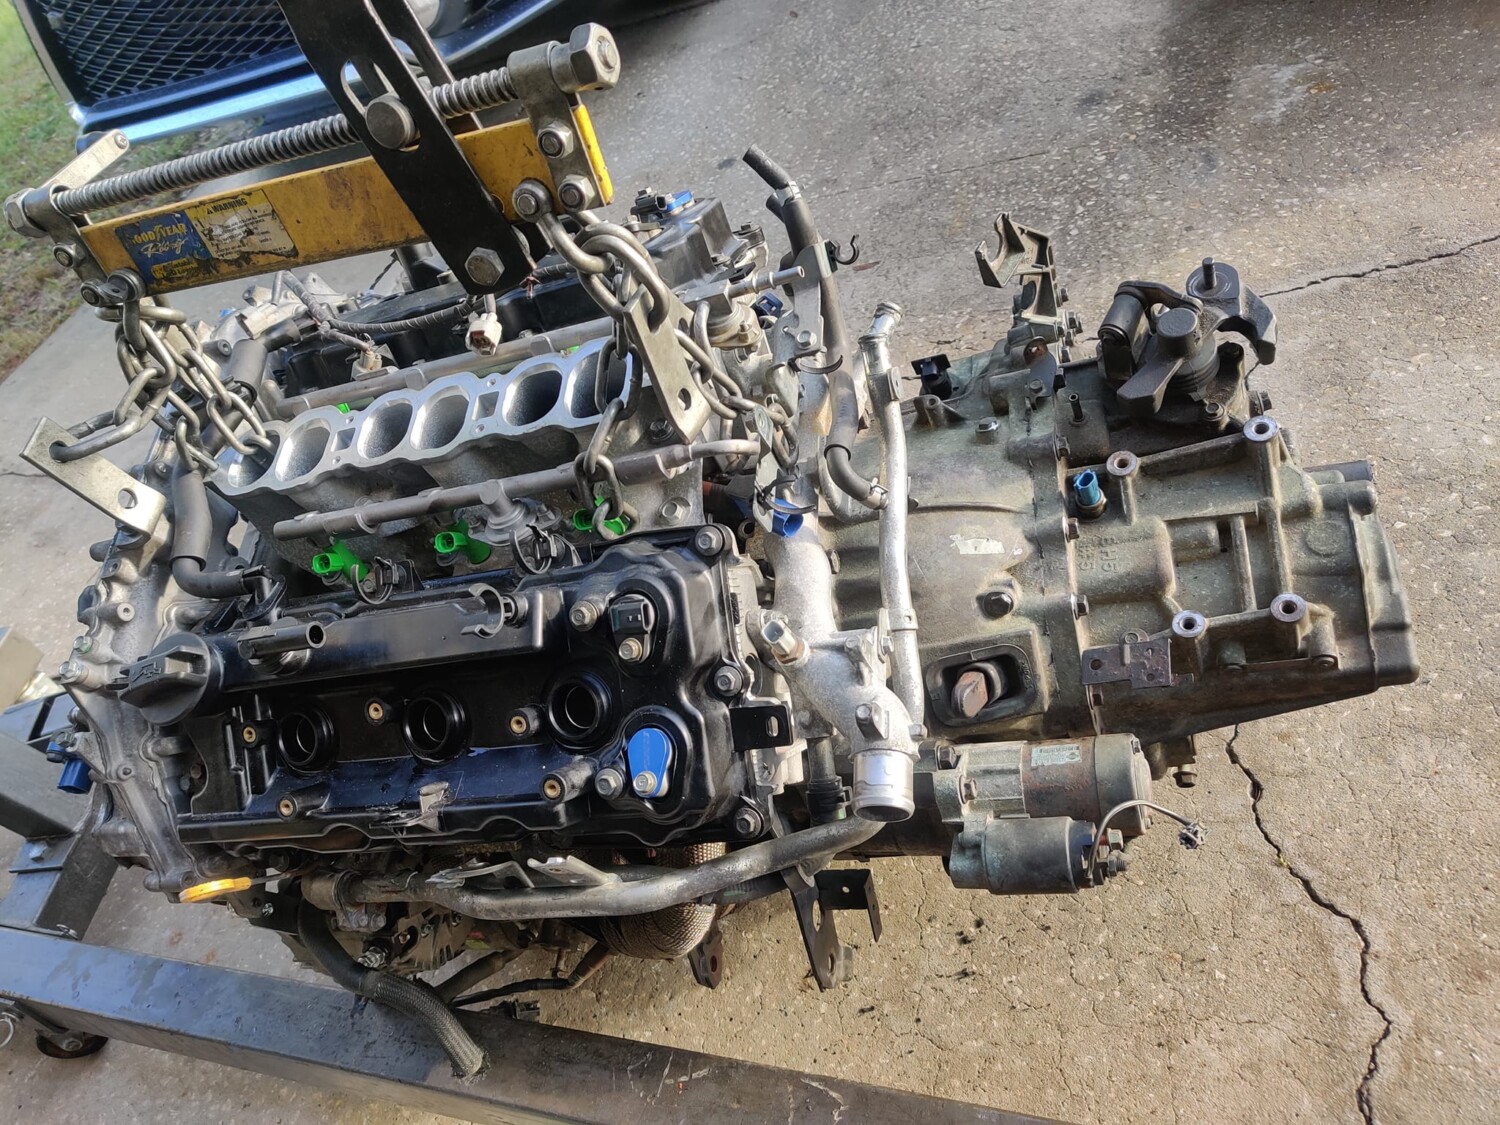
- Remove the Transmission: This is the most challenging part. With the transmission supported by the jack, carefully remove the transmission mounting bolts. Lower the transmission slowly and carefully, ensuring it clears all obstructions. It may take some maneuvering and gentle prying to separate the transmission from the engine.
Clutch and Flywheel Inspection & Replacement
Now that the transmission is out, you have access to the clutch and flywheel.
- Inspect the Flywheel: Check the flywheel for cracks, excessive wear, and heat spots (bluing). If it's damaged or excessively worn, it should be resurfaced or replaced. A *resurfaced* flywheel will have a smooth, flat surface for the new clutch disc to mate with.
- Remove the Pressure Plate: Use your flywheel locking tool (or another method) to hold the flywheel in place. Loosen the pressure plate bolts in a star pattern to evenly release the pressure on the diaphragm spring. Remove the pressure plate and clutch disc.
- Inspect the Clutch Disc: Examine the clutch disc for wear, damage, and oil contamination. If the friction material is worn down to the rivets, or if there's any other damage, it needs to be replaced.
- Inspect the Throw-Out Bearing (Release Bearing): Check the throw-out bearing for smooth operation and excessive wear. Replace it as part of the clutch kit.
- Replace the Pilot Bushing/Bearing: Use a pilot bearing puller tool (or a slide hammer with a pilot bearing attachment) to remove the old pilot bushing/bearing from the end of the crankshaft. Install the new one using a suitable driver or socket. Ensure it's seated properly.
- Install the New Clutch Disc and Pressure Plate: Use the clutch alignment tool to center the clutch disc against the flywheel. Install the pressure plate and tighten the bolts in a star pattern to the specified torque. Torque specifications are crucial here; use your service manual.
- Lubricate: Apply a small amount of high-temperature grease to the input shaft splines of the transmission and the pivot points of the clutch fork. This will ensure smooth operation.
Reassembly
Reassembly is essentially the reverse of disassembly, but here are some key points to keep in mind:
- Align the Transmission: Use the transmission jack to carefully lift and align the transmission with the engine. This can be tricky. Make sure the input shaft lines up with the clutch disc. You may need to rotate the engine slightly to get the splines to mesh. Never force the transmission into place.
- Install the Transmission Mounting Bolts: Tighten the transmission mounting bolts to the specified torque.
- Install the Transmission Mount: Reinstall the transmission mount.
- Reconnect the Drive Shafts (CV Axles): Carefully reinstall the drive shafts. Make sure they are fully seated and secured.
- Reconnect the Shift Linkage/Cables: Reconnect the shift linkage or cables.
- Reconnect Electrical Connectors: Reconnect all electrical connectors.
- Install the Starter: Reinstall the starter.
- Refill the Transmission Fluid: Fill the transmission with the correct type and amount of fluid. Check the fluid level according to your service manual.
- Install the Air Intake: Reinstall the air intake system.
- Reconnect the Battery: Reconnect the negative battery terminal.
Final Checks
Before you hit the road, perform these final checks:
- Check for Leaks: Inspect around the transmission and drive shafts for any signs of leaks.
- Test the Clutch: Start the engine and test the clutch operation. Make sure it engages and disengages smoothly.
- Test Drive: Take the car for a short test drive to ensure everything is working properly. Pay attention to any unusual noises or vibrations.
Troubleshooting Tips
Here are some common issues you might encounter:
- Transmission Won't Engage: Check the shift linkage/cables and make sure they are properly adjusted. Also, double-check that the clutch disc is properly centered with the alignment tool.
- Clutch Slipping: This could be caused by oil contamination on the clutch disc, a worn-out clutch disc, or a problem with the pressure plate.
- Clutch Chatter: This can be caused by a warped flywheel, oil contamination, or a problem with the pressure plate.
- Difficulty Shifting: This could be caused by a worn-out pilot bushing/bearing, low transmission fluid, or a problem with the shift linkage/cables.
This is a general guide, and specific procedures may vary slightly depending on your exact model year and trim level. Always consult your service manual for the most accurate and detailed information. Good luck, and be safe!