2005 Nissan Titan Driver Seat Replacement
So, your 2005 Nissan Titan's driver seat isn't quite what it used to be? Don't worry, you're not alone. After nearly two decades, wear and tear can take its toll. Whether it's ripped upholstery, a broken frame, or malfunctioning motors, replacing the driver's seat might be the best option for comfort and safety. This guide will walk you through the process, outlining common problems, replacement options, and a step-by-step procedure for DIY replacement.
Common 2005 Nissan Titan Driver Seat Issues
Before diving into replacement, let's pinpoint the specific problem. Identifying the root cause helps you choose the right solution, whether it's a simple repair or a full replacement.
- Worn or Ripped Upholstery: This is the most common issue. Years of use, sun exposure, and accidental spills can lead to cracked leather or torn fabric.
- Broken Seat Frame: The metal frame beneath the seat can crack or break due to stress, especially if the truck is frequently used for off-roading or heavy-duty work. This can make the seat unstable and unsafe.
- Faulty Seat Motors: If your Titan has power seats, the motors that control adjustments can fail. This might manifest as the seat not moving in one or more directions, or making grinding noises.
- Damaged Seat Cushion: The foam padding in the seat cushion can compress over time, losing its support and making long drives uncomfortable.
- Malfunctioning Seat Heaters: If equipped, the seat heaters might stop working due to a blown fuse, a faulty heating element, or a problem with the control module.
- Airbag System Issues: Never attempt repairs involving the airbag system yourself. A malfunctioning seat-mounted airbag requires professional diagnosis and repair to avoid accidental deployment and serious injury.
Replacement Options: Weighing Your Choices
Once you know what's wrong, you have several options for resolving the issue.
- Upholstery Repair or Replacement: If the frame and motors are sound, reupholstering the seat is a cost-effective way to restore its appearance. You can purchase aftermarket seat covers or have a professional upholstery shop redo the entire seat. Consider the cost of materials and labor if you go with a professional.
- Seat Cushion Replacement: Replacing just the seat cushion can significantly improve comfort if the original padding is worn out. Aftermarket cushions are available, or you can have a custom cushion made.
- Salvage Yard Seat: A used seat from a salvage yard can be a budget-friendly option, but inspect it carefully for damage, wear, and proper functionality. Ensure the seat is compatible with your Titan's trim level and options (e.g., power seats, heated seats). Remember to check the seat's airbag status; a deployed airbag means the seat is unusable.
- Aftermarket Replacement Seat: Several companies offer aftermarket seats designed to fit the 2005 Nissan Titan. These seats may offer improved comfort, support, and styling, but they can be more expensive than other options. Be sure to verify compatibility and read reviews before purchasing.
- OEM Replacement Seat: Buying a new Original Equipment Manufacturer (OEM) seat directly from Nissan or a Nissan parts dealer is the most expensive option, but it guarantees perfect fit and functionality. This is typically only necessary if the seat frame is severely damaged or the airbag system is compromised.
DIY Driver Seat Replacement: A Step-by-Step Guide
If you're comfortable with basic automotive repairs, replacing the driver's seat yourself is a manageable project. Allow approximately 1-2 hours for the job.
Tools and Materials Needed:
- Socket set (metric) - specifically, sockets that fit the seat bolts. Typically 14mm or 17mm.
- Wrench set (metric)
- Screwdrivers (Phillips and flathead)
- Torque wrench
- Pry bar (optional)
- Shop towels or rags
- Penetrating oil (if the bolts are rusty)
- New replacement seat
- Work gloves
- Safety glasses
- Optional: Multimeter to check electrical connections
- Important: Airbag System Safety Precautions (see below)
Airbag System Safety Precautions: Read Carefully!
Before disconnecting any electrical connectors under the seat, it's crucial to disconnect the negative battery cable. This prevents accidental airbag deployment, which can cause serious injury. Allow at least 15 minutes after disconnecting the battery for the electrical system to fully discharge.
1. Disconnect the Battery: Open the hood and locate the negative battery terminal. Loosen the nut or clamp and carefully disconnect the cable. Secure the cable away from the terminal to prevent accidental contact.
2. Prepare the Vehicle: Park the Titan on a level surface and engage the parking brake. This prevents the vehicle from rolling during the replacement process.
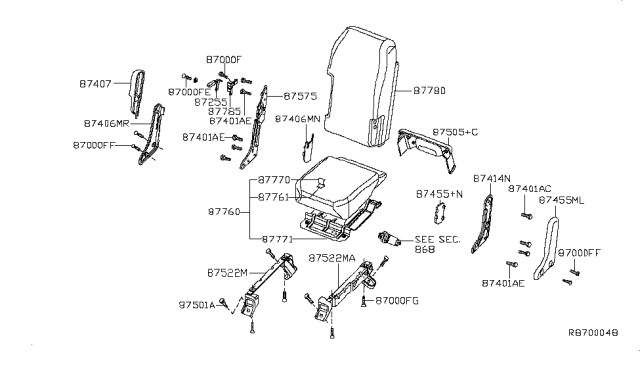
3. Remove the Old Seat:
- Locate the Seat Bolts: There are typically four bolts securing the seat to the floor. These are usually located at the corners of the seat base.
- Spray with Penetrating Oil (if needed): If the bolts are rusty or difficult to turn, apply penetrating oil and let it soak for a few minutes.
- Remove the Bolts: Use the appropriate socket and ratchet to remove the seat bolts. Keep the bolts organized, as you'll need them for the new seat.
- Tilt the Seat Backwards (Carefully): Once the bolts are removed, carefully tilt the seat backwards to access the electrical connectors underneath.
- Disconnect Electrical Connectors: Disconnect all electrical connectors attached to the seat. These connectors may have locking tabs that need to be depressed before you can pull them apart. Take your time and be gentle to avoid damaging the connectors. Note the position of each connector for easier reassembly.
- Remove the Seat: Carefully lift the seat out of the vehicle. You may need a helper for this, as the seat can be heavy and awkward. Be careful not to scratch the interior of the truck.
4. Prepare the New Seat: Inspect the new seat for any damage or defects. Ensure all necessary hardware is included.
5. Install the New Seat:
- Position the Seat: Carefully position the new seat in the vehicle, aligning it with the bolt holes in the floor.
- Connect Electrical Connectors: Reconnect all electrical connectors to the new seat, making sure they are securely attached. Double-check that you've connected the correct connectors to the correct locations.
- Install the Bolts: Install the seat bolts and tighten them to the manufacturer's specified torque. Use a torque wrench to ensure proper tightness. This is important for safety. Consult your vehicle's repair manual for the correct torque specifications. If you do not have access to the specifications, tighten the bolts firmly but do not overtighten, which can strip the threads.
- Test the Seat Functions: Reconnect the negative battery cable. Test all seat functions, including adjustments, heating (if equipped), and any other features. Make sure everything is working correctly.
6. Final Check: Double-check that all bolts are tightened and all electrical connectors are securely connected.
Troubleshooting Common Problems
Even with careful planning, you might encounter a few snags during the replacement process.
- Stuck Bolts: If the seat bolts are seized, try soaking them with penetrating oil for an extended period. You may also need to use a breaker bar or impact wrench to loosen them.
- Damaged Electrical Connectors: If you accidentally damage an electrical connector, you may be able to repair it with a connector repair kit. Otherwise, you may need to replace the entire wiring harness.
- Airbag Warning Light: If the airbag warning light comes on after replacing the seat, it indicates a problem with the airbag system. This could be due to a loose connection, a faulty sensor, or a problem with the airbag module. Take the vehicle to a qualified mechanic for diagnosis and repair. Do not attempt to troubleshoot the airbag system yourself.
- Seat Not Moving: If the seat motors are not working after reconnecting the battery, check the fuses and relays related to the seat power circuit. If the fuses and relays are good, the motor itself may be faulty.
Estimated Costs
The cost of replacing a 2005 Nissan Titan driver's seat varies depending on the replacement option you choose.
- Upholstery Repair: $200-$800 (depending on the extent of the damage and the materials used)
- Seat Cushion Replacement: $50-$200 (depending on the type of cushion)
- Salvage Yard Seat: $100-$500 (depending on the condition and availability)
- Aftermarket Replacement Seat: $300-$1000 (depending on the brand and features)
- OEM Replacement Seat: $800-$2000 (depending on the model and options)
- Professional Installation: $100-$300 (if you choose to have a mechanic install the seat)
Conclusion
Replacing your 2005 Nissan Titan's driver seat is a worthwhile investment in comfort, safety, and the overall driving experience. By carefully assessing the problem, considering your replacement options, and following the steps outlined in this guide, you can successfully complete the project yourself and save money on labor costs. Remember to prioritize safety, especially when working with the airbag system. If you're unsure about any aspect of the process, don't hesitate to seek professional assistance from a qualified mechanic.