2006 Nissan Frontier Heater Hose Outlet
The 2006 Nissan Frontier is a popular mid-size pickup truck known for its reliability and capability. However, like any vehicle, it's subject to wear and tear over time. One common area that may require attention is the heater hose outlet. This component plays a vital role in the vehicle's cooling and heating systems, and understanding its function and potential issues is crucial for maintaining your Frontier's performance.
What is the Heater Hose Outlet on a 2006 Nissan Frontier?
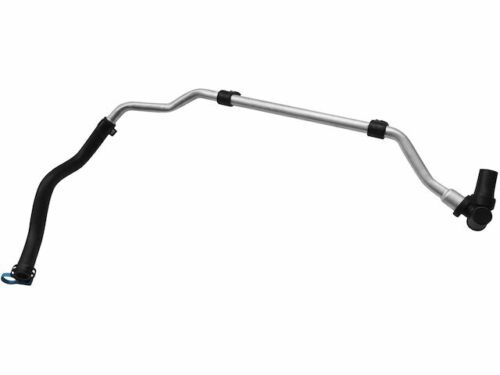
The heater hose outlet is a crucial part of the 2006 Nissan Frontier's cooling system. It serves as the connection point between the engine block and the heater core. Specifically, it's typically a metal or plastic fitting (often aluminum on the 2006 Frontier) that protrudes from the engine, usually near the thermostat housing or intake manifold. Two hoses attach to it: the heater inlet hose and the heater outlet hose (sometimes referred to as the return hose). These hoses circulate coolant between the engine and the heater core located inside the vehicle's dashboard.
Coolant, warmed by the engine's operation, flows *through* the heater inlet hose, *into* the heater core, where heat is radiated into the passenger cabin via the blower motor. The now-cooled coolant then *exits* the heater core *through* the heater outlet hose and returns to the engine to be reheated. This continuous cycle provides heat during colder weather.
In essence, the heater hose outlet acts as a critical junction, directing the flow of coolant to ensure the proper functioning of the heating system. Without a properly functioning heater hose outlet, the heating system will be unable to provide warm air, especially during colder months.
Common Problems with the 2006 Nissan Frontier Heater Hose Outlet
Several issues can arise with the heater hose outlet on a 2006 Nissan Frontier, potentially impacting the vehicle's performance and comfort. Here are some of the most common problems:
Corrosion and Rust
The heater hose outlet is constantly exposed to coolant, which, over time, can lead to corrosion and rust. This is particularly true if the coolant isn't regularly flushed and replaced. The use of incorrect coolant types can also accelerate the corrosion process. Aluminum outlets are generally more resistant to corrosion than plastic ones, but even they are susceptible over time. Corrosion weakens the outlet's structure, potentially leading to leaks and eventual failure.
Cracking and Breaking
The heater hose outlet is subjected to significant temperature fluctuations and pressure. These conditions can cause the plastic (and sometimes even metal) components to become brittle and prone to cracking. Cracks often appear around the hose connections or along the body of the outlet itself. A cracked or broken heater hose outlet will result in a coolant leak, potentially leading to engine overheating if not addressed promptly. Additionally, age and the constant expansion and contraction from heating and cooling cycles will create fatigue within the metal or plastic material, eventually leading to failure.
Leakage
Leakage is the most common symptom of a failing heater hose outlet. Leaks can occur at the hose connections due to loose clamps, damaged hoses, or corrosion on the outlet's surface. Leaks can also originate from cracks in the outlet's body. Coolant leaks are identifiable by a sweet, distinct smell and a visible puddle under the vehicle. Prolonged coolant leaks can lead to low coolant levels, causing the engine to overheat and potentially resulting in severe engine damage.
Clogged Passages
Over time, debris and contaminants can accumulate within the heater hose outlet, clogging the passages and restricting coolant flow. This blockage can reduce the efficiency of the heating system, resulting in insufficient heat in the cabin. Clogged passages can also increase pressure within the cooling system, potentially leading to further damage to other components.
Symptoms of a Failing 2006 Nissan Frontier Heater Hose Outlet
Recognizing the symptoms of a failing heater hose outlet is crucial for preventing further damage and ensuring timely repairs. Here are some telltale signs:
- Coolant Leak: This is the most obvious symptom. Look for a puddle of coolant under the vehicle, especially near the front of the engine. The coolant will often be green or orange and have a sweet smell.
- Overheating Engine: A low coolant level due to a leak can cause the engine to overheat. Watch the temperature gauge closely and address any signs of overheating immediately.
- Lack of Heat: If the heating system isn't producing warm air, even when the engine is warm, it could indicate a problem with the heater hose outlet or the heater core itself.
- Low Coolant Level: If you notice that you're constantly adding coolant to maintain the proper level, it suggests a leak somewhere in the system, possibly at the heater hose outlet.
- Visible Corrosion or Cracks: Inspect the heater hose outlet for any signs of corrosion, rust, or cracks. These are visual indicators of potential problems.
- Sweet Smell Inside the Cabin: If you smell a sweet, antifreeze-like odor inside the vehicle, it could indicate a coolant leak in the heater core or a leak near the heater hose connections that is being drawn into the cabin through the ventilation system.
Replacing the 2006 Nissan Frontier Heater Hose Outlet
Replacing the heater hose outlet is a relatively straightforward repair that can often be performed by a mechanically inclined individual. However, it's essential to follow the proper procedures and take necessary safety precautions.
Tools and Materials Needed
- New heater hose outlet (ensure it's the correct part for your 2006 Nissan Frontier)
- New heater hoses (recommended, as old hoses can be brittle)
- New hose clamps
- Coolant
- Socket set
- Wrench set
- Screwdrivers
- Pliers
- Drain pan
- Safety glasses
- Gloves
- Torque wrench (for tightening bolts to the correct specification)
Steps for Replacement
- Safety First: Allow the engine to cool completely before starting any work. Disconnect the negative battery cable to prevent electrical shorts.
- Drain the Coolant: Locate the drain cock on the radiator (usually at the bottom) and place a drain pan underneath. Open the drain cock to drain the coolant. Alternatively, you can remove the lower radiator hose, but this can be messier.
- Remove the Old Hoses: Carefully remove the old heater hoses from the heater hose outlet. Use pliers to loosen the hose clamps and then twist and pull the hoses off. If the hoses are stuck, you can use a hose removal tool or carefully slit the end of the hose with a utility knife (avoid damaging the outlet).
- Remove the Old Outlet: Disconnect any sensors or electrical connectors attached to the outlet. Unbolt the heater hose outlet from the engine block. Note the orientation of the outlet and any gaskets or seals.
- Clean the Mounting Surface: Thoroughly clean the mounting surface on the engine block to remove any old gasket material or debris. Use a scraper or wire brush if necessary.
- Install the New Outlet: Install the new heater hose outlet onto the engine block, using a new gasket or sealant as needed. Torque the bolts to the manufacturer's specifications using a torque wrench.
- Install New Hoses: Attach the new heater hoses to the heater hose outlet and secure them with new hose clamps. Ensure the hoses are properly seated and the clamps are tight.
- Refill the Coolant: Close the radiator drain cock (if used) and refill the cooling system with the correct type and amount of coolant. Refer to your owner's manual for the recommended coolant type.
- Bleed the Cooling System: Air can become trapped in the cooling system during the refilling process. Bleed the system by opening the bleeder valve (usually located on the thermostat housing or intake manifold) while the engine is running. Add coolant as needed until a steady stream of coolant flows from the bleeder valve.
- Check for Leaks: Start the engine and let it warm up. Carefully inspect the heater hose outlet and hose connections for any leaks. Tighten hose clamps as needed.
- Monitor Coolant Level: Monitor the coolant level for the next few days and add coolant as needed to maintain the proper level.
Important Note: If you are not comfortable performing this repair yourself, it is best to take your vehicle to a qualified mechanic. Improper installation can lead to coolant leaks and engine damage.
Preventative Maintenance for the 2006 Nissan Frontier Heater Hose Outlet
Taking proactive steps to maintain your cooling system can significantly extend the life of your heater hose outlet and prevent costly repairs. Here are some preventative maintenance tips:
- Regular Coolant Flushes: Flush and replace the coolant according to the manufacturer's recommended schedule (usually every 30,000 to 50,000 miles or every two to three years). This removes contaminants and helps prevent corrosion.
- Use the Correct Coolant Type: Always use the coolant type specified in your owner's manual. Using the wrong coolant can accelerate corrosion and damage cooling system components.
- Inspect Hoses and Clamps Regularly: Inspect the heater hoses and clamps for signs of wear, cracks, or leaks. Replace any damaged hoses or clamps promptly.
- Check Coolant Level Regularly: Monitor the coolant level regularly and add coolant as needed. A consistently low coolant level indicates a leak somewhere in the system.
- Pressure Test the Cooling System: Periodically have a mechanic pressure test the cooling system to check for leaks.
By understanding the function, potential problems, and preventative maintenance measures associated with the 2006 Nissan Frontier heater hose outlet, you can ensure the reliable operation of your vehicle's heating system and prevent costly repairs down the road. Remember that regular maintenance is key to keeping your Frontier running smoothly for years to come.