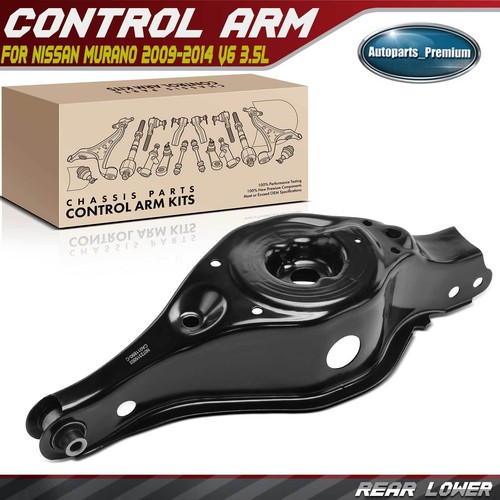
2006 Nissan Murano Rear Lower Control Arm
Alright, let's talk about the rear lower control arm on your 2006 Nissan Murano. This component is a crucial part of your vehicle's rear suspension system, and understanding its function and how to service it can save you money and keep your Murano riding smoothly. We'll break down the anatomy, common issues, and replacement procedures in a way that's clear and technically accurate.
Understanding the Rear Lower Control Arm
The rear lower control arm (RLCA) is, as the name suggests, located at the rear of your vehicle and forms a lower link in the suspension. It's a critical component of a multi-link suspension system, like the one found on the 2006 Murano. To understand its role, let's first define some key terms:
- Suspension System: The system of springs, dampers (shocks/struts), and linkages that connects the vehicle's chassis to its wheels. It's responsible for absorbing road imperfections, maintaining tire contact with the road, and providing a comfortable ride.
- Multi-Link Suspension: A type of suspension system that uses multiple arms or links to connect the wheel hub to the vehicle's chassis. This allows for greater control over wheel movement and geometry compared to simpler suspension designs like a MacPherson strut. The Murano's rear suspension benefits from this sophisticated design.
- Control Arm: A hinged suspension link that connects the wheel hub to the vehicle's chassis. Control arms control the movement of the wheel in relation to the body of the car. They allow the wheel to move up and down, while also helping to prevent unwanted lateral (side-to-side) movement.
Specifically, the rear lower control arm on your Murano:
- Connects the rear wheel hub assembly to the vehicle's frame.
- Plays a crucial role in maintaining proper wheel alignment, specifically camber and toe.
- Supports the weight of the vehicle and absorbs road shocks.
- Works in conjunction with other suspension components like the upper control arm, shocks/struts, and sway bar links to provide a stable and comfortable ride.
The RLCA typically consists of a forged or stamped steel arm with bushings pressed into each end. One end is attached to the wheel hub or knuckle via a ball joint or bushing, and the other is attached to the vehicle's frame with a bolt and bushing. These bushings are designed to allow for controlled movement while dampening vibrations and noise.
Common Problems and Symptoms
Because the rear lower control arm is exposed to significant stress and harsh road conditions, it's prone to wear and tear. Here are some common problems you might encounter:
- Worn Bushings: This is the most common issue. Over time, the rubber bushings can crack, tear, or degrade, leading to excessive play in the suspension. This play can cause:
- Clunking or rattling noises from the rear suspension, especially when going over bumps.
- Vague or unstable handling, particularly during cornering.
- Uneven tire wear.
- Wheel alignment issues (difficulty maintaining proper alignment).
- Bent or Damaged Arm: Impacts from potholes, curbs, or accidents can bend or damage the control arm itself. This can lead to:
- Noticeable visual deformation of the arm.
- Severe wheel alignment issues that cannot be corrected.
- Unsafe handling and potential suspension failure.
- Corrosion: In regions with harsh winters and road salt, corrosion can weaken the control arm over time, leading to potential failure.
How to Diagnose a Problem:
A visual inspection is the first step. With the vehicle safely supported on jack stands (never work under a vehicle supported only by a jack!), carefully examine the rear lower control arms. Look for:
- Cracks, tears, or excessive wear in the bushings.
- Any signs of bending or damage to the arm itself.
- Excessive rust or corrosion.
You can also try to pry on the control arm with a pry bar to check for excessive play in the bushings. There should be minimal movement. Any significant play indicates worn bushings that need replacement.
Another diagnostic method is a "bounce test." Push down firmly on the rear of the vehicle near the affected wheel and release. The vehicle should rebound once and settle. Excessive bouncing or swaying indicates worn suspension components, potentially including the RLCA bushings.
Replacement Procedure
Replacing the rear lower control arm isn't overly complicated, but it requires some mechanical aptitude and the right tools. Safety is paramount! Always use jack stands, wear safety glasses, and disconnect the negative battery terminal before starting any work on your vehicle.
Tools Required:
- Jack and jack stands
- Wheel chocks
- Socket set and wrenches (metric)
- Torque wrench
- Penetrating oil
- Ball joint separator (pickle fork or ball joint press – *optional, but highly recommended for separating the ball joint if applicable*)
- Hammer
- Punch or drift pin
- New rear lower control arm assembly (with new bushings)
- Wheel alignment tools (or plan to have the alignment done professionally afterwards)
Step-by-Step Instructions:
- Prepare the Vehicle: Loosen the lug nuts on the rear wheel of the side you're working on. Chock the front wheels, jack up the rear of the vehicle, and securely support it with jack stands. Remove the rear wheel.
- Apply Penetrating Oil: Generously spray penetrating oil on all bolts and nuts associated with the RLCA, especially those connecting to the hub assembly and the frame. Let it soak for at least 15-20 minutes.
- Disconnect the Sway Bar Link (if applicable): If the sway bar link is attached to the RLCA, disconnect it. Use a wrench to hold the sway bar link stud while loosening the nut.
- Disconnect the Shock Absorber (if applicable): Some Murano models may have the shock absorber attached to the RLCA. If so, disconnect the lower shock absorber mount. Support the shock absorber so it doesn't hang by the brake line.
- Disconnect the Wheel Hub/Knuckle: This is often the trickiest part. The RLCA is connected to the wheel hub/knuckle via a ball joint (or sometimes a bushing/bolt combination). Use a ball joint separator tool (pickle fork or ball joint press) to separate the ball joint. Be careful not to damage the surrounding components. A pickle fork can damage the ball joint boot, so if you're planning on reusing the ball joint, a ball joint press is the preferred method. If the ball joint is rusted in place, you may need to use heat (cautiously!) to loosen it.
- Remove the Control Arm Bolts: Remove the bolts that secure the RLCA to the vehicle's frame. These bolts can be tight, so use a breaker bar if necessary. Pay attention to the orientation of any washers or shims, as you'll need to reinstall them in the same way.
- Remove the Old Control Arm: Once all bolts are removed, the RLCA should be free. Carefully remove it from the vehicle.
- Install the New Control Arm: Install the new RLCA in the reverse order of removal. Make sure to align the bolt holes properly.
- Tighten the Bolts: Torque all bolts to the manufacturer's specifications. These torque specs can be found in a repair manual or online database specific to your 2006 Nissan Murano. It's crucial to torque these bolts correctly to ensure proper suspension function and prevent premature wear. Tighten the bolts with the suspension loaded (i.e., the vehicle is on the ground or the suspension is supported at ride height). This ensures that the bushings are not pre-loaded, which can shorten their lifespan.
- Reconnect the Sway Bar Link and Shock Absorber (if applicable): Reconnect the sway bar link and lower shock absorber mount.
- Reinstall the Wheel: Reinstall the wheel and torque the lug nuts to the manufacturer's specifications.
- Lower the Vehicle: Carefully lower the vehicle to the ground.
- Wheel Alignment: Crucially important: Take your Murano to a qualified alignment shop for a wheel alignment. Replacing the RLCA almost always affects the alignment, and driving with misaligned wheels can cause uneven tire wear and poor handling.
Torque Specifications
Obtaining the correct torque specifications is essential. I can't provide exact numbers without knowing your Murano's specific sub-model and drivetrain (FWD or AWD). However, a reliable source for torque specifications is a Haynes or Chilton repair manual for your vehicle. You can also find torque specs online from reputable auto repair websites or subscription services. The frame-side bolts usually require higher torque than the hub side.
Final Thoughts
Replacing the rear lower control arm on your 2006 Nissan Murano is a manageable DIY project for experienced car owners. However, it's important to have a solid understanding of suspension systems, use the right tools, and prioritize safety. Don't hesitate to consult a professional mechanic if you're unsure about any part of the process. And remember, a wheel alignment is a must after replacing the RLCA to ensure proper handling and tire wear.