2006 Nissan Xterra Clutch Replacement
So, you're here because you're likely experiencing some issues with the clutch in your 2006 Nissan Xterra. You're not alone! The Xterra, especially with the manual transmission, is a popular choice for off-roading and daily driving, but like any vehicle, its components wear down over time. The clutch is a wear item, and eventually, it will need replacement. Let's dive into common problems, symptoms, and what's involved in getting that clutch replaced.
Common Clutch Problems in a 2006 Nissan Xterra
Before we jump into the replacement process, let's pinpoint the likely culprit for your clutch woes. Here are some common issues specific to the 2006 Xterra:
- Clutch Slipping: This is perhaps the most common symptom. You'll notice the engine revving higher than normal, but the vehicle isn't accelerating as it should. It often occurs in higher gears or when climbing hills. Think of it like riding a bicycle and the chain slipping on the gears. This is a sign the clutch disc's friction material is worn down.
- Clutch Chatter: This feels like a vibration or shaking during clutch engagement, especially when starting from a stop. It can be caused by contamination on the clutch disc (oil, grease), a warped clutch disc, or worn engine mounts.
- Difficulty Shifting: Are you struggling to get into gear? Especially first gear or reverse? This could indicate a worn clutch disc, a faulty clutch master cylinder, or a hydraulic line issue. Sometimes, the clutch isn't fully disengaging, making it hard to shift.
- Clutch Pedal Issues: A soft, spongy, or sticking clutch pedal is a red flag. This often points to problems within the hydraulic system – the master cylinder, slave cylinder, or a leak in the lines. Air in the system can also cause this.
- Clutch Noise: Unusual noises, such as squealing, grinding, or rattling when pressing or releasing the clutch pedal, could indicate a worn throw-out bearing (release bearing), pilot bearing, or internal damage within the clutch assembly.
It's important to diagnose the issue accurately. While clutch replacement might seem like the default solution, other components in the clutch system could be the problem. A qualified mechanic can perform a thorough inspection to determine the root cause.
Is Clutch Replacement the Right Solution?
If you're experiencing any of the symptoms listed above, and especially if you have high mileage on your Xterra (over 80,000 miles is a good indicator, though it varies greatly depending on driving habits), clutch replacement is likely the appropriate solution. However, it's crucial to rule out other possibilities before committing to this relatively involved repair.
A proper diagnosis involves:
- Visual Inspection: Checking the clutch master cylinder and slave cylinder for leaks, examining the hydraulic lines for damage, and inspecting the clutch pedal assembly for proper function.
- Clutch Pedal Free Play: Ensuring the clutch pedal has the correct amount of free play. Too little or too much free play can cause shifting problems.
- Test Drive: A test drive to assess clutch slippage, chatter, and shifting difficulties.
If all other components check out, and the symptoms clearly point to a worn clutch disc or a damaged clutch assembly, then clutch replacement is the way to go.
The Clutch Replacement Process: What to Expect
Replacing the clutch in a 2006 Nissan Xterra is a moderately complex job that requires specialized tools and experience. It's generally not recommended for novice DIYers. Incorrect installation can lead to further damage and expensive repairs down the line. That being said, if you have the necessary skills and equipment, it's possible to do it yourself. Here's an overview of the process:
- Preparation: Disconnect the negative battery cable. Gather all necessary tools: a comprehensive socket set (metric), wrenches, torque wrench, jack stands, a floor jack, transmission jack (essential!), clutch alignment tool, penetrating oil, and potentially an impact wrench to loosen stubborn bolts. Wear appropriate safety gear, including safety glasses and gloves.
- Vehicle Preparation: Safely lift and support the vehicle using jack stands. Ensure the vehicle is stable and secure.
- Disconnecting Components: Disconnect the shift linkage from the transmission. Disconnect the driveshaft from the rear of the transmission. Disconnect any electrical connectors or vacuum lines attached to the transmission.
- Supporting the Engine: Use an engine support bar or jack to support the engine from above. This is crucial to prevent the engine from tilting or falling when the transmission is removed.
- Removing the Transmission: This is the most challenging part. Carefully lower the transmission using the transmission jack. It's heavy and awkward, so take your time and ensure it's properly supported. Be prepared to wiggle and maneuver it to clear the surrounding components.
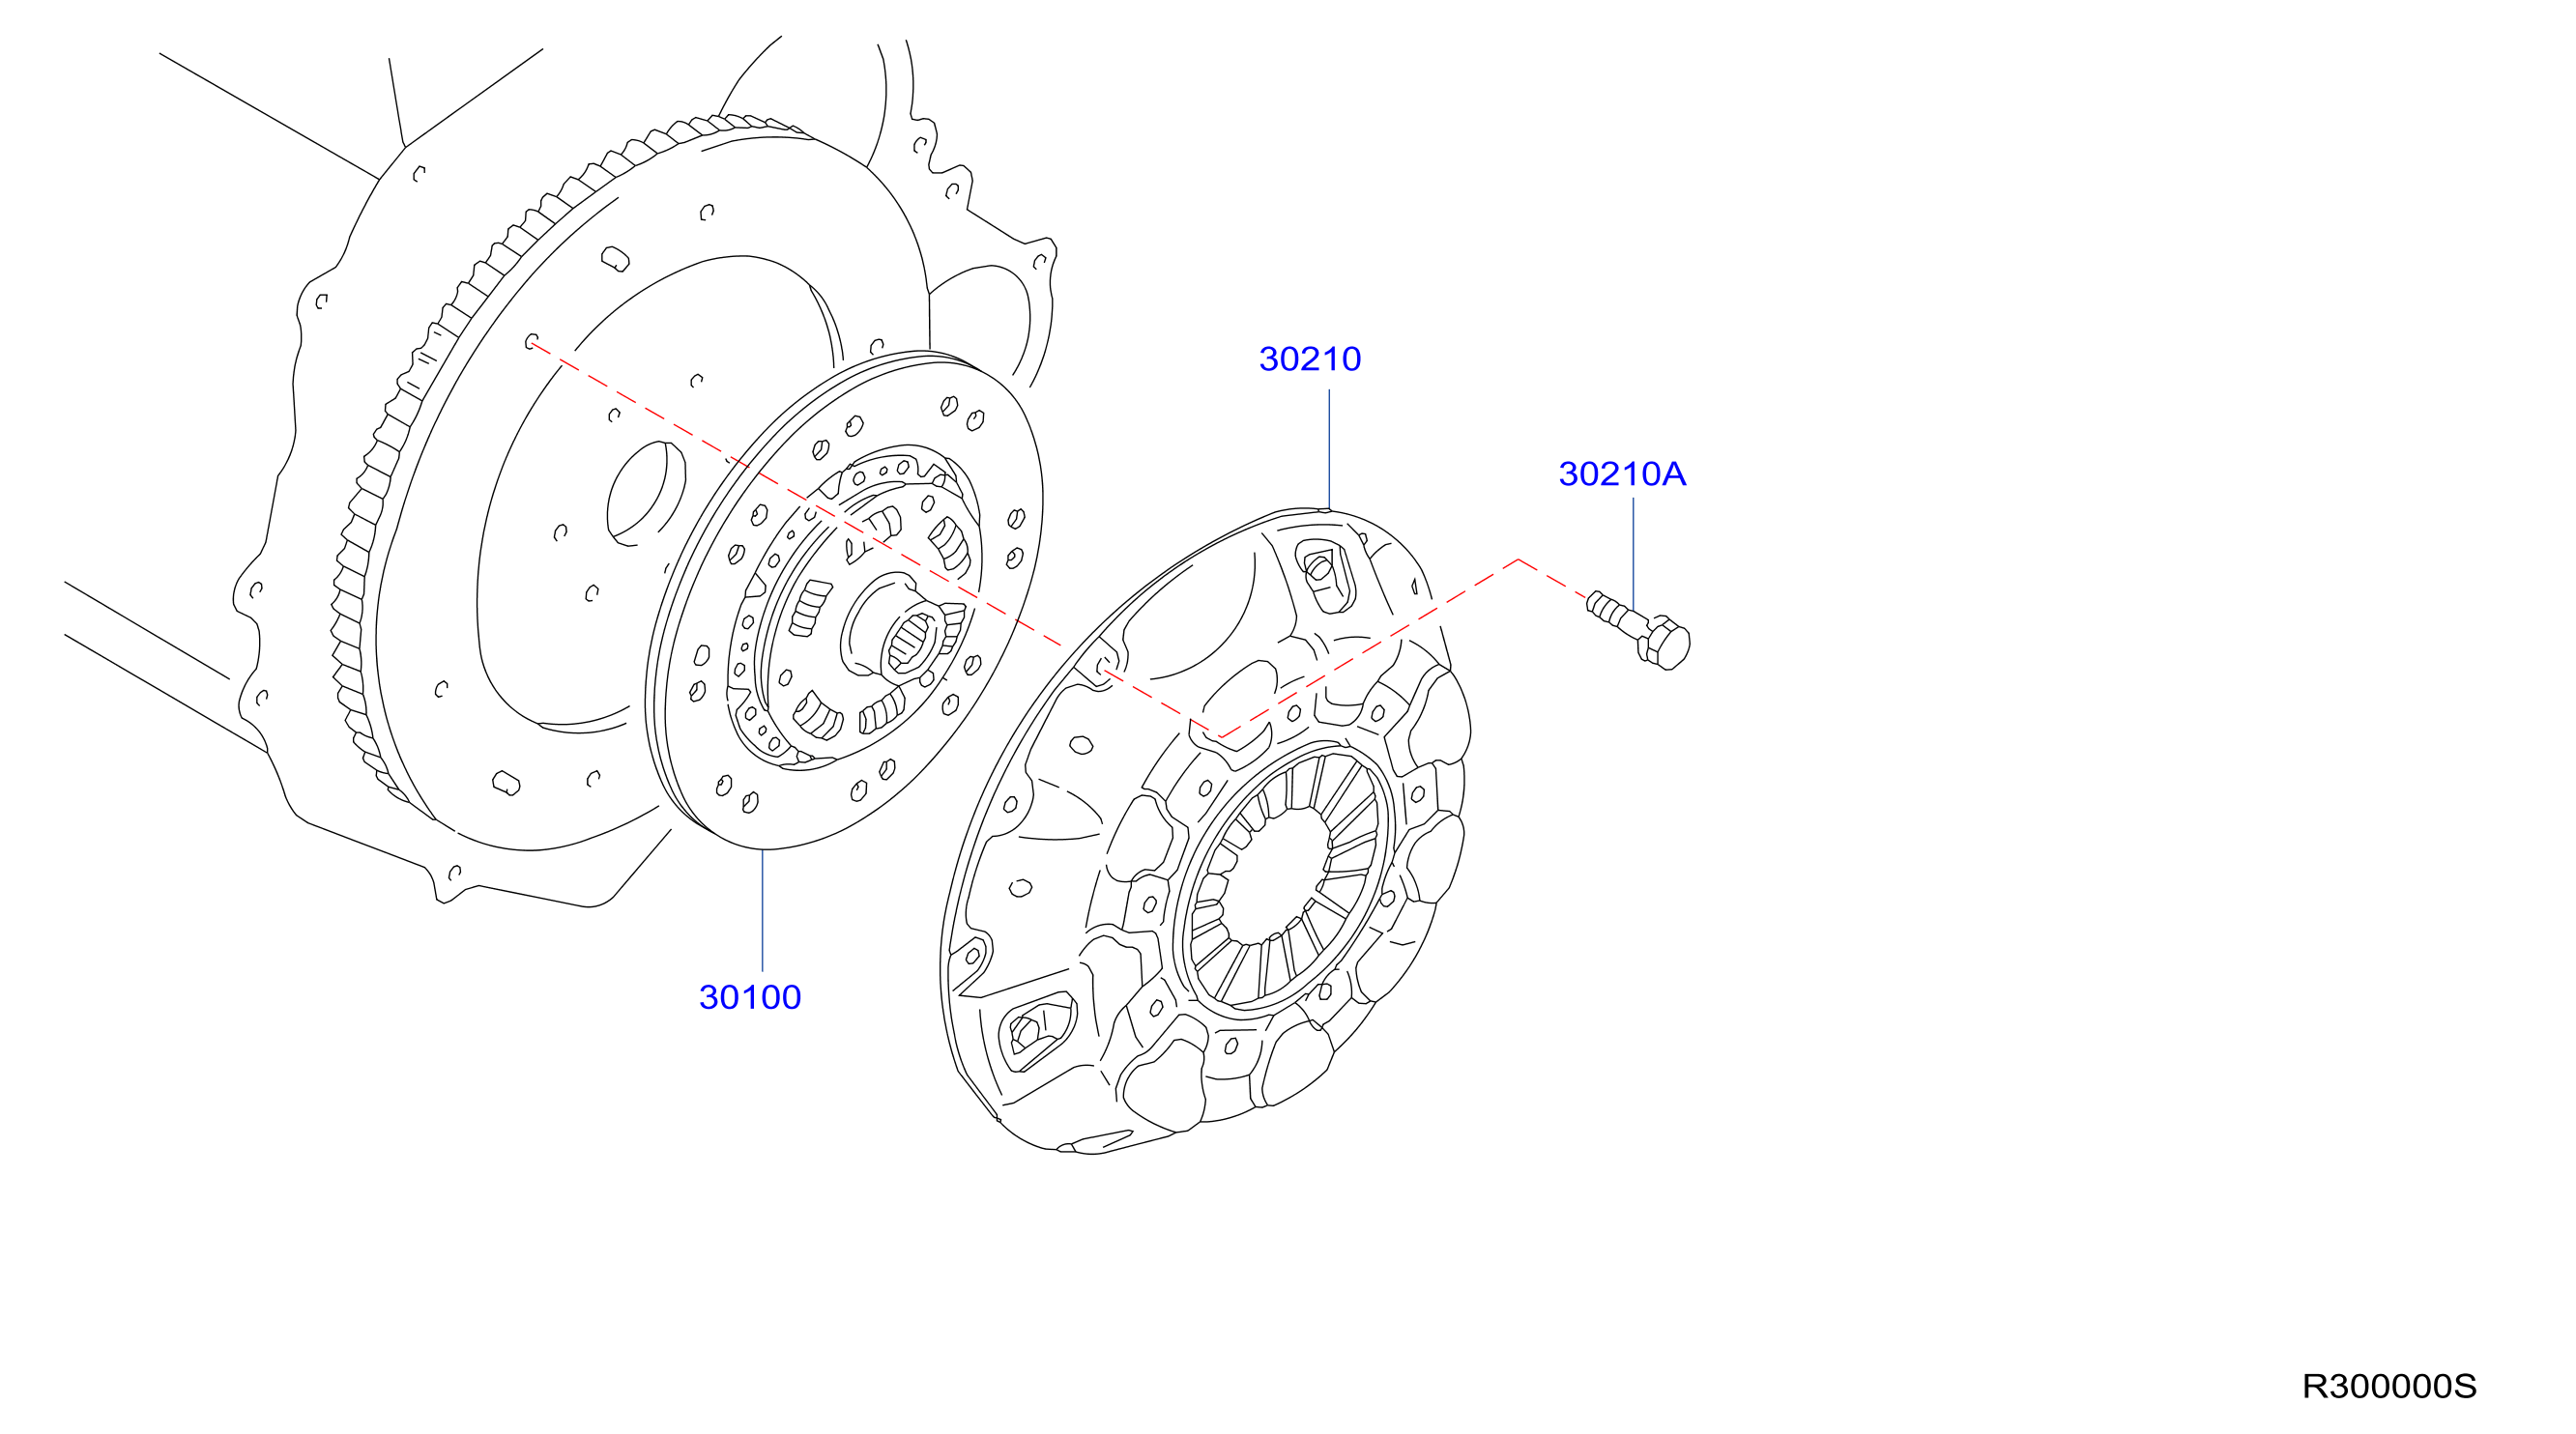
- Clutch Assembly Removal: Once the transmission is out, you'll have access to the clutch assembly. Remove the pressure plate bolts (loosening them in a star pattern to prevent warping). Remove the pressure plate and clutch disc.
- Inspecting the Flywheel: Inspect the flywheel for damage, such as cracks, excessive wear, or heat spots. If necessary, resurface or replace the flywheel. Resurfacing removes a thin layer of material to provide a smooth surface for the new clutch disc.
- Pilot Bearing/Bushing Replacement: Consider replacing the pilot bearing or bushing located in the center of the flywheel. This is a small but important component that can contribute to clutch noise and shifting problems if worn.
- Installing the New Clutch Assembly: Use a clutch alignment tool to center the clutch disc against the flywheel. Install the pressure plate and tighten the bolts in a star pattern to the manufacturer's torque specifications.
- Throw-Out Bearing Replacement: Replace the throw-out bearing (release bearing). This bearing sits on the input shaft of the transmission and is responsible for disengaging the clutch. A worn throw-out bearing can cause noise and shifting problems.
- Transmission Installation: Carefully reinstall the transmission, ensuring it's properly aligned with the engine. This can be tricky, so take your time and use the transmission jack to support and maneuver it.
- Reconnecting Components: Reconnect the shift linkage, driveshaft, electrical connectors, and vacuum lines.
- Bleeding the Clutch: Bleed the clutch hydraulic system to remove any air. This is essential for proper clutch operation.
- Final Steps: Lower the vehicle, reconnect the negative battery cable, and test drive the vehicle to ensure the clutch is functioning correctly.
Tools Needed (Beyond the Basics):
- Transmission Jack
- Clutch Alignment Tool
- Engine Support Bar (Optional, but Highly Recommended)
- Flywheel Resurfacing Tool (If needed)
- Penetrating Oil
- Brake Bleeder Kit (For bleeding the clutch hydraulics)
Estimated Cost of Clutch Replacement
The cost of clutch replacement can vary significantly depending on several factors:
- Labor Rates: Labor rates vary from shop to shop and region to region.
- Parts Quality: Using OEM (Original Equipment Manufacturer) parts will generally be more expensive than aftermarket parts.
- Additional Repairs: If the flywheel needs resurfacing or replacement, or if other components like the master cylinder or slave cylinder need to be replaced, the cost will increase.
Here's a general estimate:
- Parts: Expect to pay between $300 and $700 for a complete clutch kit (including clutch disc, pressure plate, throw-out bearing, and pilot bearing). OEM kits will be on the higher end.
- Labor: Labor costs can range from $500 to $1000, depending on the shop and the complexity of the job.
- Flywheel Resurfacing: Flywheel resurfacing typically costs between $50 and $100. A new flywheel can cost between $200 and $500.
Therefore, you can expect to pay anywhere from $800 to $2200 for a complete clutch replacement on your 2006 Nissan Xterra. It's always a good idea to get quotes from multiple shops before committing to the repair. Be sure to ask for a detailed breakdown of the costs, including parts and labor.
Tips for Extending Clutch Life
Once you've had your clutch replaced, you'll want to do everything you can to extend its lifespan. Here are some tips:
- Avoid "Riding the Clutch": Don't rest your foot on the clutch pedal while driving. This causes the throw-out bearing to constantly engage, leading to premature wear.
- Smooth Starts: Avoid abrupt or jerky starts. Gradually release the clutch pedal and accelerate smoothly.
- Proper Shifting Technique: Practice smooth and precise shifting. Avoid forcing the shifter into gear.
- Minimize Slipping: Avoid excessive clutch slippage, especially when starting on hills or towing heavy loads. Use a lower gear when needed.
- Regular Maintenance: Have the clutch hydraulic system inspected regularly for leaks and proper function. Bleed the system if necessary.
By following these tips, you can significantly extend the life of your new clutch and avoid costly repairs in the future. Good luck with your clutch replacement, and happy driving!