2007 Nissan Murano Spark Plugs
Alright, let's talk spark plugs on your 2007 Nissan Murano. This is a maintenance item that often gets overlooked, but it's absolutely crucial for optimal engine performance, fuel economy, and emissions. Replacing them on schedule can save you a lot of headaches down the road. We'll cover everything from selecting the right plugs to the installation process, ensuring you're well-equipped to tackle this job yourself.
Understanding the 2007 Murano's Ignition System
Before diving into the spark plugs themselves, it's important to understand how the ignition system on your Murano works. The 2007 Murano is equipped with a 3.5-liter VQ35DE engine, which utilizes a coil-on-plug (COP) ignition system. This means that each spark plug has its own individual ignition coil sitting directly on top of it, eliminating the need for distributor cap, rotor, and spark plug wires. This setup offers several advantages, including more precise ignition timing and reduced maintenance. In this system the Engine Control Unit (ECU) controls the ignition timing, which is vital for optimal performance and fuel economy.
Essentially, the ECU tells the ignition coil when to fire, sending a high-voltage pulse to the spark plug. This high voltage creates an electrical arc across the spark plug gap, igniting the air-fuel mixture in the combustion chamber. The resulting explosion pushes the piston down, turning the crankshaft and ultimately powering the vehicle.
Selecting the Right Spark Plugs
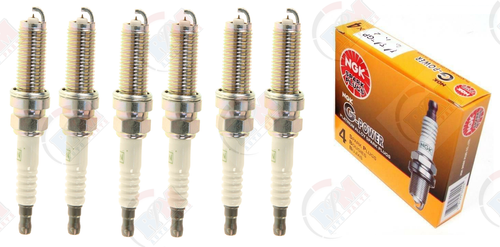
Choosing the correct spark plugs for your 2007 Murano is critical. Using the wrong plugs can lead to poor performance, engine damage, and even catalytic converter failure. Nissan specifies the use of platinum-tipped spark plugs for the VQ35DE engine in the 2007 Murano. These plugs offer extended service life and consistent performance compared to traditional copper plugs.
Specifically, Nissan typically recommends an NGK or Denso spark plug. You can typically find the exact part number in your owner's manual or by consulting a reputable parts catalog. Some commonly used part numbers include:
- NGK: PLFR5A-11
- Denso: SK16HR11
It is crucial to verify the correct part number specific to your vehicle's VIN. Using the wrong plug can have severe repercussions, which will be discussed below.
When selecting plugs, pay attention to the following:
- Heat Range: The heat range of a spark plug refers to its ability to dissipate heat. A "hotter" plug retains more heat in the tip, while a "colder" plug dissipates heat more quickly. Using the wrong heat range can lead to pre-ignition (detonation) or fouling of the plug. Always use the heat range specified by Nissan.
- Gap: The spark plug gap is the distance between the center electrode and the ground electrode. This gap is crucial for proper ignition. A gap that is too small may not produce a strong enough spark, while a gap that is too large may require excessive voltage, potentially damaging the ignition coils. The factory-specified gap for the 2007 Murano is typically around 0.044 inches (1.1 mm), but always double-check the specification for your particular spark plug model. Pre-gapped plugs are usually sold at the correct measurement but it is always recommended to use a feeler gauge to ensure that the gap matches the specification.
- Electrode Material: Platinum plugs are the recommended option for your vehicle, and are far more durable than copper. Iridium plugs are also a possibility, with slightly increased service life, but are not recommended.
Tools and Materials Needed
Before you start, gather the necessary tools and materials. Having everything on hand will make the job go much smoother.
- New Spark Plugs: (Set of 6)
- Spark Plug Socket: Usually 5/8 inch with a rubber insert to grip the plug.
- Socket Wrench: 3/8 inch drive is usually sufficient.
- Extension: Various lengths, including a wobble extension for tight spots.
- Torque Wrench: For tightening the plugs to the correct specification.
- Spark Plug Gap Tool: For verifying and adjusting the gap if needed.
- Anti-Seize Compound: Apply sparingly to the spark plug threads to prevent them from seizing in the cylinder head.
- Dielectric Grease: Apply to the inside of the spark plug boots to prevent corrosion and facilitate future removal.
- Clean Rags: For wiping up any spills and keeping things clean.
- Gloves: To protect your hands.
- Safety Glasses: To protect your eyes.
Step-by-Step Spark Plug Replacement
Now, let's get to the actual replacement process. Follow these steps carefully to ensure a successful outcome.
- Safety First: Disconnect the negative battery cable to prevent any electrical shocks. Let the engine cool down completely. Working on a hot engine can cause burns.
- Remove the Engine Cover: Most likely there is an engine cover in place which must be removed before you can access the ignition coils.
- Locate the Ignition Coils: Identify the six ignition coils sitting on top of the spark plugs.
- Disconnect the Electrical Connector: Carefully disconnect the electrical connector from each ignition coil. There is usually a small clip that you need to press to release the connector.
- Remove the Ignition Coil: Remove the bolt or fastener holding the ignition coil in place. Then, gently pull the coil straight up and out. Avoid twisting or bending the coil.
- Inspect the Ignition Coil: Examine the ignition coil for any signs of damage, such as cracks, corrosion, or oil contamination. If you find any damage, replace the coil.
- Access the Spark Plug: With the coil removed, you can now access the spark plug. Use your spark plug socket and extension to loosen the spark plug.
- Remove the Spark Plug: Once the plug is loose, carefully remove it from the cylinder head. The rubber insert in the spark plug socket should grip the plug.
- Inspect the Old Spark Plug: Examine the old spark plug. The condition of the plug can tell you a lot about the health of your engine. Look for signs of fouling, oil contamination, or detonation. Any irregularities can indicate other underlying mechanical issues.
- Prepare the New Spark Plug: Before installing the new plug, inspect it for any damage. Verify the gap and adjust if necessary. Apply a small amount of anti-seize compound to the threads of the new spark plug. Do not over-apply as this can affect the torque readings.
- Install the New Spark Plug: Carefully thread the new spark plug into the cylinder head by hand to avoid cross-threading. Once the plug is finger-tight, use your torque wrench to tighten it to the specification (typically around 18-22 ft-lbs, but refer to your service manual for the exact value). Overtightening can damage the cylinder head, while undertightening can cause leaks.
- Apply Dielectric Grease: Apply a small amount of dielectric grease to the inside of the spark plug boot on the ignition coil.
- Reinstall the Ignition Coil: Carefully reinstall the ignition coil onto the spark plug. Make sure it is fully seated and secure. Tighten the bolt or fastener to the specified torque.
- Reconnect the Electrical Connector: Reconnect the electrical connector to the ignition coil until you hear a click.
- Repeat for Remaining Plugs: Repeat steps 4-14 for the remaining spark plugs.
- Reinstall the Engine Cover: Reinstall the engine cover.
- Reconnect the Battery: Reconnect the negative battery cable.
- Start the Engine: Start the engine and let it idle for a few minutes. Listen for any unusual noises or misfires.
- Test Drive: Take the vehicle for a test drive to ensure everything is working properly.
Troubleshooting
Even with careful installation, problems can arise. Here are some common issues and how to address them:
- Engine Misfire: This is often caused by a cracked or damaged spark plug. It can also be caused by a faulty ignition coil. Use an OBD-II scanner to identify the cylinder that is misfiring.
- Rough Idle: This can be caused by a vacuum leak, a dirty throttle body, or incorrect spark plug gap.
- Poor Fuel Economy: This can be caused by worn spark plugs, a clogged air filter, or a faulty oxygen sensor.
- Check Engine Light: If the check engine light comes on after replacing the spark plugs, use an OBD-II scanner to read the diagnostic trouble codes (DTCs). Common codes related to spark plugs include P0300 (random misfire), P0301-P0306 (misfire in specific cylinder), and P030A (cold start misfire).
Important Considerations and Warnings
Here are some final tips and warnings to keep in mind:
- Torque Specifications: Always use a torque wrench and tighten the spark plugs to the specified torque. Overtightening can damage the cylinder head, while undertightening can cause leaks.
- Anti-Seize: Apply anti-seize compound sparingly to the spark plug threads. Too much anti-seize can affect the torque readings and potentially cause the plugs to loosen.
- Cleanliness: Keep the area around the spark plugs clean to prevent dirt and debris from entering the cylinders.
- Used Plugs Inspection: Inspecting the used spark plugs is vital to understanding potential engine issues. Black, sooty plugs indicate a rich running condition, while white or light gray plugs suggest a lean condition. Oil fouled plugs will be coated in oil and indicate possible valve stem seal or piston ring issues.
- Don't Strip the Threads: Be incredibly careful not to cross-thread the spark plugs when installing them. Start threading by hand and ensure they turn smoothly before using a wrench.
Replacing the spark plugs on your 2007 Nissan Murano is a straightforward task that can significantly improve your vehicle's performance and fuel efficiency. By following these instructions carefully, you can confidently tackle this maintenance item yourself. Remember to always prioritize safety and consult your service manual for specific torque specifications and part numbers. Good luck!