2008 Nissan Sentra Clutch Replacement
Alright, let's talk clutch replacement on your 2008 Nissan Sentra. This isn't a job for a complete beginner, but if you've tackled suspension work, brake jobs, or even a timing chain replacement before, you should be able to handle it. We're going to go through the process step-by-step, covering the tools you'll need, the parts you should replace while you're in there, and some common pitfalls to avoid. Remember, safety first! Always use jack stands, disconnect the negative battery terminal, and wear appropriate safety gear.
Preparation and Parts
Before you even think about touching your car, you need to gather everything you'll need. This isn't a job you want to start and then realize you're missing a crucial bolt or tool.
Essential Tools:
- Jack and Jack Stands: Get sturdy ones! Don't cheap out here.
- Wheel Chocks: For safety, always chock the rear wheels.
- Socket Set: Metric, including deep sockets, various extensions, and a breaker bar. You'll need sockets for the suspension components, exhaust, and transmission bolts.
- Wrench Set: Metric wrenches are a must.
- Torque Wrench: Absolutely critical for properly tightening bolts, especially pressure plate bolts.
- Impact Wrench (Optional but Recommended): Makes removing stubborn bolts much easier.
- Pry Bar: For separating the transmission from the engine.
- Transmission Jack: A must-have for safely lowering and raising the transmission. Trying to muscle it out without one is dangerous and can damage the transmission.
- Clutch Alignment Tool: This is essential for centering the clutch disc before installing the pressure plate. Without it, you won't be able to get the transmission input shaft back into the pilot bearing.
- Punch and Hammer: For removing dowel pins (if needed).
- Penetrating Oil: Spray down any rusty bolts well in advance. PB Blaster or similar works wonders.
- Gloves and Safety Glasses: Protect yourself!
- Drain Pan: You'll need to drain the transmission fluid.
- Shop Rags: Lots of them.
Replacement Parts:
While you're in there, it's best to replace more than just the bare minimum. Think of it as preventive maintenance. A complete clutch kit is highly recommended. These kits usually include:
- Clutch Disc: The friction material that engages with the flywheel and pressure plate.
- Pressure Plate: The spring-loaded mechanism that presses the clutch disc against the flywheel.
- Throw-Out Bearing (Release Bearing): This bearing pushes on the pressure plate fingers to disengage the clutch.
- Pilot Bearing: A small bearing located in the center of the flywheel that supports the transmission input shaft. Always replace this.
Beyond the clutch kit, consider these:
- Flywheel (Resurface or Replace): Inspect the flywheel surface. If it's scored, warped, or heat-checked, it needs to be resurfaced or replaced. A resurfaced flywheel provides a fresh, flat surface for the new clutch disc.
- Rear Main Seal: This is located behind the flywheel. Replacing it now is much easier than having to pull the transmission again later if it starts leaking.
- Transmission Fluid: Replace the fluid after the transmission is reinstalled. Use the correct fluid type specified in your owner's manual or service manual. Do not guess!
- Clutch Master Cylinder and Slave Cylinder (Consider): If your clutch pedal feels spongy or you're experiencing shifting issues, consider replacing these hydraulic components. They are relatively inexpensive and can improve clutch feel.
Step-by-Step Clutch Replacement
Now, let's get to the actual procedure. This is a general guide, and specific details may vary slightly depending on the year and model of your Sentra. Refer to a service manual for your specific vehicle for torque specifications and detailed diagrams.
1. Preparation and Disconnection:
- Disconnect the Negative Battery Terminal: Safety first! This prevents accidental shorts and electrical damage.
- Loosen Lug Nuts: Loosen the lug nuts on the front wheels before lifting the car.
- Raise and Support the Vehicle: Jack up the front of the car and securely support it on jack stands. Place the jack stands on the frame rails, not on suspension components.
- Remove the Wheels: Remove the front wheels.
- Drain the Transmission Fluid: Locate the drain plug on the transmission (usually on the bottom). Place a drain pan underneath and remove the plug. Let the fluid drain completely. Be sure to use the correct wrench to avoid stripping the plug.
2. Disconnecting Components:
- Remove the Air Intake System: Remove the air intake tube and any related components that are in the way.
- Disconnect the Shift Linkage: Disconnect the shift linkage from the transmission. This usually involves removing a few bolts or clips.
- Disconnect the Clutch Slave Cylinder: Disconnect the clutch slave cylinder from the transmission. Do not disconnect the hydraulic line unless you are replacing the slave cylinder. If you are not replacing the slave cylinder, carefully move it out of the way and secure it so that the brake line does not get overextended.
- Disconnect Electrical Connectors: Disconnect any electrical connectors attached to the transmission, such as the vehicle speed sensor (VSS) connector.
- Remove the Starter: Disconnect the electrical connections to the starter and remove the starter.
- Support the Engine: Before removing the transmission, you need to support the engine. You can use an engine support bar or a jack with a piece of wood to support the oil pan. Do not place the jack directly on the oil pan without a buffer.
- Remove the Driveshafts (Axles): This is a critical step. Depending on your Sentra's configuration, you may need to remove the lower ball joints or disconnect the sway bar links to get enough clearance to remove the driveshafts. Be careful not to damage the CV joints. Once removed, hang them securely out of the way.
- Remove Exhaust Components (Possibly): Depending on the exhaust system design, you may need to remove sections of the exhaust to create enough clearance to remove the transmission.
3. Removing the Transmission:
- Support the Transmission with a Transmission Jack: This is absolutely essential. Position the transmission jack under the transmission and secure it properly.
- Remove the Transmission Mount: Remove the bolts that secure the transmission mount to the transmission and the chassis.
- Remove the Transmission Bolts: Carefully remove the bolts that secure the transmission to the engine. There are usually several bolts, and some may be difficult to reach. Use extensions and swivels as needed.
- Separate the Transmission from the Engine: This can be tricky. The transmission is likely stuck to the engine due to dowel pins. Use a pry bar carefully to separate the transmission from the engine. Do not force it. Make sure you have removed all the bolts first. Work it slowly and evenly.
- Lower the Transmission: Once the transmission is free, slowly lower it using the transmission jack. Be careful not to snag any wires or hoses.
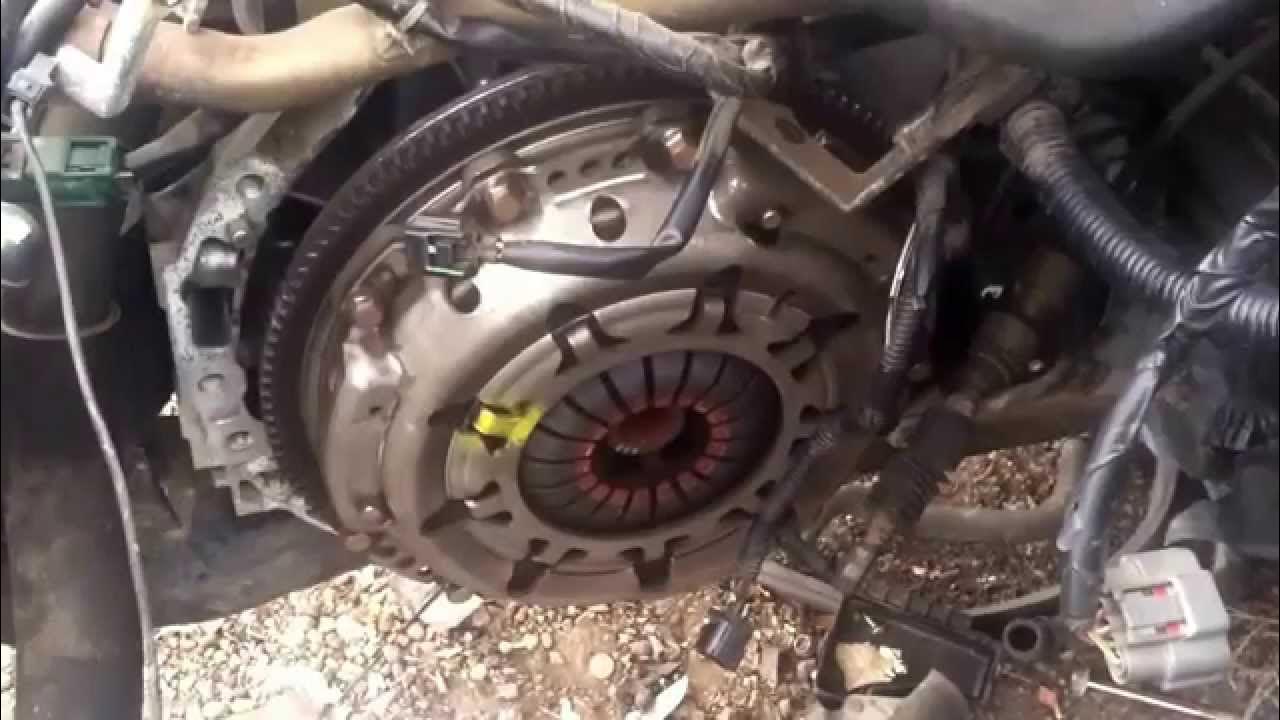
4. Clutch and Flywheel Replacement:
- Inspect the Flywheel: As mentioned earlier, inspect the flywheel for damage. Resurface or replace as needed.
- Remove the Pressure Plate and Clutch Disc: Loosen the pressure plate bolts in a star pattern to evenly release the pressure on the clutch disc. Remove the bolts completely and remove the pressure plate and clutch disc.
- Remove the Pilot Bearing: There are several ways to remove the pilot bearing. You can use a pilot bearing puller, a slide hammer, or even pack the cavity behind the bearing with grease and use a punch to force it out.
- Install the New Pilot Bearing: Use a socket that is slightly smaller than the outer diameter of the pilot bearing to press it into place. Tap it gently and evenly until it is fully seated.
- Install the New Clutch Disc and Pressure Plate: Use the clutch alignment tool to center the clutch disc against the flywheel. Install the pressure plate and tighten the bolts in a star pattern to the specified torque. This is a very important step. Incorrect torque can lead to premature clutch failure.
- Install the New Throw-Out Bearing: Install the new throw-out bearing onto the transmission input shaft.
- Install the Rear Main Seal (If Replacing): Remove the old rear main seal and install the new one. Use a seal installer tool to ensure it is properly seated and not damaged.
5. Reinstallation:
- Reinstall the Transmission: Carefully raise the transmission into position using the transmission jack. Align the transmission input shaft with the clutch disc and pilot bearing. This may take some maneuvering. Make sure everything is aligned properly before trying to force it.
- Install the Transmission Bolts: Install the transmission bolts and tighten them to the specified torque.
- Reinstall the Transmission Mount: Reinstall the transmission mount and tighten the bolts to the specified torque.
- Reinstall the Driveshafts (Axles): Reinstall the driveshafts (axles) and secure them properly.
- Reinstall the Starter: Reinstall the starter and connect the electrical connections.
- Reinstall the Clutch Slave Cylinder: Reinstall the clutch slave cylinder.
- Reinstall the Shift Linkage: Reinstall the shift linkage.
- Reconnect Electrical Connectors: Reconnect all electrical connectors.
- Reinstall Exhaust Components (If Removed): Reinstall any exhaust components that were removed.
- Fill the Transmission with Fluid: Fill the transmission with the correct type and amount of fluid.
- Reinstall the Air Intake System: Reinstall the air intake system.
- Reinstall the Wheels: Reinstall the wheels and tighten the lug nuts to the specified torque.
- Lower the Vehicle: Lower the vehicle and remove the jack stands.
- Reconnect the Negative Battery Terminal: Reconnect the negative battery terminal.
6. Final Checks:
- Start the Engine: Start the engine and let it idle for a few minutes.
- Test the Clutch: Test the clutch by shifting through all the gears. Make sure the clutch engages smoothly and doesn't slip.
- Check for Leaks: Check for any leaks around the transmission, engine, and driveshafts.
Common Pitfalls
- Stripping Bolts: Use the correct size sockets and wrenches, and don't overtighten bolts. If a bolt is stuck, use penetrating oil and heat.
- Damaging the Driveshafts: Be careful when removing and reinstalling the driveshafts. Avoid pulling on the CV joints excessively.
- Forcing the Transmission: Don't force the transmission during removal or reinstallation. If it's not going in smoothly, double-check that everything is aligned properly.
- Incorrect Clutch Alignment: If the clutch disc is not properly aligned, you won't be able to get the transmission input shaft into the pilot bearing.
- Using the Wrong Transmission Fluid: Using the wrong transmission fluid can damage the transmission. Always use the fluid specified in your owner's manual or service manual.
- Overlooking Pilot Bearing Replacement: This is a small, inexpensive part that can cause major problems if it fails. Always replace it.
This guide should give you a solid foundation for tackling a clutch replacement on your 2008 Nissan Sentra. Remember to consult a service manual for your specific vehicle and take your time. If you run into any problems, don't hesitate to seek professional help.