2009 Nissan Titan Catalytic Converter
Alright, let's talk about the catalytic converter in your 2009 Nissan Titan. It's a crucial component of your exhaust system, responsible for reducing harmful emissions. Understanding how it works, potential issues, and replacement options is key for any experienced DIYer.
What is a Catalytic Converter and Why is it Important?
At its core, a catalytic converter is an emissions control device that uses a catalyst to convert toxic pollutants in exhaust gas into less toxic substances. These pollutants include:
- Hydrocarbons (HC): Unburned fuel.
- Carbon Monoxide (CO): A poisonous gas.
- Nitrogen Oxides (NOx): Contribute to smog and acid rain.
The converter essentially speeds up (catalyzes) a chemical reaction. Inside, you'll typically find a ceramic monolith substrate, often referred to as a honeycomb structure. This substrate is coated with a washcoat, which is itself coated with precious metals – typically platinum, palladium, and rhodium. These metals act as the catalysts. There are typically two types of catalytic reactions happening:
- Reduction Catalyst: Primarily reduces NOx into nitrogen and oxygen. Rhodium is key here.
- Oxidation Catalyst: Primarily oxidizes HC and CO into water (H2O) and carbon dioxide (CO2). Platinum and palladium are crucial for this.
Without a functioning catalytic converter, your 2009 Titan will fail emissions testing, contribute significantly to air pollution, and potentially experience drivability issues. It’s also illegal to remove or disable your catalytic converter.
Specifics for the 2009 Nissan Titan
The 2009 Nissan Titan, depending on the cab configuration (King Cab or Crew Cab) and engine (5.6L VK56DE), will have a specific catalytic converter setup. Typically, it's a two-converter system. One catalytic converter for each bank of cylinders. It’s vital to identify which converter is failing, if any.
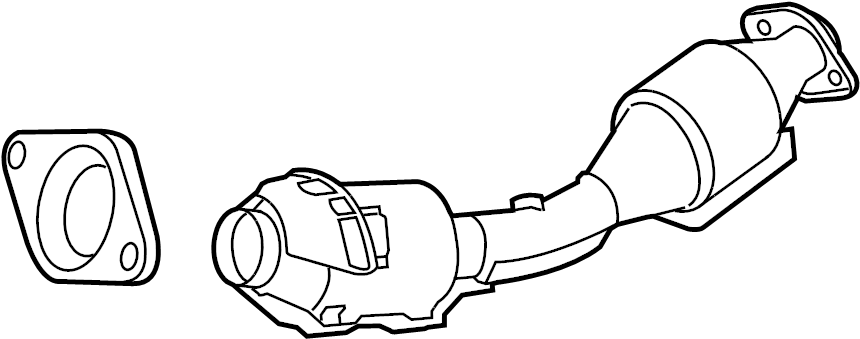
Location
The catalytic converters are located in the exhaust system, downstream from the exhaust manifolds. They are typically bolted to the exhaust manifold or the exhaust pipe immediately after the manifold. Their exact location is crucial to know when diagnosing issues.
Types Used
Your 2009 Titan likely uses a three-way catalytic converter. This means it’s designed to address all three major pollutants (HC, CO, and NOx) simultaneously.
OEM vs. Aftermarket
When it comes to replacing the catalytic converter, you have two main options: OEM (Original Equipment Manufacturer) or aftermarket. OEM converters are generally more expensive but are designed specifically for your vehicle and should guarantee proper function and emissions compliance. Aftermarket converters are usually cheaper but can vary significantly in quality and performance. Important Note: When buying aftermarket, be sure the converter is legal for use in your location and meets EPA standards.
Common Problems and Symptoms
Several things can cause a catalytic converter to fail. Here are some common culprits:
- Contamination: The most frequent killer. Coolant leaks into the exhaust system, excessive oil consumption, or using the wrong type of fuel (leaded fuel, for instance) can poison the catalyst, rendering it ineffective.
- Overheating: Rich-running conditions (too much fuel, not enough air) can cause excessive heat within the converter, melting the internal substrate.
- Physical Damage: Road debris, impacts, or even severe rusting can damage the converter externally, and sometimes internally.
- Age: Even without external factors, the catalyst can simply degrade over time, losing its effectiveness.
Signs that your catalytic converter might be failing include:
- Check Engine Light (CEL): This is the most common indicator. Diagnostic Trouble Codes (DTCs) like P0420 (Catalyst System Efficiency Below Threshold - Bank 1) or P0430 (Catalyst System Efficiency Below Threshold - Bank 2) are strong indicators.
- Reduced Engine Performance: A clogged converter restricts exhaust flow, leading to reduced power and acceleration.
- Poor Fuel Economy: The engine has to work harder to overcome the restricted exhaust flow, leading to decreased MPG.
- Rattling Noise: If the internal substrate is broken, it can rattle around inside the converter housing.
- Smell of Rotten Eggs: This is a sign that the converter is struggling to process sulfur compounds in the exhaust.
- Failed Emissions Test: Obviously, if you fail an emissions test, the catalytic converter is a prime suspect.
Diagnosis
Before condemning the catalytic converter, it's crucial to properly diagnose the problem. Here's a step-by-step approach:
- Read the Diagnostic Trouble Codes (DTCs): Use an OBD-II scanner to retrieve any stored codes. A P0420 or P0430 code points towards a catalyst efficiency issue, but remember these codes can have other causes.
- Inspect the Converter: Visually inspect the converter for any signs of physical damage, rust, or leaks. Check the surrounding exhaust pipes and connections as well.
- Check for Exhaust Leaks: Even small exhaust leaks *before* the catalytic converter can introduce extra oxygen and throw off the readings of the downstream oxygen sensor, leading to a false P0420/P0430 code.
- Check Upstream Components: Make sure the engine is running properly. Issues like misfires, vacuum leaks, or faulty oxygen sensors can contribute to catalytic converter failure. Fix these problems *before* replacing the converter.
- Oxygen Sensor Readings: Use a scan tool to monitor the oxygen sensor readings. The upstream oxygen sensor (before the converter) should fluctuate rapidly, while the downstream oxygen sensor (after the converter) should have a relatively stable voltage reading. Large fluctuations in the downstream sensor indicate the converter isn't functioning efficiently.
- Backpressure Test: A backpressure test can help determine if the converter is clogged. You'll need a backpressure gauge and an adapter that screws into the oxygen sensor port. High backpressure indicates a blockage.
Replacement Procedure
Replacing a catalytic converter is a relatively straightforward task for an experienced DIYer, but it requires some mechanical skill and safety precautions.
- Safety First: Allow the exhaust system to cool down completely before starting any work. Wear safety glasses and gloves. Support the vehicle securely with jack stands.
- Loosen Connections: Spray penetrating oil on all bolts and connections that you'll be disconnecting. Let it soak in for a while.
- Disconnect Oxygen Sensors: Disconnect the electrical connectors for the oxygen sensors located before and after the catalytic converter.
- Remove the Old Converter: Unbolt the converter from the exhaust manifold or exhaust pipe. You may need to use a breaker bar to loosen stubborn bolts. Be careful not to damage the exhaust manifold studs. In some cases, you may need to cut the exhaust pipe to remove the converter if the bolts are severely corroded.
- Clean Mating Surfaces: Clean the mating surfaces on the exhaust manifold and exhaust pipe to ensure a good seal with the new converter.
- Install the New Converter: Install new gaskets and bolt the new converter into place. Tighten the bolts to the manufacturer's specifications.
- Install Oxygen Sensors: Install the oxygen sensors, making sure to apply anti-seize compound to the threads.
- Reconnect Electrical Connectors: Reconnect the electrical connectors for the oxygen sensors.
- Check for Leaks: Start the engine and check for exhaust leaks around the converter connections.
- Clear DTCs: Use an OBD-II scanner to clear any stored DTCs.
- Test Drive: Take the vehicle for a test drive to ensure that the check engine light doesn't come back on and that the engine is running smoothly.
Tools Required
- Socket set
- Wrench set
- Penetrating oil
- Oxygen sensor socket
- Torque wrench
- Jack and jack stands
- OBD-II scanner
- New gaskets
- Anti-seize compound
- Breaker bar (optional, but often necessary)
Important Considerations
- State and Federal Regulations: Be aware of the emissions regulations in your area. Some states require that you use a CARB-compliant (California Air Resources Board) catalytic converter.
- Oxygen Sensor Compatibility: Make sure the oxygen sensors are compatible with the new catalytic converter. Sometimes it's recommended to replace the oxygen sensors along with the converter.
- Proper Installation: Incorrect installation can lead to leaks and premature failure of the catalytic converter.
- Address Underlying Issues: Replacing the catalytic converter is only a temporary fix if you don't address the underlying cause of the failure (e.g., coolant leak, oil consumption).
Replacing the catalytic converter on your 2009 Nissan Titan can save you money compared to taking it to a shop. However, it's essential to be prepared and have a good understanding of the process. Remember to follow all safety precautions and consult the service manual for specific torque specifications and procedures for your vehicle.