2010 Nissan Cube Transmission Filter
Let's talk about the 2010 Nissan Cube's transmission filter. Specifically, we're going to delve into its location, replacement considerations, and some of the common pitfalls you might encounter during the process. This isn't a job for a complete novice, but with some patience and the right tools, a mechanically inclined DIYer can tackle it. Remember, when working on your vehicle, safety always comes first. Disconnect the negative battery terminal before you begin.
Understanding the CVT in the 2010 Cube
The 2010 Nissan Cube utilizes a Continuously Variable Transmission, or CVT. Unlike traditional automatic transmissions with fixed gear ratios, a CVT uses a system of belts and pulleys to provide a seamless, almost infinite range of gear ratios. This contributes to better fuel economy and a smoother driving experience. However, CVTs also require specific maintenance, particularly regarding the transmission fluid and filter.
It's crucial to understand that not all CVTs have easily accessible, replaceable filters. Some are integrated into the transmission housing, requiring a more involved process, sometimes even requiring disassembly of the transmission itself. In the case of the 2010 Nissan Cube, we'll focus on the more common (and DIY-friendly) scenario: an externally accessible filter, though its exact ease of access can vary.
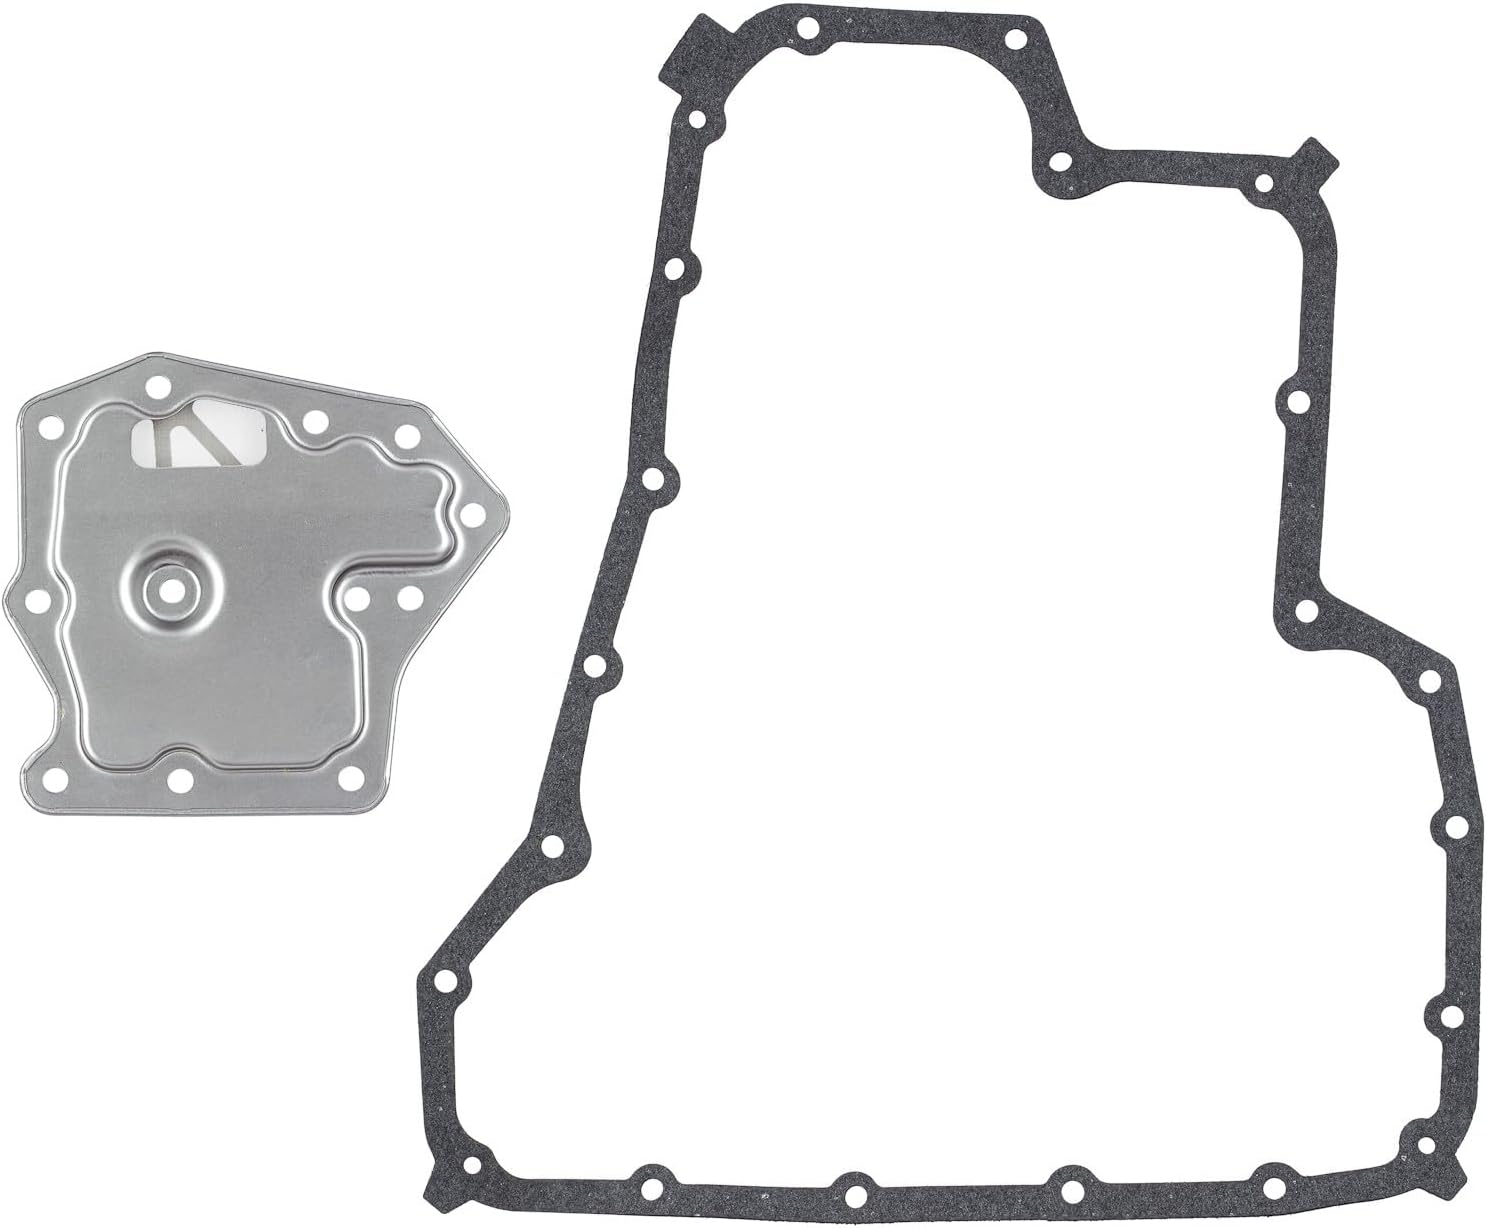
Locating the Transmission Filter
The primary transmission filter on the 2010 Nissan Cube (with the CVT) is typically found inside the transmission pan. This means you'll need to drop the pan to access it. There might also be a smaller, secondary inline filter located externally; however, this is less common on this particular model year. Always consult your vehicle's service manual or a reliable online parts database to confirm the presence and location of both filters before you start.
Here's a general procedure for finding the filter, assuming it's located inside the pan:
- Raise and Secure the Vehicle: Use a jack and jack stands to safely raise the vehicle. Never work under a vehicle supported only by a jack.
- Locate the Transmission Pan: It's usually a rectangular or irregularly shaped pan located at the bottom of the transmission. It will be secured by multiple bolts.
- Identify the Drain Plug (if present): Some transmission pans have a drain plug. If yours does, you can drain the fluid before dropping the pan to minimize the mess.
Important Note: While you're under the vehicle, carefully inspect the transmission cooler lines for any signs of leaks or damage. These lines carry transmission fluid to the cooler (usually integrated with the radiator) and are susceptible to corrosion and wear.
Replacing the Transmission Filter
Now for the main event. Here's a step-by-step guide to replacing the internal transmission filter. This assumes you've located the filter and have the necessary tools and replacement parts.
Step 1: Draining the Transmission Fluid
If your transmission pan has a drain plug, loosen it and let the fluid drain into a drain pan. If there's no drain plug, you'll need to carefully loosen the pan bolts, starting with the ones furthest from a corner, and allow the fluid to drain as you lower the pan. Be prepared for a mess! CVTs use specialized fluids that are often expensive.
Pro Tip: Measure the amount of fluid you drain. This will give you a good starting point for refilling the transmission later. However, always verify the correct fluid level using the dipstick or the prescribed procedure in your service manual.
Step 2: Removing the Transmission Pan
Once the fluid is mostly drained, carefully remove the remaining pan bolts. The pan might be stuck, so you might need to gently tap it with a rubber mallet to break the seal. Be careful not to damage the pan or the transmission housing.
Step 3: Locating and Removing the Filter
With the pan removed, you'll see the transmission filter. It's usually held in place by a few bolts or clips. Note the orientation of the filter before removing it. Some filters have a specific direction they need to be installed in.
Step 4: Cleaning the Transmission Pan
This is a crucial step. Thoroughly clean the transmission pan with a parts cleaner or solvent. Remove any debris or sludge that has accumulated. Also, inspect the magnet in the pan (if present). This magnet attracts metal particles that circulate in the fluid. Clean the magnet thoroughly. Replace the pan gasket. Never reuse the old gasket.
Step 5: Installing the New Filter
Install the new filter in the same orientation as the old one. Secure it with the bolts or clips that you removed earlier. Make sure it's properly seated and snug.
Step 6: Reinstalling the Transmission Pan
Install a new transmission pan gasket. Carefully position the pan and align the bolt holes. Tighten the pan bolts in a star pattern to ensure even pressure on the gasket. Torque the bolts to the manufacturer's specification. Overtightening can damage the pan or the transmission housing.
Step 7: Refilling the Transmission Fluid
Refill the transmission with the correct type and amount of fluid. This is critical! CVTs are very sensitive to the type of fluid used. Using the wrong fluid can cause serious damage. Refer to your vehicle's service manual for the correct fluid specification. Use a funnel to pour the fluid into the dipstick tube.
Step 8: Checking the Fluid Level
Start the engine and let it idle for a few minutes. Then, shift through all the gears (P, R, N, D) several times. Check the fluid level using the dipstick. Add more fluid as needed to reach the correct level. You might need to drive the vehicle for a short distance to fully circulate the fluid and get an accurate reading.
Pro Tip: Some CVTs have a specific fluid level checking procedure that involves measuring the fluid temperature. Consult your service manual for details.
Step 9: Checking for Leaks
Carefully inspect the transmission pan and cooler lines for any leaks. If you find any leaks, tighten the bolts or fittings as needed. If the leaks persist, you might need to replace the gasket or the cooler lines.
Common Pitfalls and Considerations
- Using the Wrong Fluid: As mentioned earlier, using the wrong transmission fluid is a recipe for disaster. Always use the fluid specified in your vehicle's service manual. Nissan CVTs typically require Nissan NS-2 or NS-3 CVT fluid. Double-check!
- Overtightening the Pan Bolts: Overtightening the pan bolts can damage the pan or the transmission housing, leading to leaks. Use a torque wrench to tighten the bolts to the manufacturer's specification.
- Forgetting to Clean the Pan: Cleaning the transmission pan is essential to remove debris and sludge that can contaminate the new fluid.
- Reusing the Old Gasket: Never reuse the old transmission pan gasket. It will likely be compressed and brittle, and it won't seal properly.
- Incorrect Fluid Level: An incorrect fluid level can cause shifting problems and damage to the transmission. Always check the fluid level using the dipstick or the prescribed procedure in your service manual.
- Secondary Filter Location: If a secondary inline filter is present, it's often located near the transmission cooler lines or the transmission itself. It may require specific tools to remove and install.
- Torque Converter Drain Plug (Rare): Some transmissions have a drain plug on the torque converter. Draining the torque converter can remove even more old fluid, but it's a more involved process. The 2010 Cube typically doesn't have this.
When to Consult a Professional
While this guide provides a comprehensive overview of replacing the transmission filter on a 2010 Nissan Cube, there are situations where you should consult a professional mechanic:
- You're not comfortable working on your vehicle's transmission.
- You don't have the necessary tools or equipment.
- You encounter problems that you can't resolve.
- You suspect there's a more serious problem with your transmission.
In conclusion, replacing the transmission filter on a 2010 Nissan Cube is a manageable task for experienced DIYers. However, it's crucial to understand the process, use the correct fluid and parts, and take your time. When in doubt, always consult a professional.