2011 Nissan Rogue Control Arm Replacement
The 2011 Nissan Rogue, a compact SUV known for its practicality and fuel efficiency, relies on a sophisticated suspension system to provide a comfortable ride and responsive handling. A critical component of this system is the control arm, responsible for connecting the wheel hub to the vehicle's frame. Over time, control arms can wear due to the constant stress they endure from road imperfections, corrosion, and the forces exerted during acceleration, braking, and turning. This wear can manifest as looseness in the suspension, unusual noises, uneven tire wear, and compromised handling. Replacing a worn control arm is therefore essential to maintaining the vehicle's safety and performance.
Understanding the Control Arm's Role
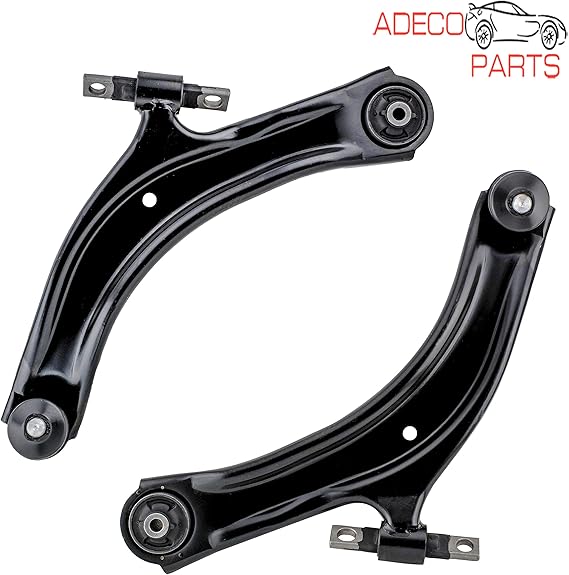
Before diving into the replacement procedure, it's crucial to understand the control arm's function and construction. A control arm, often referred to as a wishbone due to its shape, is a hinged suspension member that allows vertical movement while controlling the wheel's position. The 2011 Rogue typically employs two control arms per front wheel: an upper control arm and a lower control arm. The lower control arm, being subjected to greater loads, is more prone to wear. Control arms are typically constructed from stamped steel or cast aluminum, offering a balance of strength and weight. They pivot on bushings at the frame mounting points and connect to the wheel hub via a ball joint. The bushings dampen vibrations and allow for controlled movement, while the ball joint provides a pivoting connection for steering.
Identifying Control Arm Wear
Recognizing the signs of a worn control arm is the first step in determining the need for replacement. Common indicators include:
- Clunking or rattling noises: These sounds often occur when driving over bumps or during steering maneuvers, indicating excessive play in the ball joint or worn bushings.
- Vibrations in the steering wheel: Worn ball joints or bushings can cause vibrations, particularly at higher speeds.
- Uneven tire wear: A misaligned suspension, often caused by a worn control arm, can lead to uneven wear patterns on the tires.
- Wandering or pulling: The vehicle may drift to one side or feel unstable, requiring constant steering corrections.
- Visible damage: A visual inspection may reveal cracks, bends, or corrosion on the control arm itself, as well as torn or deteriorated bushings.
A thorough inspection by a qualified mechanic is recommended to accurately diagnose control arm wear.
Tools and Materials Required
Replacing a control arm requires a specific set of tools and materials. Having everything on hand before starting the procedure will save time and frustration. Here's a comprehensive list:
- New control arm assembly: Ensure you purchase the correct control arm (left or right, upper or lower) specifically designed for your 2011 Nissan Rogue. Verify the part number and compatibility before ordering.
- Jack and jack stands: Essential for safely lifting and supporting the vehicle.
- Wheel chocks: To prevent the vehicle from rolling.
- Lug wrench: For removing the wheel.
- Socket set and wrenches: Including sockets and wrenches of various sizes, both metric and potentially SAE.
- Torque wrench: Crucial for tightening fasteners to the correct specifications.
- Ball joint separator (pickle fork or ball joint press): To separate the ball joint from the steering knuckle. A ball joint press is generally preferred to avoid damaging the ball joint.
- Hammer: For tapping stubborn components.
- Penetrating oil: To loosen corroded fasteners. Apply generously and allow time to soak.
- Pry bar: For leverage and manipulating components.
- Alignment tool (optional): While a professional alignment is recommended after control arm replacement, a simple alignment tool can help maintain a relatively straight steering wheel.
- Gloves and safety glasses: For personal protection.
- Shop towels or rags: For cleaning.
- Vehicle service manual (optional, but highly recommended): Provides detailed instructions and torque specifications specific to your vehicle.
Step-by-Step Control Arm Replacement Procedure
Safety First: Before beginning any work on your vehicle, ensure it is parked on a level surface, the parking brake is engaged, and the wheels are chocked. Disconnect the negative battery terminal to prevent accidental electrical shorts.
- Loosen the lug nuts: Use the lug wrench to loosen the lug nuts on the wheel of the side you're working on. Do not remove them completely at this stage.
- Raise and support the vehicle: Position the jack under the vehicle's designated jacking point and raise it until the wheel is off the ground. Securely place jack stands under the vehicle's frame for support. Never work under a vehicle supported only by a jack.
- Remove the wheel: Completely remove the lug nuts and take off the wheel.
- Disconnect any sensors or wiring: Carefully disconnect any sensors or wiring attached to the control arm or nearby components, such as the ABS sensor.
- Separate the ball joint: This is often the most challenging step. Apply penetrating oil to the ball joint stud and allow it to soak. Use a ball joint separator (pickle fork or press) to separate the ball joint from the steering knuckle. If using a pickle fork, be aware that it may damage the ball joint boot. A ball joint press is the preferred method to avoid damage.
- Remove the control arm mounting bolts: Locate the bolts that secure the control arm to the vehicle's frame. Apply penetrating oil to the bolts and allow it to soak. Use the appropriate sockets and wrenches to remove the bolts. Note the position of any shims or washers, as they will need to be reinstalled in the same location. Be prepared for the control arm to drop down once the final bolt is removed.
- Remove the old control arm: Carefully remove the old control arm from the vehicle. Inspect the surrounding area for any damage or corrosion.
- Install the new control arm: Position the new control arm in place and loosely install the mounting bolts. Do not tighten them completely at this stage.
- Connect the ball joint: Carefully align the ball joint stud with the steering knuckle and insert it into the hole. Install the ball joint nut and tighten it to the manufacturer's specified torque. Use a new nut if the old one is damaged or corroded.
- Tighten the control arm mounting bolts: With the ball joint connected, tighten the control arm mounting bolts to the manufacturer's specified torque. It is crucial to tighten these bolts with the vehicle at ride height (weight on the suspension) to ensure proper bushing preload and longevity. This may require temporarily lowering the vehicle onto ramps or using a jack under the suspension.
- Reconnect any sensors or wiring: Reconnect any sensors or wiring that were disconnected earlier.
- Reinstall the wheel: Place the wheel back onto the hub and tighten the lug nuts by hand.
- Lower the vehicle: Carefully lower the vehicle back to the ground.
- Torque the lug nuts: Use a torque wrench to tighten the lug nuts to the manufacturer's specified torque in a star pattern.
- Get a wheel alignment: After replacing a control arm, it is essential to have a professional wheel alignment performed. This will ensure proper tire wear and handling.
Important Considerations and Cautions
Replacing a control arm is a moderately complex task that requires mechanical aptitude and the proper tools. Here are some important considerations and cautions:
- Torque Specifications: Always adhere to the manufacturer's specified torque specifications for all fasteners. Overtightening can damage components, while undertightening can lead to loosening and failure.
- Bushing Preload: As mentioned earlier, tightening the control arm mounting bolts with the vehicle at ride height is crucial for proper bushing preload. This ensures that the bushings operate within their designed range and prevents premature wear.
- Rust and Corrosion: In regions with harsh winters or coastal environments, rust and corrosion can make it extremely difficult to remove fasteners. Apply penetrating oil liberally and be prepared to use heat (with caution) to loosen stubborn bolts.
- Ball Joint Condition: If the ball joint is severely corroded or damaged, it may be necessary to replace the entire steering knuckle assembly.
- Professional Alignment: A wheel alignment is non-negotiable after replacing a control arm. Failure to have an alignment performed will result in uneven tire wear, poor handling, and potential damage to other suspension components.
- Safety: Always prioritize safety. Wear safety glasses and gloves, and never work under a vehicle supported only by a jack.
Disclaimer: This guide is for informational purposes only and should not be considered a substitute for professional advice. If you are not comfortable performing this procedure, it is recommended to seek the assistance of a qualified mechanic.