2011 Nissan Sentra Driver Side Mirror
Alright, let's talk about the driver's side mirror on your 2011 Nissan Sentra. It's a pretty common area for damage, whether from a rogue shopping cart, a close encounter with another vehicle, or just plain old wear and tear. This guide will walk you through understanding the components, troubleshooting common problems, and even replacing the entire unit if necessary.
Understanding the 2011 Sentra Driver's Side Mirror Assembly
First, let's break down what we're dealing with. The 2011 Sentra driver's side mirror isn't just a piece of glass; it's a whole assembly comprised of several key parts:
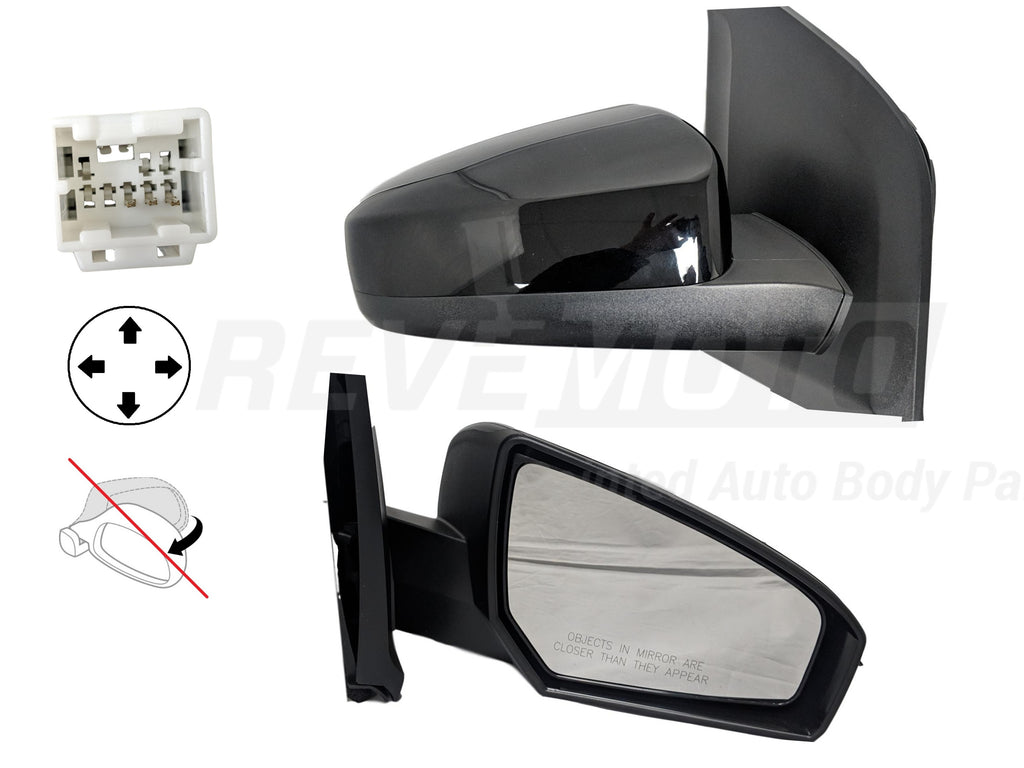
- Mirror Glass (Reflector): This is the actual reflective surface. It's often held in place with adhesive or clips. Some models have heated mirror glass, denoted by wiring connected to the back. The heating element is a resistive film that warms the glass to defrost it.
- Mirror Housing (Casing): This is the plastic shell that protects the mirror glass and internal components. It's usually painted to match the car's body color. Cracks, dents, and fading are common issues.
- Motor(s) (Actuators): If you have power mirrors, these small electric motors are responsible for adjusting the mirror's angle horizontally and vertically. Each direction typically has its own motor. These motors utilize small gears that can wear out over time.
- Wiring Harness and Connector: This connects the mirror assembly to the car's electrical system, providing power to the motors (if equipped) and the heating element (if equipped). Corroded connectors or damaged wires can cause all sorts of problems.
- Mounting Bracket: This is the part that attaches the entire mirror assembly to the door. It's usually held in place by a few screws or bolts accessible from inside the door panel.
Knowing these components will help you diagnose problems more effectively. Now, let's dive into some common issues.
Troubleshooting Common Driver's Side Mirror Problems
Before you start tearing things apart, let's try to pinpoint the issue. Here are some frequent problems and how to approach them:
1. Mirror Not Adjusting (Power Mirrors)
If your power mirrors aren't working, the first thing to check is the fuse. Consult your owner's manual for the location of the correct fuse. A blown fuse is a simple fix.
If the fuse is good, the problem could be with the switch itself. You can test the switch with a multimeter. Look for continuity when the switch is in the "adjust" position. No continuity suggests a faulty switch.
If the switch is working, the problem could be with the motors or the wiring. Use a multimeter to check for voltage at the mirror connector when the switch is activated. No voltage indicates a wiring problem between the switch and the mirror. If you do have voltage, the motor(s) are likely the culprit.
Important Note: When checking for voltage, be sure to set your multimeter to the correct voltage range (typically DC voltage). Also, be very careful not to short any wires together, which could damage the electrical system.
2. Heated Mirror Not Working
If your heated mirror isn't defrosting, start by checking the fuse (often the same fuse as the power mirrors). If the fuse is good, check the wiring harness at the back of the mirror glass. Disconnect the connector and use a multimeter to check for voltage when the rear defroster is activated. Again, no voltage means a wiring issue. If you have voltage, the heating element itself may be faulty. You can check the resistance of the heating element using your multimeter. A very high or infinite resistance suggests a failed element.
3. Cracked or Broken Mirror Glass
This is a purely mechanical issue. The glass needs to be replaced. You can often buy replacement mirror glass separately. The process usually involves carefully prying out the old glass and snapping or adhering the new glass into place. Be very careful, as broken glass can be sharp.
4. Damaged Mirror Housing
A cracked or broken housing can be repaired with body filler and paint, but it's often more cost-effective to replace the entire mirror assembly. Replacement is straightforward, as described below.
5. Loose or Wobbly Mirror
This usually indicates a problem with the mounting bracket or the screws/bolts that hold it in place. Tighten the screws or bolts first. If the bracket itself is damaged, you'll need to replace the entire mirror assembly.
Replacing the Entire Driver's Side Mirror Assembly
If you've determined that you need to replace the entire mirror assembly, here's a step-by-step guide:
Tools You'll Need:
- Screwdrivers (Phillips and flathead)
- Socket set with ratchet
- Trim removal tool (optional, but recommended)
- New driver's side mirror assembly (make sure it's compatible with your 2011 Sentra!)
Step-by-Step Instructions:
- Disconnect the Negative Battery Terminal: Always disconnect the negative battery terminal before working on any electrical components. This prevents accidental shorts and potential damage.
- Remove the Interior Door Panel: This is the trickiest part. Use a trim removal tool to carefully pry off any plastic trim pieces around the door handle, window switches, and door panel edges. There are usually screws hidden behind these trim pieces. Once all the screws are removed, gently pull the door panel away from the door. It's held in place by plastic clips. You may need to use some force, but be careful not to break the clips.
- Locate the Mirror Mounting Bolts: Once the door panel is removed, you'll see the back of the mirror mounting bracket. It's usually held in place by three or four bolts.
- Disconnect the Mirror Wiring Harness: Locate the connector for the mirror wiring harness and disconnect it. There may be a retaining clip that you need to depress to release the connector.
- Remove the Mirror Mounting Bolts: Use a socket wrench to remove the bolts holding the mirror assembly to the door.
- Remove the Old Mirror: Carefully remove the old mirror assembly from the door.
- Install the New Mirror: Align the new mirror assembly with the mounting holes and install the mounting bolts. Tighten them securely.
- Connect the Wiring Harness: Connect the wiring harness to the new mirror assembly. Make sure it clicks into place securely.
- Reinstall the Door Panel: Reinstall the door panel, making sure all the clips are properly aligned. Reinstall the screws and trim pieces.
- Reconnect the Negative Battery Terminal: Reconnect the negative battery terminal.
- Test the Mirror: Test the power mirror functions (if equipped) and the heated mirror (if equipped) to make sure everything is working properly.
Torque Specifications: While not absolutely critical for this job, if you're aiming for perfection, consult a repair manual for the specific torque specifications for the mirror mounting bolts. Over-tightening can damage the bracket or the door panel.
Possible Complications and Tips
- Broken Door Panel Clips: These are common casualties during door panel removal. You can usually buy replacement clips at an auto parts store.
- Rust: If you live in an area with a lot of salt on the roads, you may encounter rust on the mounting bolts. Use a penetrating oil to loosen them before attempting to remove them.
- Wiring Issues: If you're still having problems after replacing the mirror, there may be a more serious wiring issue. Consult a qualified mechanic for further diagnosis.
- Mirror Glass Removal: When just replacing the glass, heat can help loosen the adhesive. A heat gun (used carefully!) or even a hair dryer can be helpful.
- Aftermarket Mirrors: Aftermarket mirrors can be significantly cheaper than OEM (Original Equipment Manufacturer) parts, but the quality can vary. Read reviews carefully before purchasing.
Replacing your 2011 Nissan Sentra's driver's side mirror is a manageable DIY project. By understanding the components, troubleshooting the issue effectively, and following these steps carefully, you can save yourself some money and gain some valuable automotive repair experience.