2012 Nissan Maxima Alternator Replacement
So, your 2012 Nissan Maxima is acting a bit…sluggish? Maybe the battery light is glaring at you from the dashboard, or perhaps you've experienced a sudden stall? Chances are, your alternator might be the culprit. A failing alternator on a Maxima can cause a variety of headaches, but thankfully, replacing it is a repair most DIY enthusiasts with some experience can tackle. This guide will walk you through the process, common symptoms, and what you should know before diving in.
Symptoms of a Failing 2012 Nissan Maxima Alternator
Before we get into the replacement procedure, let’s confirm that the alternator is indeed the issue. Here are some of the most common symptoms indicating a failing alternator on your 2012 Maxima:
- Battery Light Illumination: This is often the first and most obvious sign. The battery light (which looks like a battery) indicates a problem with the charging system, and a failing alternator is a prime suspect. Don't automatically assume it's the battery; a weak alternator can prevent the battery from charging properly.
- Dimming Headlights or Interior Lights: The alternator provides power to your car's electrical components. If it's failing, it might not be able to supply enough juice, leading to dimming lights, especially at idle.
- Slow or No-Start: While a dead battery can cause this, a failing alternator can drain the battery overnight, leading to a slow crank or no start at all. If you jump-start your car and it dies shortly after, the alternator is likely not charging the battery.
- Stalling: A failing alternator can cause the engine to stall, particularly at low speeds or when using multiple electrical accessories (like the A/C and headlights). This is because the engine isn't getting the power it needs to run smoothly.
- Unusual Noises: A worn-out alternator bearing can produce whining, grinding, or rattling noises. These noises often become more noticeable as the engine speed increases.
- Electrical Problems: Other electrical problems, such as erratic gauge readings, malfunctioning power windows, or a weak radio signal, can also be signs of a failing alternator.
- Burning Smell: In some cases, a failing alternator can overheat and produce a burning smell. This is a serious sign and should be addressed immediately.
Important Note: While these symptoms often indicate an alternator problem, it’s always a good idea to have your car’s charging system tested by a qualified mechanic to confirm the diagnosis. Most auto parts stores offer free charging system tests.
Tools and Materials You'll Need
Here's a list of the tools and materials you'll need to replace the alternator on your 2012 Nissan Maxima:
- New Alternator: Make sure to get the correct alternator for your 2012 Maxima. Check your VIN number and consult with your local auto parts store to ensure you get the right one. There can be variations based on trim level.
- Socket Set: A good socket set with metric sizes (typically 10mm, 12mm, 14mm) is essential.
- Wrench Set: You'll likely need wrenches to complement your socket set.
- Screwdrivers: Both Phillips head and flathead screwdrivers might be necessary.
- Pliers: For disconnecting electrical connectors and possibly removing hoses.
- Multimeter: To test the battery voltage and confirm the alternator is charging after the replacement.
- Jack and Jack Stands: For safely lifting the car to access the alternator (if required, based on its location).
- Wheel Chocks: To secure the rear wheels while working on the front.
- Gloves: To protect your hands.
- Safety Glasses: To protect your eyes.
- Penetrating Oil: To loosen stubborn bolts.
- Battery Terminal Cleaner: To clean the battery terminals.
- Torque Wrench: To tighten bolts to the correct specifications.
- Shop Rags: For cleaning up spills.
- New serpentine belt (Optional, but Recommended): If your belt is old or shows signs of wear, replace it while you're replacing the alternator. It's easy to access at this point, and a worn belt can damage the new alternator.
- Alternator Pulley Removal Tool (potentially): Some alternators have a clutch pulley that requires a special tool for removal/installation if you are swapping the pulley over.
Step-by-Step Alternator Replacement Guide for 2012 Nissan Maxima
Safety First! Disconnect the negative battery cable before starting any work on the electrical system. This will prevent accidental short circuits and potential injury.
- Disconnect the Negative Battery Cable: Locate the negative battery terminal (marked with a "-" symbol) and use a wrench to loosen the nut securing the cable. Carefully remove the cable and tuck it away from the battery terminal.
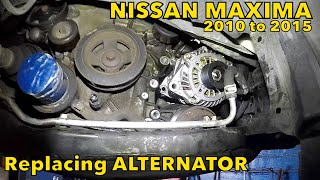
- Locate the Alternator: The alternator is typically located at the front of the engine, driven by the serpentine belt. Refer to your vehicle's repair manual or online resources for the exact location.
- Remove the Serpentine Belt: Locate the belt tensioner pulley. Use a wrench or socket to rotate the tensioner, relieving tension on the serpentine belt. Carefully slip the belt off the alternator pulley and other pulleys. Diagram the belt routing *before* removing the belt – a photo with your phone works great!
- Disconnect the Electrical Connections: Disconnect the electrical connectors attached to the alternator. There will typically be one or two connectors, and a heavy gauge wire attached to the back. Be gentle when disconnecting these, as the plastic can become brittle with age. Remove the nut securing the heavy gauge wire.
- Remove the Alternator Mounting Bolts: Locate the bolts that secure the alternator to the engine bracket. Use a socket and wrench to remove these bolts. You may need to use penetrating oil to loosen stubborn bolts. Keep track of the order of the bolts and any shims, as they need to be reinstalled in the same way.
- Remove the Alternator: Carefully maneuver the alternator out of the engine compartment. You may need to wiggle it around and move hoses or wires out of the way.
- Install the New Alternator: Position the new alternator in the engine compartment and align it with the mounting bracket. Install the mounting bolts and tighten them to the manufacturer's specified torque. Refer to your vehicle's repair manual for the correct torque specifications.
- Reconnect the Electrical Connections: Reconnect the electrical connectors to the alternator. Make sure they are securely attached. Reattach the heavy gauge wire and tighten the nut.
- Reinstall the Serpentine Belt: Route the serpentine belt around the pulleys, following the diagram you made earlier. Use a wrench or socket to rotate the belt tensioner and slip the belt onto the alternator pulley. Release the tensioner and ensure the belt is properly seated on all pulleys.
- Reconnect the Negative Battery Cable: Reconnect the negative battery cable to the battery terminal and tighten the nut securely.
- Start the Engine and Test: Start the engine and let it run for a few minutes. Use a multimeter to check the battery voltage. With the engine running, the voltage should be between 13.5 and 14.5 volts. This indicates that the alternator is charging the battery properly. Turn on the headlights, A/C, and other electrical accessories to ensure the alternator can handle the load.
- Double-Check Everything: Make sure all connections are secure and that the serpentine belt is properly routed.
Common Mistakes to Avoid
Here are some common mistakes to avoid when replacing an alternator:
- Forgetting to Disconnect the Battery: This is a crucial safety step. Always disconnect the negative battery cable before working on the electrical system.
- Using the Wrong Alternator: Make sure you get the correct alternator for your specific vehicle. Check your VIN number and consult with your local auto parts store.
- Over-Tightening Bolts: Over-tightening bolts can damage the alternator or the engine block. Use a torque wrench to tighten bolts to the manufacturer's specified torque.
- Not Routing the Serpentine Belt Correctly: Improper belt routing can cause the belt to slip or break. Refer to your vehicle's repair manual or a diagram to ensure the belt is routed correctly.
- Damaging Electrical Connectors: Be gentle when disconnecting and reconnecting electrical connectors. The plastic can become brittle with age.
- Ignoring a Worn Serpentine Belt: Replace the serpentine belt if it's old or shows signs of wear. A worn belt can damage the new alternator.
Approximate Repair Costs
The cost of replacing an alternator can vary depending on several factors, including the cost of the alternator, labor costs (if you're not doing it yourself), and the location of the repair shop. Here's a general estimate:
- Alternator Cost: $200 - $500 (depending on the brand and type)
- Labor Cost: $150 - $300 (if you're having a mechanic do it)
- Total Cost: $350 - $800
Doing the job yourself can save you a significant amount of money on labor costs. However, if you're not comfortable working on your car, it's best to have a qualified mechanic do the job.
Important Note: These are just estimates. Contact your local auto parts store and repair shops for accurate pricing.
When to Consult a Professional
While replacing an alternator can be a DIY project, there are times when it's best to consult a professional mechanic:
- If you're not comfortable working on your car.
- If you don't have the necessary tools.
- If you're unsure about any step in the process.
- If you suspect there may be other underlying electrical problems.
- If you encounter any unexpected issues during the replacement.
A qualified mechanic can diagnose the problem accurately and ensure that the alternator is replaced correctly.
Replacing the alternator on your 2012 Nissan Maxima can seem daunting, but by following these steps and tips, you can save money and gain a better understanding of your car's electrical system. Remember to always prioritize safety and consult a professional if you're unsure about any part of the process. Good luck!