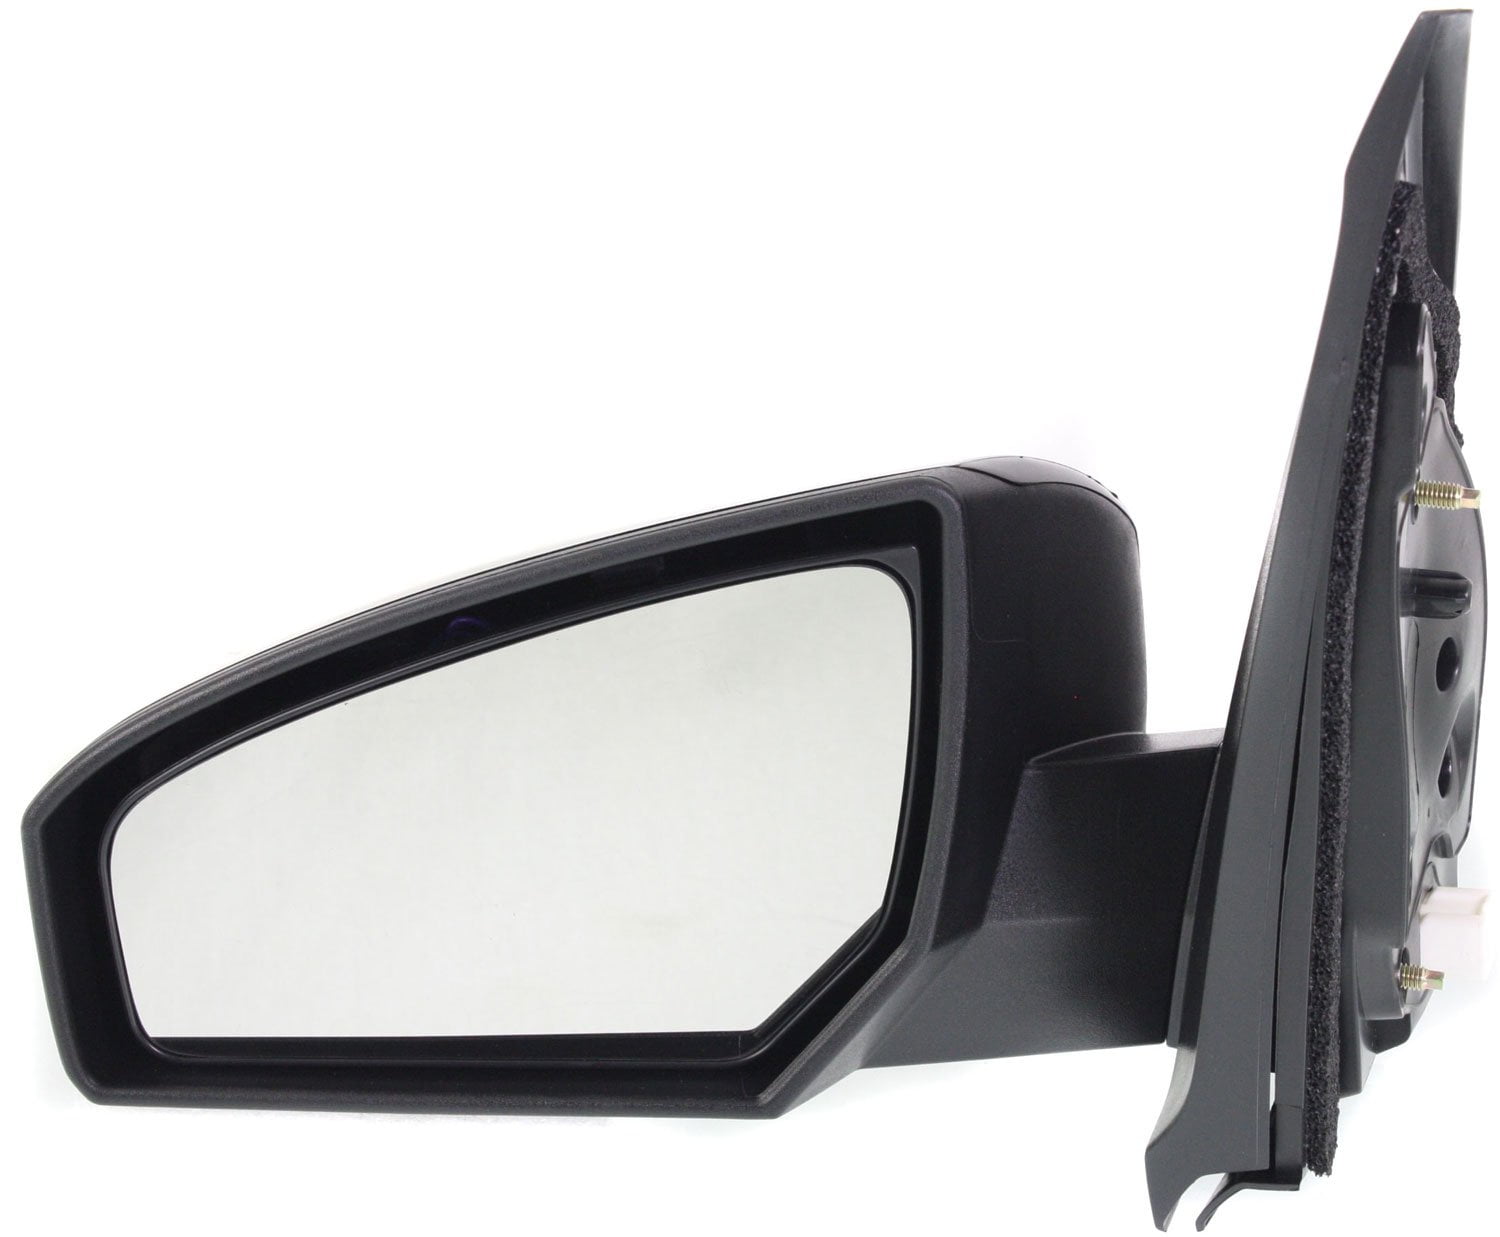
2012 Nissan Sentra Driver Side Mirror
Alright, let's dive into the driver's side mirror on a 2012 Nissan Sentra. We're going to cover everything from basic identification and potential issues to removal, repair, and even aftermarket upgrades. This guide assumes you have some basic mechanical knowledge and access to common tools. If you're comfortable changing your oil and replacing brake pads, you should be able to handle this project.
Identifying the 2012 Sentra Driver's Side Mirror
The 2012 Sentra's driver's side mirror is a crucial safety component, providing rearward visibility. It's important to correctly identify the mirror type before attempting any repairs or replacements. Here's what to look for:
- Manual vs. Power Adjustment: Some models came with manually adjustable mirrors, controlled by levers inside the cabin. Others featured power mirrors, adjusted electronically via a switch on the door panel. Determine which you have. The power mirror assembly will have more electrical connectors.
- Heated Mirrors: Some Sentras, especially higher trim levels, included heated mirrors to melt ice and snow. If equipped, you'll notice a heating grid pattern faintly visible on the mirror surface and an additional electrical connector.
- Integrated Turn Signals: Certain models had turn signal indicators built into the mirror housing. This is an important feature to consider when replacing, as it adds complexity to the wiring and replacement options. The integrated turn signal will also have its own dedicated electrical connector.
Knowing the Options
Knowing the specific features of your mirror is essential when sourcing replacement parts. Check your vehicle's VIN (Vehicle Identification Number) against online parts catalogs to ensure compatibility. Dealership parts departments can also confirm the exact mirror type originally installed on your Sentra.
Common Problems with the 2012 Sentra Driver's Side Mirror
Like any mechanical or electrical component, the driver's side mirror is susceptible to various issues. Here are some of the most common problems encountered with the 2012 Sentra's mirror:
- Broken Mirror Glass: This is the most frequent issue. Cracks, chips, or complete shattering of the mirror glass itself are common, usually caused by impacts. Replacements are readily available, either as direct replacements or aftermarket options.
- Power Mirror Malfunctions: If you have power mirrors, they might stop adjusting in one or more directions. This could be due to a faulty switch, damaged wiring, or a failing motor within the mirror assembly. Testing the switch and wiring with a multimeter is crucial for diagnosis. The actuator, the small motor responsible for movement, could also be the problem.
- Heated Mirror Failure: If the heated mirror stops working, the heating element itself could be burned out, or there might be a problem with the wiring or the heating circuit. Again, using a multimeter to check for voltage at the mirror connector when the defroster is activated is a good diagnostic step.
- Damaged Housing: The plastic housing surrounding the mirror can be cracked or broken due to impacts or exposure to the elements. Replacing the entire mirror assembly is often the best solution in this case.
- Loose or Wobbly Mirror: Over time, the mirror assembly can become loose on its mounting point, causing it to vibrate or move excessively while driving. This can be caused by worn or broken internal components within the folding mechanism (if equipped).
- Turn Signal Issues: For mirrors with integrated turn signals, the LED or bulb can burn out, or the wiring can become damaged, causing the signal to malfunction.
Removing the 2012 Sentra Driver's Side Mirror
Before you can repair or replace the mirror, you'll need to remove it from the vehicle. Here's a step-by-step guide:
- Gather Your Tools: You'll need a Phillips head screwdriver, a flathead screwdriver (for prying), a socket set (usually 10mm), a trim removal tool (optional, but recommended), and possibly a multimeter for electrical testing.
- Disconnect the Negative Battery Terminal: This is a crucial safety precaution to prevent electrical shorts or shocks while working on the wiring.
- Remove the Interior Door Panel: This is usually held in place by screws (often hidden behind plastic covers) and plastic clips. Use a trim removal tool to gently pry the panel away from the door, being careful not to break the clips. Start at the bottom and work your way up. Document the location of each screw as you remove them.
- Locate the Mirror Wiring Connector(s): Behind the door panel, you'll find the wiring connector(s) for the mirror. Disconnect these connectors by pressing the release tab and pulling them apart. Take note of the connector locations, especially if you have multiple connectors for power mirrors, heated mirrors, or turn signals.
- Remove the Mirror Mounting Bolts: The mirror is typically attached to the door with three or four bolts. Use a socket wrench to remove these bolts. Support the mirror while removing the last bolt to prevent it from falling and getting damaged.
- Remove the Mirror: Carefully pull the mirror assembly away from the door.
Repairing the 2012 Sentra Driver's Side Mirror
The extent of repair depends on the specific problem. Here are some common repair scenarios:
Replacing Broken Mirror Glass
This is often the easiest repair. You can purchase replacement mirror glass online or from auto parts stores. The old glass is usually held in place with adhesive. Use a heat gun (carefully!) or a hairdryer to soften the adhesive. Wear gloves and eye protection. Pry the old glass away from the mirror housing using a plastic putty knife or a specialized mirror removal tool. Clean the remaining adhesive from the housing and apply new adhesive (mirror adhesive is specifically formulated for this purpose) to the back of the new glass. Press the new glass firmly into place and allow the adhesive to cure according to the manufacturer's instructions.
Troubleshooting and Repairing Power Mirror Issues
If your power mirrors aren't working, the first step is to check the fuse. Consult your owner's manual for the location of the power mirror fuse. If the fuse is blown, replace it with a new one of the same amperage. If the fuse blows again immediately, there's likely a short circuit in the wiring or the motor. If the fuse is good, use a multimeter to check for voltage at the mirror connector when the power mirror switch is activated. If there's no voltage, the problem could be the switch, the wiring, or the power supply to the switch. If there is voltage, the motor itself may be faulty. Replacing the entire mirror assembly is often the easiest solution for a faulty motor. You can also sometimes find replacement motors online, but replacing them requires more advanced disassembly and repair skills. Be sure to use the multimeter correctly and understand what the readings mean.
Repairing Heated Mirror Issues
Use a multimeter to check for voltage at the heated mirror connector when the defroster is activated. If there's no voltage, the problem could be the defroster switch, the wiring, or the relay that controls the heated mirrors. If there is voltage, the heating element itself may be burned out. You can test the heating element for continuity using a multimeter. A reading of "OL" or infinite resistance indicates a broken circuit and a faulty heating element. Replacing the mirror glass is the only practical way to repair a burned-out heating element.
Dealing with Turn Signal Problems
If the turn signal in the mirror isn't working, check the bulb or LED first. Replacing a bulb is straightforward. Replacing an LED may require soldering skills. If the bulb or LED is good, check the wiring for damage or corrosion. Use a multimeter to check for voltage at the turn signal connector when the turn signal is activated. If there's no voltage, the problem could be the turn signal switch, the wiring, or the flasher relay. If there is voltage, the problem is likely in the wiring within the mirror housing or the turn signal assembly itself.
Installing the 2012 Sentra Driver's Side Mirror
Installation is essentially the reverse of removal:
- Position the Mirror: Carefully align the mirror assembly with the mounting holes on the door.
- Install the Mounting Bolts: Tighten the bolts securely.
- Connect the Wiring Connector(s): Make sure the connectors are fully seated and locked into place.
- Reinstall the Interior Door Panel: Align the panel with the door and press it into place, ensuring that all the clips are engaged. Reinstall the screws and plastic covers.
- Reconnect the Negative Battery Terminal.
- Test the Mirror: Verify that the power mirrors, heated mirrors, and turn signals are all functioning correctly.
Aftermarket Upgrades
Looking to customize or improve your 2012 Sentra's mirrors? Here are a few aftermarket options:
- Chrome Mirror Covers: These add a stylish touch to the exterior of your vehicle.
- Wide-Angle Mirrors: These provide a wider field of vision, improving safety.
- Mirrors with Blind Spot Monitoring: Some aftermarket mirrors incorporate blind spot monitoring systems, alerting you to vehicles in your blind spots.
- Power Folding Mirrors: Though not a factory option, you *might* be able to find a kit to add power folding functionality, requiring more extensive wiring and potentially control module programming. This is an advanced modification.
Remember to research compatibility and read reviews before purchasing any aftermarket parts. Also, be aware that some aftermarket upgrades may require professional installation.
Final Thoughts
Working on your 2012 Nissan Sentra's driver's side mirror can be a rewarding DIY project. By understanding the components, potential problems, and repair procedures, you can save money and gain valuable mechanical experience. Always prioritize safety and take your time. If you're unsure about any step, consult a qualified mechanic. Good luck!