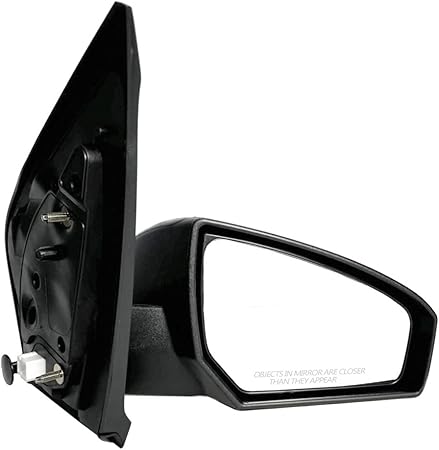
2012 Nissan Sentra Passenger Side Mirror
Alright, let's talk about replacing the passenger side mirror on a 2012 Nissan Sentra. This guide assumes you're comfortable with basic hand tools and have a decent understanding of automotive electrical systems. We'll cover everything from removal and installation to troubleshooting common issues. We're aiming for a clean, functional replacement, and I'll walk you through each step to minimize headaches.
Preparation and Tools
Before you even think about touching your car, gather your tools and the replacement mirror. A successful job starts with the right equipment. Here's what you'll need:
- New Passenger Side Mirror Assembly: Ensure it's specifically for a 2012 Nissan Sentra. Different trim levels (S, SR, SL) may have different features like turn signals or heated mirrors. Verify compatibility!
- Phillips Head Screwdriver: A standard size will usually do the trick.
- Flathead Screwdriver: For prying and potentially disconnecting electrical connectors. Be gentle!
- Panel Removal Tool (Optional but Recommended): These are plastic tools designed to pop off interior panels without damaging them. A flathead screwdriver can work, but you risk scratching or breaking the plastic.
- Socket Set (8mm, 10mm): Mirror assemblies are often secured with bolts. Have a socket set handy.
- Needle-Nose Pliers: Useful for disconnecting tight electrical connectors.
- Multimeter (Optional but Recommended): If your mirror has electrical functions (heated, turn signal), a multimeter can help diagnose wiring issues if things don't work after installation.
- Gloves: Keep your hands clean and protected.
- Work Light: Good lighting is essential.
- Safety Glasses: Always protect your eyes.
Also, a good practice is to disconnect the negative terminal of your car's battery before starting. This minimizes the risk of electrical shorts or shocks during the process. Just remember to have your radio code handy if needed – disconnecting the battery can sometimes reset it.
Mirror Removal
Now for the fun part: getting the old mirror off. The process involves removing the interior door panel trim to access the mirror's mounting bolts and electrical connectors.
Step 1: Accessing the Interior Door Panel
The first step is removing the interior door panel trim piece that covers the mirror mounting area. This is usually a triangular plastic piece located in the upper corner of the door, on the inside.
Use your panel removal tool (or a carefully applied flathead screwdriver) to gently pry the trim piece away from the door panel. Work your way around the edges, applying even pressure. The trim is usually held in place by plastic clips. Be patient and avoid forcing it, as you could break the clips.
Step 2: Disconnecting the Electrical Connectors (if applicable)
Once the trim piece is removed, you should see the electrical connector(s) for the mirror (if it has features like power adjustment, heating, or turn signals). Carefully inspect the connector(s). There will likely be a locking tab or clip that needs to be released before you can pull the connector apart. Use a small flathead screwdriver or needle-nose pliers to gently release the tab and then disconnect the connector. Do not pull on the wires themselves. Always pull on the connector housing.
Take a moment to examine the connector terminals for any signs of corrosion or damage. If you find any, clean them with electrical contact cleaner before reconnecting the new mirror.
Step 3: Removing the Mirror Mounting Bolts/Nuts
With the electrical connector disconnected (if applicable), you can now access the mirror mounting bolts or nuts. These are typically located behind the area where the trim piece was. They're usually 8mm or 10mm.
Use your socket set to remove the bolts or nuts. Be careful not to drop them inside the door panel. It's helpful to have a magnetic pickup tool handy just in case. As you remove the last bolt, support the mirror from the outside to prevent it from falling and potentially damaging the door panel or itself.
Step 4: Removing the Old Mirror
With all the fasteners removed, you should be able to carefully remove the old mirror assembly from the door. You might need to wiggle it gently to break any seal that's formed between the mirror base and the door.
Installing the New Mirror
Installation is essentially the reverse of removal, but with a few key considerations.
Step 1: Positioning and Securing the New Mirror
Carefully position the new mirror assembly against the door. Align the mounting holes with the holes in the door panel. Install the bolts or nuts you removed earlier, tightening them snugly but not excessively. Do not overtighten, as you could strip the threads or damage the mirror housing. Follow the torque specs if you have them (usually around 8-10 Nm, but refer to your service manual for the exact value).
Step 2: Reconnecting the Electrical Connectors (if applicable)
Reconnect the electrical connector(s) to the new mirror. Make sure the connector clicks into place, indicating that it's securely locked. Give the connector a gentle tug to ensure it's properly seated. If you're dealing with multiple connectors, double-check that you're plugging them into the correct locations. A wiring diagram can be helpful in this situation.
Step 3: Testing the Mirror Functions
Before reassembling the door panel trim, test all the mirror functions (power adjustment, heating, turn signal). Reconnect the negative battery terminal if you disconnected it earlier. Turn on the ignition and test each function. If something isn't working, double-check the electrical connector and the fuse for the mirror. A multimeter can be used to verify that power and ground are present at the connector.
Troubleshooting Tip: If the mirror is getting power but still not working, the problem could be with the mirror motor itself. In rare cases, you might have received a defective replacement mirror.
Step 4: Reinstalling the Interior Door Panel Trim
If everything is working correctly, reinstall the interior door panel trim piece. Align the trim piece with the door panel and gently press it into place. The plastic clips should snap back into their respective holes. Ensure the trim piece is flush with the door panel and securely fastened.
Final Checks
Once the mirror is installed and the trim is reassembled, give the mirror a final inspection. Make sure it's securely mounted and that all the electrical functions are working properly. Adjust the mirror to your desired viewing angle. You should now have a fully functional passenger side mirror on your 2012 Nissan Sentra.
Advanced Troubleshooting
Let's delve into some more complex troubleshooting scenarios:
- Heated Mirror Not Working: Use a multimeter to check for voltage at the mirror's heating element connector when the rear defroster is activated. If there's no voltage, trace the wiring back to the rear defroster switch and check for any breaks or shorts in the circuit. Also, check the relevant fuse.
- Turn Signal Not Working: Same principle as the heated mirror. Check for voltage at the turn signal connector when the turn signal is activated. If there's no voltage, check the turn signal switch and the wiring leading to the mirror. Don't forget the fuse! A burnt-out bulb inside the mirror assembly (if applicable) can also be the culprit.
- Power Adjustment Not Working: Check the power mirror switch on the driver's side door. Make sure it's functioning correctly. Use a multimeter to check for voltage at the mirror's adjustment motor connectors when the switch is activated. If there's voltage, the problem is likely with the motor itself. If there's no voltage, trace the wiring back to the switch and check for any breaks or shorts.
Remember to consult your vehicle's wiring diagram for accurate wire colors and connector locations. Working with electrical systems can be tricky, so if you're not comfortable with electrical troubleshooting, it's best to seek professional help. Good luck!