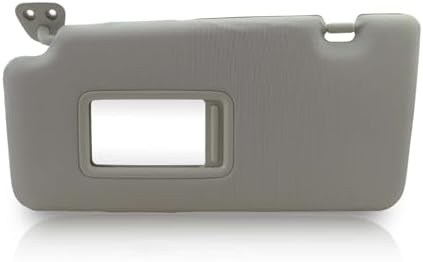
2012 Nissan Versa Driver Side Sun Visor
Okay, so you're dealing with a droopy, broken, or otherwise frustrating driver-side sun visor in your 2012 Nissan Versa. It's a common issue, and believe me, you're not alone. That pesky visor can become a real safety hazard when it’s flopping down, blocking your view of the road. Let's walk through some common problems and, more importantly, how to fix them.
Common 2012 Versa Sun Visor Problems
First, let's identify what exactly is going wrong. Here are the most frequent complaints I hear from Versa owners regarding their sun visors:
- The Visor Won't Stay Up: This is probably the most common complaint. The visor just droops down, even after you've tried pushing it back into place.
- Broken Pivot Point: The plastic pivot where the visor attaches to the headliner can crack or break entirely. This leads to a wobbly or completely detached visor.
- Loose or Stripped Screws: Sometimes, the screws holding the visor in place become loose or the holes they screw into get stripped, resulting in the visor falling down.
- Worn Out Clip: The clip that holds the visor in the "up" position can lose its tension over time, failing to keep the visor securely in place.
- Internal Damage: Less common, but sometimes there's internal damage within the visor itself, perhaps due to impact or just material fatigue.
Troubleshooting Your Visor
Before you start tearing things apart, do a little investigating. This will help you pinpoint the exact cause of the problem and choose the right solution.
- Visual Inspection: Carefully examine the visor, paying close attention to the pivot point, the screws, and the clip. Look for any obvious cracks, breaks, or looseness.
- Test the Movement: Gently try moving the visor. Does it feel loose or wobbly? Does it swing freely even when it should be locked in place?
- Check the Screws: Use a screwdriver (usually a Phillips head) to check if the screws are tight. If they spin freely, they're likely stripped.
- Examine the Clip: Try pushing the visor into the "up" position. Does the clip feel like it's providing any resistance? If it's loose and wobbly, the clip is likely worn out.
Solutions: From Simple Fixes to Replacement
Now that you've identified the problem, let's talk about fixing it. Here are several solutions, ranging from the easiest and cheapest to the more involved options.
Tightening Loose Screws
This is the simplest fix, and often the first thing you should try. You'll need a Phillips head screwdriver of the appropriate size. Sometimes, the screw hole itself is stripped. If this is the case, try these tricks:
- Toothpick Trick: Insert a small piece of a toothpick into the screw hole, then try tightening the screw again. The toothpick will provide extra grip.
- Matchstick Trick: Similar to the toothpick trick, but use a small sliver of a matchstick. Be careful not to use too much, or you might strip the hole even further.
- Thread Repair Kit: For more severely stripped holes, you can purchase a thread repair kit from an auto parts store. These kits usually involve inserting a small metal coil into the hole to create new threads.
Important: Don't overtighten the screws! You could strip the holes even worse.
Replacing the Clip
If the clip is worn out, replacing it is often the best solution. Unfortunately, you typically can't buy just the clip. You'll usually need to replace the entire sun visor assembly.
Tools Needed:
- Phillips head screwdriver
- Possibly a small flathead screwdriver (for prying if needed)
Steps:
- Locate the screws holding the visor to the headliner.
- Remove the screws. There may be a small plastic cover concealing the screws, gently pry this off with the flathead screwdriver if necessary.
- Disconnect any electrical connectors. Some Versa models have vanity lights in the visor, which will require disconnecting a wiring harness.
- Remove the old visor.
- Install the new visor, connecting the electrical connectors and tightening the screws.
Dealing with a Broken Pivot Point
A broken pivot point is a bit trickier. You *could* try to repair it with epoxy or super glue, but in my experience, this is rarely a long-term solution. The stress on the pivot point is significant, and the repair will likely fail again before long. The most reliable solution is to replace the entire visor assembly.
Why replace instead of repair? The plastic used in the visor is often brittle, and even the strongest adhesives may not hold up to repeated use and temperature changes inside your car. A replacement visor ensures a proper and lasting fix.
Replacing the Entire Sun Visor
As you’ve probably gathered, replacing the entire sun visor is often the most effective and long-lasting solution, especially for broken pivot points or worn-out clips. You can purchase a replacement visor online from various retailers (like Amazon, eBay, or parts websites) or from your local Nissan dealership.
Finding the Right Replacement:
- Check the Part Number: The best way to ensure you get the right visor is to check the part number. The part number may be printed on the original visor itself. If not, you can call your local Nissan dealership and provide them with your vehicle's VIN (Vehicle Identification Number). They can look up the correct part number for you.
- Consider Color: Make sure the replacement visor matches the interior color of your car. Versas come in different interior color options, so choose accordingly.
- Aftermarket vs. OEM: You can choose between aftermarket and OEM (Original Equipment Manufacturer) visors. OEM visors are made by Nissan and will be an exact match for your original visor. Aftermarket visors are made by third-party manufacturers and may be slightly cheaper, but the quality and fit may not be as good.
Estimated Cost:
- Aftermarket Visor: $30 - $70
- OEM Visor: $70 - $150 (or more, depending on the dealership)
Tools Needed:
- Phillips head screwdriver
- Possibly a small flathead screwdriver (for prying if needed)
Steps:
- Disconnect the negative terminal of your car's battery. This is an important safety precaution, especially if your visor has vanity lights.
- Locate the screws holding the visor to the headliner.
- Remove the screws. There may be a small plastic cover concealing the screws, gently pry this off with the flathead screwdriver if necessary.
- Disconnect any electrical connectors (if applicable).
- Remove the old visor.
- Install the new visor, connecting the electrical connectors (if applicable) and tightening the screws.
- Reconnect the negative terminal of your car's battery.
A Note on Safety
Before starting any repair, always disconnect the negative terminal of your car's battery. This prevents accidental electrical shocks, especially if your visor has a vanity light. Also, be careful not to over-tighten screws, as this can strip the holes.
When to Call a Professional
While replacing a sun visor is generally a straightforward DIY project, there are times when it's best to call a professional mechanic. If you're uncomfortable working with electrical components, or if you're having trouble removing the old visor, don't hesitate to seek help. A mechanic will have the experience and tools to get the job done quickly and safely.
Approximate Labor Cost: If you choose to have a mechanic replace your visor, expect to pay around $50 - $150 for labor, in addition to the cost of the visor itself.
Preventative Measures
While you can't completely prevent wear and tear, there are a few things you can do to prolong the life of your sun visor:
- Avoid Over-Adjusting: Don't constantly flip the visor up and down unnecessarily. The less you move it, the less wear and tear it will experience.
- Be Gentle: When adjusting the visor, be gentle and avoid forcing it.
- Protect from Extreme Heat: Park your car in the shade whenever possible to protect the interior from extreme heat, which can degrade the plastic components of the visor.
I hope this guide has been helpful! Remember to take your time, be careful, and don't hesitate to ask for help if you need it. A properly functioning sun visor is essential for safe driving, so it's worth getting it fixed right.