2012 Nissan Versa Transmission Replacement
The 2012 Nissan Versa, known for its fuel efficiency and affordability, utilizes a Continuously Variable Transmission (CVT) in many of its models. While CVTs offer smooth acceleration and improved gas mileage, they can, like any mechanical system, experience issues that eventually necessitate replacement. This article delves into the intricacies of replacing the transmission in a 2012 Nissan Versa, providing an analytical overview of the process, highlighting potential challenges, and explaining the underlying principles involved.
Understanding the 2012 Versa's CVT
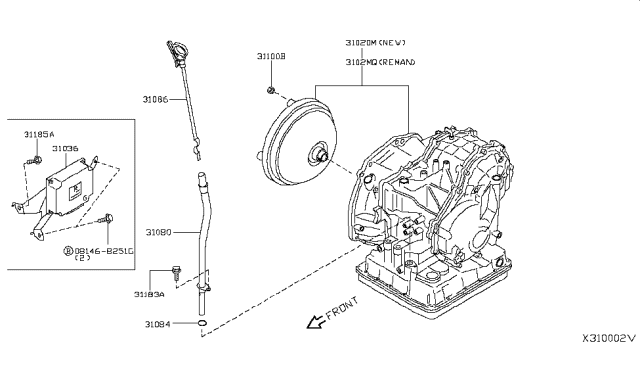
Before embarking on a replacement procedure, it’s crucial to understand the specific CVT used in the 2012 Versa. Nissan commonly employed the JF011E (RE0F10A) transmission in models of this era. This CVT, manufactured by Jatco, is characterized by its belt-and-pulley system. Unlike traditional automatic transmissions that use gears, a CVT relies on a steel belt connecting two variable-diameter pulleys. The transmission's control unit adjusts the diameter of these pulleys, creating a continuous range of gear ratios. This allows the engine to operate at its most efficient RPM, optimizing fuel economy and providing seamless acceleration.
It is vital to confirm the exact transmission model installed in your specific Versa. Check the vehicle's identification plate (usually located on the driver's side doorjamb) or consult your owner's manual. Using the wrong replacement transmission can lead to severe mechanical damage and render the vehicle inoperable.
Reasons for Transmission Replacement
Several factors can contribute to the need for a transmission replacement. Common culprits include:
- High Mileage: Over time, the internal components of the CVT, particularly the belt and pulleys, wear down.
- Lack of Maintenance: Neglecting regular transmission fluid changes can lead to overheating, internal damage, and premature failure. CVT fluid is specifically formulated for these transmissions and using the incorrect type can cause catastrophic damage.
- Overheating: Sustained high temperatures can degrade the transmission fluid and damage internal seals and components.
- Mechanical Failure: Internal parts like the valve body, solenoids, or the belt itself can fail due to wear, stress, or manufacturing defects.
- Contamination: Debris or contaminants in the transmission fluid can damage internal components and reduce the transmission's lifespan.
Signs that your Versa's transmission might require replacement include:
- Slipping: The engine revs but the vehicle doesn't accelerate properly.
- Shuddering or Jerking: The transmission feels rough or vibrates during acceleration.
- Unusual Noises: Whining, buzzing, or clunking sounds coming from the transmission.
- Difficulty Shifting: The transmission struggles to engage gears or shifts erratically.
- Transmission Fluid Leaks: Visible leaks under the vehicle, often accompanied by a burning smell.
- Check Engine Light: Diagnostic Trouble Codes (DTCs) related to the transmission.
Step-by-Step Transmission Replacement Guide
Replacing a transmission is a complex undertaking, best left to experienced mechanics. However, understanding the procedure can provide valuable insights. Here's a breakdown of the key steps:
1. Preparation and Safety
Safety is paramount. Before starting, disconnect the negative battery terminal to prevent electrical shocks. Gather all necessary tools and equipment, including:
- New or remanufactured transmission (correct model for your vehicle)
- New transmission fluid (Nissan NS-2 or equivalent CVT fluid)
- New transmission filter (if applicable)
- New transmission pan gasket
- Sockets and wrenches (metric)
- Torque wrench
- Jack and jack stands
- Wheel chocks
- Drain pan
- Penetrating oil
- Shop towels
- Service manual (highly recommended)
Raise the vehicle and securely support it with jack stands. Chock the rear wheels for added safety.
2. Draining the Transmission Fluid
Locate the transmission drain plug and position a drain pan underneath. Carefully remove the plug and allow the fluid to drain completely. Dispose of the used fluid responsibly according to local regulations.
3. Disconnecting Components
Disconnect all electrical connectors attached to the transmission, including those for the solenoids, sensors, and wiring harnesses. Carefully label each connector to ensure proper reinstallation. Remove any cables or linkages connected to the transmission, such as the shift cable and any vacuum lines. Support the engine with an engine support bar or a suitable jack to prevent it from tilting when the transmission is removed.
4. Removing Drive Shafts/Axles
Disconnect the drive shafts (or axles) from the transmission. This typically involves removing bolts securing the drive shafts to the transmission flanges. Use a pry bar to carefully dislodge the drive shafts. Be mindful of potential fluid spillage from the transmission seals.
5. Supporting the Transmission
Position a transmission jack underneath the transmission to support its weight during removal. Secure the transmission to the jack using straps or chains. Double-check that the transmission is securely supported before proceeding.
6. Removing the Transmission Mounts and Bolts
Remove the bolts securing the transmission to the engine block and the transmission mounts to the vehicle's frame. Start by loosening the bolts, then fully remove them once the transmission is securely supported by the jack.
7. Lowering and Removing the Transmission
Carefully lower the transmission using the transmission jack. As you lower it, ensure that it clears all surrounding components. Once the transmission is clear of the vehicle, carefully remove it from underneath the car.
8. Preparing the New Transmission
Before installing the new transmission, inspect it for any damage. Install the new transmission filter (if applicable) and the new transmission pan gasket. Transfer any necessary components from the old transmission to the new one, such as the shift linkage or any sensors. Ensure all transferred components are in good working order.
9. Installing the New Transmission
Carefully raise the new transmission into position using the transmission jack. Align the transmission with the engine block and the transmission mounts. Install the transmission mounting bolts, tightening them to the manufacturer's specified torque. Reconnect all electrical connectors, cables, and linkages. Reinstall the drive shafts/axles, ensuring they are properly seated and secured.
10. Filling with Transmission Fluid
Locate the transmission fill plug and add the correct type and amount of transmission fluid (Nissan NS-2 or equivalent). Use a funnel to prevent spills. Check the fluid level using the dipstick (if equipped) or by following the manufacturer's instructions for your specific transmission model. It's best to consult the service manual for the exact fluid capacity.
11. Final Checks and Adjustments
Reconnect the negative battery terminal. Start the engine and let it idle for a few minutes. Check for any leaks around the transmission and its connections. Shift the transmission through all gears to ensure proper operation. Test drive the vehicle to verify that the transmission shifts smoothly and accelerates properly.
Important Note: Many CVT transmissions require a "CVT Learning" or "CVT Adaptation" procedure after replacement. This involves using a diagnostic scan tool to reset the transmission's control unit and allow it to learn the characteristics of the new transmission. Consult your service manual or a qualified mechanic for specific instructions.
Potential Challenges and Considerations
Transmission replacement can present several challenges:
- Tight Spaces: Working in the confined space under the vehicle can be difficult.
- Heavy Components: Transmissions are heavy and awkward to handle, requiring specialized tools like a transmission jack.
- Complexity: CVTs are complex systems with many intricate components.
- Proper Torque Specifications: Using the correct torque specifications for all bolts is crucial to prevent damage and ensure proper sealing.
- Programming Requirements: As mentioned earlier, CVT learning procedures are often necessary.
Important Considerations:
- Transmission Source: Choose a reputable source for your replacement transmission. Consider a new, remanufactured, or used transmission depending on your budget and needs. Research the warranty offered by the supplier.
- Fluid Type: Using the incorrect transmission fluid can cause irreparable damage to the CVT. Always use the manufacturer-recommended fluid (Nissan NS-2 or equivalent).
- Professional Assistance: If you lack the necessary experience or tools, it's best to seek professional assistance from a qualified mechanic.
Conclusion
Replacing the transmission in a 2012 Nissan Versa is a significant undertaking requiring technical knowledge, specialized tools, and meticulous attention to detail. Understanding the intricacies of the CVT system, following a step-by-step procedure, and addressing potential challenges are essential for a successful outcome. While this guide provides a comprehensive overview, it's crucial to consult a service manual and consider seeking professional assistance when necessary. Remember, proper maintenance and preventative care can significantly extend the life of your transmission and potentially avoid the need for replacement altogether.