2013 Nissan Altima Driver Seat Replacement
Replacing a car seat might seem daunting, conjuring images of complex wiring harnesses and stubborn bolts. However, with the right tools, a systematic approach, and a dash of patience, swapping out the driver's seat in a 2013 Nissan Altima is a perfectly achievable DIY project. This guide will dissect the process, not just offering instructions but illuminating the underlying mechanical principles involved. We'll delve into the safety precautions, the anatomy of the seat mounting system, and even troubleshoot common pitfalls.
Safety First: Disconnecting the Power
Before even thinking about touching a wrench, the absolute first step is to disconnect the negative terminal of your car's battery. This is not optional. The Altima's seats, especially driver's seats, often incorporate electrical components like seatbelt pretensioners, airbag sensors, and powered adjustments. Working on these systems while powered can lead to accidental airbag deployment or other electrical mishaps, resulting in serious injury.
To disconnect the battery, locate the battery in the engine bay (usually under a plastic cover). Use a wrench (typically a 10mm) to loosen the nut on the negative terminal (marked with a "-" symbol). Once loosened, carefully detach the cable from the terminal and tuck it away so it doesn't accidentally reconnect. Wait at least 10 minutes after disconnecting before proceeding. This allows any residual electrical charge in the system to dissipate, further minimizing the risk of accidental activation.
Tool Time: Gathering Your Arsenal
Having the right tools is crucial for a smooth and efficient seat replacement. Here's a comprehensive list:
- Socket set: A variety of metric sockets, particularly 10mm, 12mm, 14mm, and 17mm sockets. Different size nuts and bolts hold the seat in place and the seatbelt receiver.
- Socket wrench: To drive the sockets. A ratchet wrench with a comfortable handle is ideal.
- Torque wrench: Absolutely essential for re-installing the seat bolts to the proper torque specification. This ensures the seat is securely fastened and meets safety standards. Refer to your Altima's service manual for the correct torque values; typically, seat mounting bolts require around 35-45 Nm (Newton-meters).
- Extension bars: For the socket wrench, allowing access to bolts in recessed or hard-to-reach areas.
- Screwdrivers: Both flathead and Phillips head screwdrivers may be needed to remove plastic trim pieces or access hidden fasteners.
- Pliers: For disconnecting electrical connectors. Consider using needle-nose pliers for precision.
- Trim removal tools: These plastic tools help to gently pry off trim panels without damaging them.
- Work gloves: To protect your hands from sharp edges and grease.
- Shop towel: To wipe away dirt and grease.
- Pen and paper or a camera: To document the location of electrical connectors. Take pictures before disconnecting anything to ensure correct reassembly.
Disconnecting the Electrical Symphony
With the battery disconnected, the next step is to disconnect the electrical connectors underneath the seat. This is arguably the most delicate part of the entire operation. Take your time and be careful not to damage any of the connectors.
Tilt the seat back (or forward, depending on accessibility) to gain access to the underside. You'll likely find several connectors, each with a different function. Some connectors might be for the seatbelt pretensioner, others for the airbag sensor, and still others for the seat's power adjustments (if equipped).
Before disconnecting anything, carefully examine each connector. Most connectors have a locking mechanism that needs to be disengaged before the connector can be pulled apart. This might be a small tab that needs to be pressed or a sliding lock that needs to be moved. Gently try to wiggle the connector to see how it releases before applying force.
Crucially, document which connector goes where. A simple diagram or a series of photographs taken with your phone will save you a lot of headaches during reassembly. Labeling each connector with a piece of masking tape is another good strategy. A simple mistake here could lead to a malfunctioning airbag or other critical safety system.
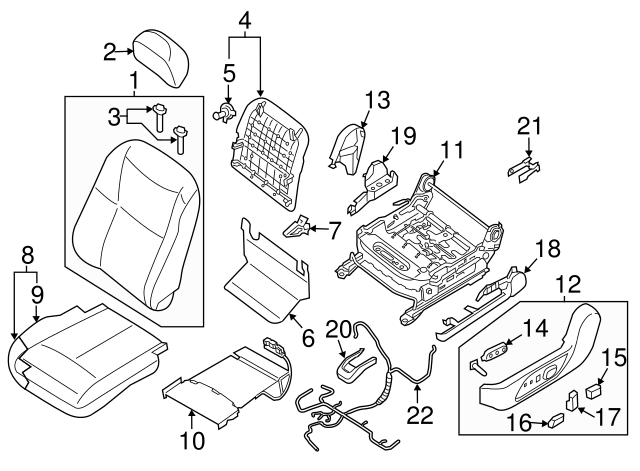
Unbolting the Throne
Now comes the physical task of removing the seat from the car's floor pan. Typically, four bolts secure the seat to the floor. These bolts are usually located at each corner of the seat frame.
Use the appropriate socket and socket wrench to remove these bolts. You might need to use an extension bar to reach some of the bolts, especially those located closer to the center console or door sill. Be prepared for the bolts to be tight, especially if they haven't been removed in a while. Use a penetrating oil if necessary, letting it soak for a few minutes before attempting to loosen the bolts. Avoid stripping the bolt heads by ensuring the socket is fully seated on the bolt before applying force.
Once all four bolts are removed, the seat should be free to lift out of the car. However, be mindful of the seatbelt. The seatbelt receiver is usually bolted to the seat frame. Disconnect this now, by either removing the bolt connecting it or, if possible, detach it from the seat frame via some other retaining mechanism. This may require another wrench or screwdriver.
Extraction and Replacement
With the seat unbolted and the seatbelt detached, carefully lift the seat out of the car. Be mindful of the door frame and the center console to avoid scratching or damaging them. It's often helpful to have a second person assist with this step, especially if the seat is heavy or bulky.
Now you can introduce the new seat. Carefully align the new seat with the mounting holes in the floor pan. Reconnect the seatbelt receiver to the seat frame. Insert the mounting bolts and hand-tighten them initially. This will help to ensure that all the bolts are properly aligned before you torque them down.
This is where the torque wrench comes in. Consult your Altima's service manual (or a reputable online source) for the correct torque specification for the seat mounting bolts. Use the torque wrench to tighten each bolt to the specified torque. It's important to tighten the bolts in a criss-cross pattern to ensure even distribution of pressure.
Finally, reconnect the electrical connectors under the seat. Refer to your diagrams or photographs to ensure that each connector is plugged into the correct socket. Double-check all connections to be certain they are secure.
Final Checks and Reconnection
Before reattaching the battery, double-check that all bolts are properly torqued, all electrical connectors are securely connected, and that nothing is trapped or pinched under the seat.
Reconnect the negative terminal of the battery. Tighten the nut securely.
Now it's time for the moment of truth. Start the car and test all the seat functions: seat adjustments, seat heaters (if equipped), and most importantly, the seatbelt. Pay close attention to any warning lights on the dashboard, especially the airbag warning light. If the airbag warning light is illuminated, it indicates a problem with the airbag system and should be addressed immediately by a qualified mechanic. Don't drive the car until the airbag system is functioning correctly.
Troubleshooting: Common Pitfalls and Solutions
Even with careful planning, problems can arise during a seat replacement. Here are some common issues and how to address them:
- Stripped bolt heads: If you encounter a bolt that is stripped, try using a bolt extractor tool. These tools are designed to grip the stripped bolt head and allow you to remove it. If a bolt extractor doesn't work, you might need to drill out the bolt.
- Broken electrical connectors: If you break an electrical connector, you can try to repair it using electrical tape or heat shrink tubing. However, for critical connectors like those for the airbag system, it's best to replace the entire connector.
- Airbag warning light: If the airbag warning light comes on after replacing the seat, it indicates a problem with the airbag system. The most likely cause is a disconnected or improperly connected airbag sensor. Double-check all the connectors and make sure they are securely connected. If the light persists, you'll need to take the car to a qualified mechanic for diagnosis.
- Seat won't move: If the seat won't move after replacing it, check the electrical connectors to ensure they are properly connected. Also, check the fuses for the seat's power adjustments.
Conclusion: A Rewarding Accomplishment
Replacing a car seat isn't just about swapping out a component; it's about understanding the intricate systems within your vehicle and gaining the confidence to tackle automotive repairs yourself. By following these steps, prioritizing safety, and paying attention to detail, you can successfully replace the driver's seat in your 2013 Nissan Altima and enjoy the satisfaction of a job well done. Remember to always consult your vehicle's service manual for specific instructions and torque specifications. The knowledge you've gained will not only save you money but also deepen your appreciation for the engineering that makes your car tick. And who knows, you might just inspire a friend to try it themselves!