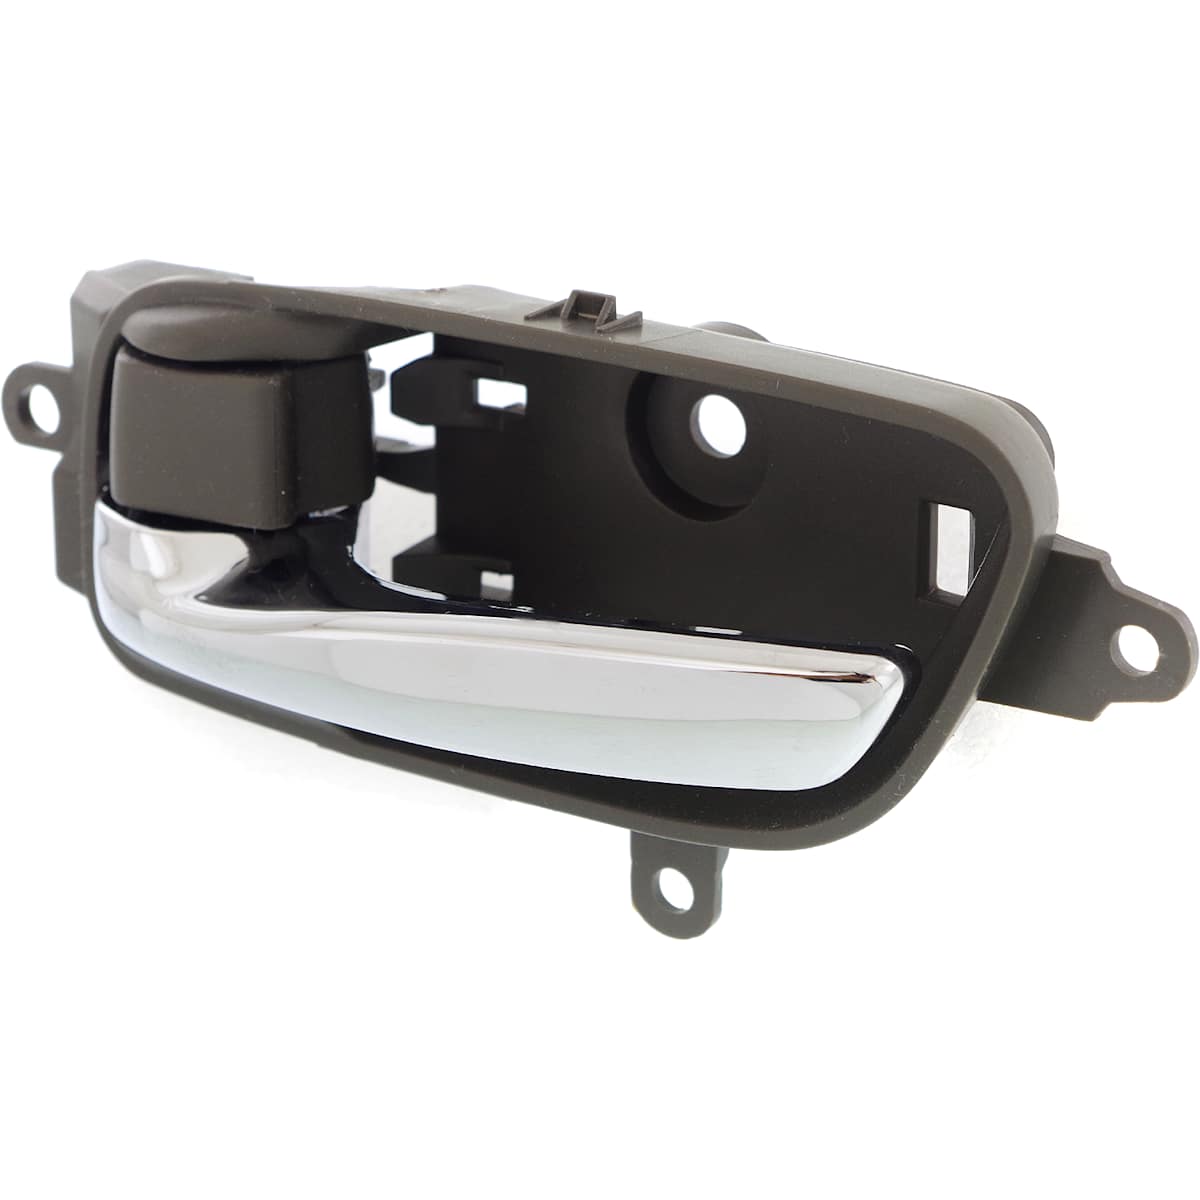
2013 Nissan Altima Interior Door Handle
So, you're having trouble with the interior door handle on your 2013 Nissan Altima? You're not alone. We've seen this issue come up quite a bit, and it's usually one of a few things. Don't worry, we're here to help you diagnose the problem and find a solution.
Understanding the Common Issues
The 2013 Altima, while generally a reliable car, can experience issues with its interior door handles. The most common complaint is a loose or broken handle that simply doesn't open the door anymore. This can be incredibly frustrating, especially if you're stuck inside the car! Let's break down the possible causes:
1. Broken Plastic Components
Many interior door handles, including those in the 2013 Altima, use plastic components for various parts of the mechanism. Over time, these plastic pieces can become brittle and break due to repeated use, stress, and temperature fluctuations. A broken plastic clip or lever inside the handle assembly is a very frequent culprit.
2. Cable Detachment or Stretching
The interior door handle doesn't directly actuate the door latch. Instead, it pulls on a cable that runs from the handle to the latch mechanism within the door. If this cable becomes detached at either end (handle or latch), or if it stretches excessively, the handle won't be able to properly release the door. This is a very common problem after years of usage.
3. Latch Mechanism Failure
While less common than handle or cable issues, the door latch mechanism itself can fail. This is the assembly inside the door that physically holds the door closed. If the latch is jammed, corroded, or otherwise malfunctioning, no amount of handle pulling will open the door.
4. Binding or Obstruction
Sometimes, the door handle mechanism may be binding due to debris, rust, or misaligned parts. This can prevent the handle from moving freely and engaging the cable properly. This could also be caused by physical damage, maybe something was slammed into the door trim previously.
Diagnosing the Problem
Before you start tearing things apart, let's try to pinpoint the cause of the issue. Here's a simple troubleshooting process:
- Inspect the Handle: Carefully examine the handle itself. Does it feel loose or wobbly? Does it move freely, or does it feel stuck or resistant? If the handle feels very loose or you hear rattling inside, it's likely a broken plastic component within the handle assembly.
- Listen for Sounds: When you pull the handle, do you hear any clicking, snapping, or grinding noises? These sounds can indicate a broken part or a cable that's slipping. If you hear nothing at all, the cable might be completely detached.
- Try the Exterior Handle: Does the exterior door handle work correctly? If the exterior handle opens the door without issue, it strongly suggests that the problem lies within the interior handle assembly or its cable, and not with the latch mechanism itself. This helps narrow the diagnosis down.
- Check the Door Lock: Ensure that the door lock is fully unlocked. Sometimes, a partially engaged lock can interfere with the handle's operation. Try both the manual lock and the power locks to be sure.
- Look for Obvious Damage: Carefully inspect the door panel around the handle. Is there any visible damage, such as cracks or loose trim? Damage could indicate a physical impact that has affected the handle mechanism.
Solutions and Repair Options
Once you have a better understanding of the problem, you can explore the following solutions:
1. Replacing the Interior Door Handle Assembly
If the handle itself is broken, the most common solution is to replace the entire interior door handle assembly. This is usually a straightforward DIY project, but it does require some basic tools and mechanical skill.
Tools Needed:
- Screwdriver set (Phillips and flathead)
- Panel removal tool or a thin, flat blade (to avoid scratching the door panel)
- Socket set (for removing screws holding the handle assembly)
- New interior door handle assembly (ensure it's the correct one for your year, model, and door - driver or passenger side)
Procedure (General Guide - always consult a repair manual for specific instructions):
- Remove the Door Panel: Use the panel removal tool to carefully detach the door panel from the door frame. Start at the bottom and work your way around the edges. Be patient and apply gentle pressure to avoid breaking the plastic clips that hold the panel in place.
- Disconnect Electrical Connectors: Disconnect any electrical connectors attached to the door panel, such as those for the power windows, door locks, and speakers.
- Locate the Door Handle Assembly: The interior door handle assembly will be visible once the door panel is removed.
- Detach the Cable: Carefully detach the cable from the handle assembly. There's usually a clip or retainer that holds the cable in place.
- Remove the Handle Assembly: Remove the screws or bolts that secure the handle assembly to the door.
- Install the New Handle Assembly: Install the new handle assembly in the reverse order of removal. Be sure to connect the cable securely.
- Reinstall the Door Panel: Reconnect the electrical connectors and snap the door panel back into place.
Approximate Cost: The cost of a new interior door handle assembly can range from $30 to $100, depending on the brand and vendor. Labor costs for professional installation can range from $50 to $150.
2. Repairing the Cable
If the cable is detached, you might be able to reattach it. Sometimes, the cable end just pops out of its retainer. However, if the cable is stretched or frayed, it may need to be replaced. Universal door handle cables are available, or you can purchase a cable specifically for your Altima.
Tools Needed: (In addition to those listed above for handle replacement)
- Pliers
- Cable crimper (if replacing the cable)
- New door handle cable (if necessary)
Procedure:
- Follow steps 1-4 of the handle replacement procedure to access the cable.
- Inspect the cable and its connection points.
- If the cable is simply detached, try reattaching it securely. Make sure it's properly seated in its retainer.
- If the cable is damaged, replace it. You may need to crimp a new end onto the cable.
- Test the handle operation to ensure the cable is working correctly.
- Reassemble the door panel.
Approximate Cost: A replacement door handle cable can cost between $10 and $30. Labor costs for cable repair or replacement can range from $40 to $100.
3. Addressing Latch Mechanism Issues
If you suspect a problem with the latch mechanism, the repair is more complicated. It's best to consult a professional mechanic, as it may involve disassembling the door and working with potentially complex components. Trying to fix the latch yourself without proper knowledge could cause further damage or even prevent the door from opening at all!
Approximate Cost: Latch mechanism repairs or replacements can range from $100 to $300 or more, depending on the extent of the damage and labor costs.
4. Cleaning and Lubricating
If the handle is binding, try cleaning and lubricating the mechanism. Use a penetrating oil or silicone lubricant to loosen up any stuck parts. Spray the lubricant into the handle assembly and the cable connections. Work the handle back and forth to distribute the lubricant. This might be a simple fix that avoids more extensive repairs.
Tools Needed:
- Penetrating oil or silicone lubricant
- Straw attachment for precise application
Procedure:
- Access the handle mechanism by partially removing the door panel (enough to expose the handle).
- Apply lubricant to all moving parts of the handle and cable connection.
- Work the handle repeatedly to distribute the lubricant.
- Test the handle operation.
- Reassemble the door panel.
Approximate Cost: This is a very inexpensive solution, costing only the price of the lubricant (typically under $10).
Important Considerations
- Safety First: Always disconnect the car's battery before working on any electrical components, including door locks and power windows.
- Consult a Repair Manual: Refer to a repair manual specific to your 2013 Nissan Altima for detailed instructions and diagrams. This will help you avoid mistakes and ensure a proper repair.
- Don't Force Anything: If something is stuck or difficult to remove, don't force it. You could break something or injure yourself.
- Professional Help: If you're not comfortable performing the repair yourself, don't hesitate to take your car to a qualified mechanic.
Dealing with a broken door handle can be a pain, but with a little patience and the right information, you can often fix the problem yourself. Remember to diagnose the issue carefully, gather the necessary tools, and follow the instructions closely. Good luck!
Disclaimer: This information is for general guidance only. Always consult a qualified mechanic for specific repair advice. The author is not responsible for any damage or injury resulting from the use of this information.