2013 Nissan Altima Radiator Replacement
So, your 2013 Nissan Altima's radiator is giving you grief? Overheating, coolant leaks, or maybe you just want to replace it preventatively? Replacing the radiator on a 2013 Altima is a manageable job for the experienced DIYer. This article walks you through the process, providing the necessary steps, technical terms (explained along the way), and precautions to take. Remember, safety is paramount! Always disconnect the battery and allow the engine to cool completely before beginning any work.
Tools and Materials You'll Need
Before diving in, gather these tools and materials. Having everything ready will streamline the process:
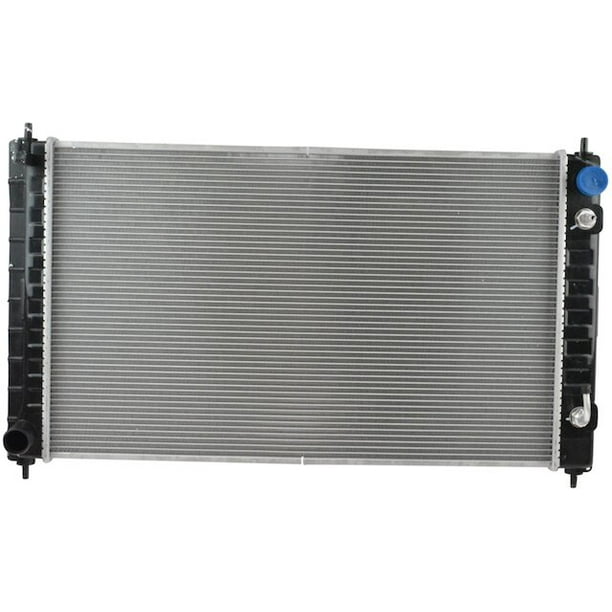
- New Radiator (ensure it's the correct one for your Altima's engine – 2.5L or 3.5L)
- New Coolant (Nissan specifies a particular type; check your owner's manual)
- Distilled Water (for flushing and mixing coolant)
- Socket Set (metric, typically 10mm, 12mm, 13mm, 14mm)
- Wrench Set (metric, same sizes as sockets)
- Screwdrivers (Phillips and flathead)
- Pliers (regular and hose clamp pliers – very important!)
- Drain Pan (large enough to hold all the coolant)
- Funnel
- Jack and Jack Stands (for safe vehicle lifting)
- Gloves
- Safety Glasses
- Shop Rags or Towels
- Penetrating Oil (like PB Blaster or WD-40) – for stubborn bolts
- Optional: Coolant Pressure Tester (for leak testing after installation)
- Optional: Radiator Fin Comb (to straighten bent fins on the A/C Condenser if needed)
Preparation: Safety First!
Safety is key! Begin by disconnecting the negative (-) battery terminal. This prevents accidental electrical shorts during the process. Use a wrench to loosen the terminal clamp and carefully remove the cable. Tuck it away so it doesn't accidentally reconnect. Next, allow the engine to cool down completely. Working on a hot engine can cause burns. This is crucial; don't rush this step. Finally, prepare your workspace. Make sure you have adequate lighting and room to move around the vehicle.
Step-by-Step Radiator Replacement
Step 1: Drain the Coolant
This is the messiest part, so prepare accordingly. Locate the radiator drain petcock. It's usually a small, plastic valve located at the bottom corner of the radiator (typically on the driver's side). Place your drain pan directly beneath the petcock. Some Altima models might have a drain plug instead of a petcock; either way, the process is similar. Carefully open the petcock (or remove the plug). Be prepared for a surge of coolant. Once the coolant flow slows to a trickle, you can remove the radiator cap to allow air to enter the system and speed up the draining process. Remember to dispose of the used coolant responsibly. It's toxic and should not be poured down drains or onto the ground.
Important: Coolant is harmful to the environment and animals. Dispose of it properly at a recycling center or auto parts store.
Step 2: Disconnect Electrical Connectors and Hoses
Carefully disconnect any electrical connectors attached to the radiator or its surrounding components (like the cooling fan). These usually have small locking tabs that you need to depress before pulling the connector apart. Never force them! Next, disconnect the upper and lower radiator hoses. Use hose clamp pliers to loosen the clamps and slide them away from the radiator necks. Then, gently twist and pull the hoses off. If the hoses are stuck, you can use a flathead screwdriver to carefully break the seal between the hose and the radiator neck. Be cautious not to damage the radiator neck. Expect some residual coolant to spill out when you disconnect the hoses. Cap the hose ends to prevent further dripping. If your Altima has a transmission cooler integrated into the radiator (most automatic transmission models do), you'll also need to disconnect the transmission cooler lines. These are typically secured with quick-connect fittings. Use a small screwdriver or pick to release the retaining clips, and then carefully pull the lines out. Be prepared for a small amount of transmission fluid to spill out. Have some caps ready to plug the lines. Label the lines so you know which one goes where during reassembly!
Step 3: Remove the Cooling Fan(s)
The cooling fan assembly is usually attached to the radiator with bolts or clips. Remove the fasteners to detach the fan assembly. In some cases, you may need to disconnect the fan shroud (the plastic housing that surrounds the fan) before you can remove the entire assembly. Pay attention to how the fan assembly is oriented so you can reinstall it correctly. Set the fan assembly aside in a safe place.
Step 4: Remove the Radiator
With everything disconnected, you can now remove the radiator itself. It's usually held in place by mounting brackets at the top and bottom. Remove the bolts or fasteners that secure the radiator to these brackets. You might need to wiggle the radiator slightly to free it from the brackets. Carefully lift the radiator out of the engine bay. Be mindful of the A/C condenser, which is often located in front of the radiator. Avoid damaging the condenser fins. If the radiator is stuck, double-check that you've removed all the fasteners and disconnected all the hoses and lines.
Step 5: Inspect and Clean
Before installing the new radiator, inspect the area around the radiator mounting brackets. Clean away any dirt, debris, or corrosion. If you notice any damage to the A/C condenser fins, you can use a radiator fin comb to carefully straighten them. This will improve airflow and cooling efficiency. Also, check the condition of the radiator hoses. If they are cracked, brittle, or showing signs of wear, it's a good idea to replace them while you have everything apart.
Step 6: Install the New Radiator
Carefully lower the new radiator into the engine bay. Align it with the mounting brackets and secure it with the bolts or fasteners you removed earlier. Make sure the radiator is seated properly and securely in the brackets. Now, reattach the cooling fan assembly. Ensure it's oriented correctly and that all the fasteners are tightened securely. Reconnect the upper and lower radiator hoses. Slide the hose clamps back into their original positions and tighten them securely. Double-check that the hoses are fully seated on the radiator necks and that the clamps are properly positioned. If your Altima has a transmission cooler, reconnect the transmission cooler lines. Ensure the retaining clips are properly engaged and that the lines are securely connected. Reconnect any electrical connectors that you disconnected earlier. Make sure the connectors are fully seated and that the locking tabs are engaged.
Step 7: Refill the Coolant
Before refilling the coolant, make sure the radiator drain petcock (or plug) is closed tightly. Use a funnel to slowly pour the new coolant into the radiator. Refer to your owner's manual for the correct coolant capacity and type. It's best to use a 50/50 mixture of coolant and distilled water. As you fill the radiator, watch for any leaks. If you see any leaks, stop filling and address the issue before proceeding. Once the radiator is full, fill the coolant overflow tank to the "MAX" line.
Tip: Some Altima models have a coolant bleeding procedure to remove air pockets from the cooling system. Consult your owner's manual or a repair manual for specific instructions.
Step 8: Bleed the Cooling System
Air trapped in the cooling system can cause overheating. Most Altimas have a bleeder valve located on or near the thermostat housing. Open the bleeder valve slightly while the engine is running to allow air to escape. Close the valve when a steady stream of coolant flows out. Consult your repair manual for the exact location of the bleeder valve and the proper bleeding procedure for your specific Altima model. If your model doesn't have a bleeder valve, you can try squeezing the upper and lower radiator hoses to help dislodge any trapped air.
Step 9: Test and Monitor
Reconnect the negative (-) battery terminal. Start the engine and let it idle for several minutes. Monitor the temperature gauge closely. If the engine starts to overheat, turn it off immediately and allow it to cool down before troubleshooting. Check for any leaks around the radiator hoses, connections, and drain petcock. Add more coolant to the radiator and overflow tank as needed. Take the Altima for a short test drive and continue to monitor the temperature gauge. Check the coolant level again after the engine has cooled down. You might need to repeat the bleeding process several times to remove all the air from the system. A coolant pressure tester can be used to verify the integrity of the system.
Important Considerations
- Coolant Type: Using the wrong type of coolant can damage your Altima's cooling system. Always use the coolant specified in your owner's manual.
- Hose Clamps: Use new hose clamps if the old ones are corroded or damaged. Over-tightening hose clamps can damage the radiator necks.
- Transmission Cooler Lines: Be very careful when disconnecting and reconnecting the transmission cooler lines. Damaging these lines can lead to transmission problems.
- Air Conditioning Condenser: The A/C condenser is delicate and easily damaged. Be careful not to bend or puncture the condenser fins.
- Torque Specifications: Refer to a repair manual for the correct torque specifications for all bolts and fasteners. Over-tightening can damage components.
Troubleshooting
If you encounter any problems during the radiator replacement, here are some common issues and their solutions:
- Coolant Leaks: Check the hose connections, drain petcock, and radiator seams for leaks. Tighten clamps or replace damaged components.
- Overheating: Check the coolant level, radiator cap, thermostat, and water pump. Bleed the cooling system to remove air pockets.
- Low Coolant Level: Check for leaks. A leaking radiator can cause low coolant.
- Fan not turning on: Check the fan motor, fan relay, and coolant temperature sensor. A faulty sensor may not trigger the fan.
- Difficulty Removing Hoses: Use a hose pick or specialized hose removal tool. Heating the hose slightly with a heat gun (carefully!) can also help.
Replacing your 2013 Nissan Altima's radiator is a rewarding project that can save you money. By following these steps and taking the necessary precautions, you can successfully complete the job yourself. Remember to always prioritize safety and consult a professional mechanic if you're unsure about any part of the process. Good luck!