2014 Nissan Altima Starter Relay Location
So, your 2014 Nissan Altima isn't starting? That's a frustrating situation, and one of the first things many folks suspect – and rightly so – is the starter relay. Tracking down that little culprit can sometimes be tricky, so let's walk through finding the starter relay on your 2014 Altima and how to troubleshoot potential starting issues. I'm here to help you get back on the road.
Understanding the Starter Relay's Role
Before we dive into the location, let's quickly review what the starter relay does. Think of it as a gatekeeper. The starter motor needs a lot of power to crank the engine. The ignition switch, however, isn't designed to handle that much current directly. The starter relay acts as an intermediary. When you turn the key, a small current flows from the ignition switch *to* the relay. This triggers the relay to close, allowing the high-current circuit from the battery to the starter motor to complete, thus engaging the starter. If the relay fails, that gate stays closed, and the starter won't get the power it needs.
Locating the Starter Relay on Your 2014 Altima
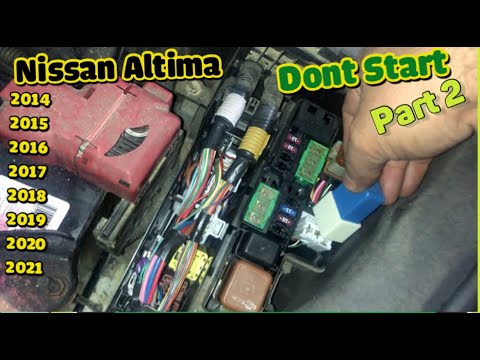
Alright, time to find that relay. The starter relay on your 2014 Nissan Altima is located in the Intelligent Power Distribution Module (IPDM) E/R, which is, more commonly, called the IPDM or IPDM/ER. This module is housed under the hood.
Steps to Locate the IPDM E/R and Relay:
- Pop the Hood: Start by safely opening the hood of your Altima.
- Locate the IPDM E/R: Stand in front of your vehicle facing the engine. The IPDM E/R is a black plastic box usually found on the passenger side of the engine compartment, near the battery and the front of the car. It's a rectangular box with several wires and connectors going into it. Don't confuse it with the Engine Control Module (ECM), which is also usually black, but smaller, and might be mounted closer to the firewall.
- Open the IPDM E/R Cover: The IPDM E/R has a cover that's usually held in place by clips or latches. Gently release these clips to remove the cover. Be careful not to break them.
- Identify the Starter Relay: Once the cover is off, you'll see a collection of relays and fuses. The starter relay is typically a small, cube-shaped component. *This is the crucial part: its location within the IPDM E/R can vary slightly depending on the specific options your Altima has.* The best way to be absolutely sure is to consult the diagram on the inside of the IPDM E/R cover. This diagram shows the layout of the fuses and relays, and it will label the starter relay. If the diagram is missing, your owner's manual will have this information. If neither is available you can also search online for the diagram of your specific make/model/year Altima. A quick search for "2014 Nissan Altima IPDM E/R Relay Diagram" should turn up a visual guide.
Important Note: The relay is usually labeled something like "Starter Relay," "ST Relay," or similar. The diagram is key to avoiding confusion with other relays in the box.
Troubleshooting Starting Problems: Is it Really the Relay?
Okay, you've found the relay. Now what? Before you run out and buy a new one, let's do some quick troubleshooting to make sure the relay is actually the problem. Many starting problems appear to be relay-related, but are actually caused by other issues.
Common Starting Problems and Checks:
- Dead Battery: The most obvious, but often overlooked. Make sure your battery has a good charge. Use a voltmeter to check the voltage. A fully charged battery should read around 12.6 volts. If it's below 12 volts, the battery might be the issue.
- Loose or Corroded Battery Cables: Check the battery terminals and cable connections for corrosion or looseness. Clean the terminals with a wire brush if necessary and ensure the connections are tight.
- Faulty Starter Motor: The starter motor itself could be failing. If you hear a clicking sound when you turn the key, but the engine doesn't crank, the starter motor might be the culprit.
- Faulty Ignition Switch: The ignition switch sends the signal to the relay. If the switch is bad, the relay won't receive the signal.
- Neutral Safety Switch: Automatic transmission vehicles have a neutral safety switch that prevents the engine from starting unless the transmission is in Park or Neutral. If this switch is faulty, it can prevent the starter from engaging.
- Security System Issues: A malfunctioning anti-theft system could prevent the engine from starting.
Testing the Starter Relay:
Here are a couple of methods to test the starter relay:
- The Swap Test: This is the simplest test. Locate another identical relay in the IPDM E/R (e.g., the horn relay). Swap the suspected starter relay with the known good relay. Now try to start the car. If the car starts, the original relay is bad. If the car doesn't start, and the horn now doesn't work, then the swapped relay is bad. If the car *still* doesn't start, and the horn works after the swap, the problem lies elsewhere. Important: Make sure the relays are identical in terms of voltage and amperage ratings before swapping them.
- Using a Multimeter: This requires a bit more knowledge, but it's a more definitive test. You'll need a multimeter and some basic understanding of electrical circuits. You can test the relay's continuity and its ability to switch when power is applied. There are numerous online tutorials on how to test a relay with a multimeter. Look for videos or articles specifically related to testing automotive relays.
Tools You Might Need:
- Socket set or wrenches (for removing the IPDM E/R cover, if necessary)
- Screwdriver (for releasing clips)
- Wire brush (for cleaning battery terminals)
- Voltmeter or Multimeter (for testing battery voltage and relay continuity)
- Jumper wire (for testing purposes - *use with caution and knowledge*)
Replacing the Starter Relay
If you've confirmed that the starter relay is the problem, replacing it is usually a straightforward process.
Steps to Replace the Relay:
- Disconnect the Negative Battery Terminal: This is a crucial safety step to prevent short circuits.
- Locate the Faulty Relay: As determined earlier.
- Remove the Old Relay: The relay should pull straight out. It might be a bit snug, but avoid using excessive force. A relay puller tool can be helpful, but often isn't necessary.
- Install the New Relay: Make sure the new relay is the correct replacement for your vehicle (check the part number). Align the pins and press the new relay firmly into place.
- Reconnect the Negative Battery Terminal:
- Test the Car: Try starting the engine to ensure the new relay is working properly.
Potential Costs
Here's a breakdown of potential costs:
- Starter Relay: A new starter relay typically costs between $10 and $30.
- Battery Terminal Cleaning: Cleaning the terminals yourself is free (assuming you have the tools). A shop might charge around $20-$40 for this service.
- Starter Motor Replacement: If the starter motor is the problem, replacement can cost between $200 and $500, depending on the part and labor involved.
- Professional Diagnosis: If you're unsure about diagnosing the problem yourself, a mechanic will likely charge an hourly rate for diagnostic work, usually between $80 and $150 per hour.
When to Seek Professional Help
While replacing a starter relay is often a simple DIY task, there are times when it's best to seek professional help:
- If you're not comfortable working on your car's electrical system.
- If you've tried the troubleshooting steps and are still unable to identify the problem.
- If you suspect a more complex issue, such as a problem with the ECM or security system.
- If you are unsure which relay to swap or remove.
A qualified mechanic can accurately diagnose the problem and perform the necessary repairs, ensuring your car is running safely and reliably.
Remember to always prioritize safety when working on your car. Disconnect the battery before working on any electrical components, and use caution when handling tools. Hopefully, this helps you get your 2014 Nissan Altima back on the road! Good luck!