2014 Nissan Murano Sun Visor Replacement
So, you're having trouble with the sun visor on your 2014 Nissan Murano? You're not alone! It's a fairly common issue with this generation of Murano, often involving sagging, breaking at the pivot point, or just generally becoming unusable. The good news is that replacing it yourself is a very manageable DIY project that can save you some money over going to the dealership. Let's walk through the problem and the solution.
Understanding the Problem: Why Your Murano's Sun Visor Fails
Before diving into the repair, it's helpful to understand why these visors tend to fail. There are a few common culprits:
- Wear and Tear: This is the most obvious. Over years of use, the internal mechanisms that hold the visor in place can weaken. The constant adjusting and pivoting take their toll, causing the visor to droop or become loose.
- Material Degradation: The materials used in the visor (plastic, fabric, and internal supports) can degrade over time, especially with exposure to sunlight and heat. This can lead to cracking, splitting, and general weakening of the structure. The UV rays hitting the visor day after day cause the plastic to become brittle.
- Broken Pivot Point: This is a frequent complaint. The plastic around the pivot point, where the visor attaches to the headliner, is a common weak spot. A sudden forceful adjustment or even just repeated use can cause it to crack or break entirely. If you see small pieces of plastic on your seat, this is likely the cause.
- Internal Spring Failure: Some visors have internal springs that provide tension and hold them in position. These springs can weaken or break over time, leading to a sagging or loose visor.
- Accidental Damage: Sometimes, it’s simply accidental damage – hitting the visor, snagging something on it, or even a pet getting a little too enthusiastic can cause it to break.
Is Replacement the Right Solution?
In most cases, replacement is the best course of action. While you might find some temporary fixes online (like using Velcro or attempting to glue a broken pivot point), these are usually short-lived and often look unsightly. A new sun visor will restore both the functionality and the appearance of your Murano.
When Not to Replace:
There are a few rare instances where you might consider alternatives:
- Minor Sagging (and you're very handy): If the visor is only slightly sagging and you're comfortable with DIY upholstery work, you might be able to tighten the fabric or reinforce the internal supports. However, this is a more involved process than replacement and requires specialized tools and skills.
- Cosmetic Damage Only: If the visor is fully functional but has a small tear in the fabric, you *could* try covering it with a fabric patch or even replacing the fabric entirely. Again, this is a more advanced DIY project.
For the vast majority of cases involving significant sagging, a broken pivot point, or internal mechanism failure, replacement is the most practical and reliable solution.
Gathering Your Tools and Parts
Before you start, make sure you have everything you need. This will make the process much smoother and prevent you from getting stuck halfway through.
Tools Required:
- Screwdriver Set: A Phillips head screwdriver is essential. A small flathead screwdriver might be useful for prying or releasing clips.
- Trim Removal Tool (Optional but Recommended): These plastic tools are designed to gently pry off trim pieces without damaging them. They're inexpensive and can save you from scratching your interior.
- Socket Set (Possibly): Some visors are held in place with screws that require a socket wrench. A small socket set with various sizes will be helpful.
- Safety Glasses: Protect your eyes from falling debris.
- Gloves (Optional): To protect your hands.
Finding the Right Replacement Sun Visor:
This is crucial. You need to get the correct visor for your 2014 Nissan Murano. Here are some tips:
- Check Your Vehicle's VIN: Your VIN (Vehicle Identification Number) is the most accurate way to identify the correct part. Use it when searching online or at auto parts stores.
- Specify the Side: Sun visors are side-specific (driver's side vs. passenger's side). Make sure you order the correct one.
- Match the Color: Muranos come in various interior colors. Check the color code on your vehicle's sticker (usually located on the driver's side door jamb) to ensure you get a matching visor. Pay particular attention to terms like "Gray," "Beige," "Tan," etc.
- Consider OEM vs. Aftermarket:
- OEM (Original Equipment Manufacturer): These are the same parts that came with your Murano from the factory. They're usually more expensive but offer the best fit and quality. You can find them at Nissan dealerships or online parts retailers.
- Aftermarket: These are parts made by third-party manufacturers. They're often less expensive than OEM parts, but the quality can vary. Read reviews carefully before purchasing.
- Check for Features: Some Murano visors have lighted vanity mirrors or extendable sections. Make sure your replacement visor has the same features as your original.
Where to Buy: You can find replacement sun visors at:
- Nissan Dealerships: Guaranteed to be the correct part, but usually the most expensive option.
- Online Auto Parts Retailers: Sites like RockAuto, AutoZone, Advance Auto Parts, and eBay offer a wide selection of OEM and aftermarket visors.
- Local Auto Parts Stores: Good for getting parts quickly, but the selection might be limited.
- Salvage Yards: A budget-friendly option, but the visor might be used and have some wear and tear. Ensure there are no rips or tears.
Approximate Cost:
The cost of a replacement sun visor can vary depending on the brand, whether it's OEM or aftermarket, and where you buy it. Expect to pay:
- Aftermarket: $30 - $80
- OEM: $80 - $150+
Labor costs at a repair shop or dealership can add another $50 - $150, making DIY replacement a significant cost saver.
Step-by-Step Replacement Guide
Now, let's get to the actual replacement process. These steps are a general guide, and your specific Murano might have slight variations. Always exercise caution and consult your owner's manual if needed.
- Prepare the Area: Park your Murano in a well-lit area and turn off the ignition. Consider covering your seat with a towel to protect it from dirt and scratches.
- Remove the Old Visor:
- Locate the Mounting Screws or Clips: Look for screws or plastic clips that hold the visor to the headliner. These are typically located near the pivot point and the visor clip.
- Remove the Screw Covers (If Applicable): Some visors have small plastic covers that conceal the screws. Use a small flathead screwdriver or trim removal tool to gently pry them off. Be careful not to break them.
- Remove the Screws: Use the appropriate screwdriver to remove the screws. Place the screws in a safe place so you don't lose them.
- Release the Visor Clip: The visor clip is usually held in place by a screw or a push-in clip. Remove the screw or gently pry out the clip with a trim removal tool.
- Detach the Visor: Once all the screws and clips are removed, gently pull the visor away from the headliner. It should come free easily. If there's any resistance, double-check that you've removed all the fasteners.
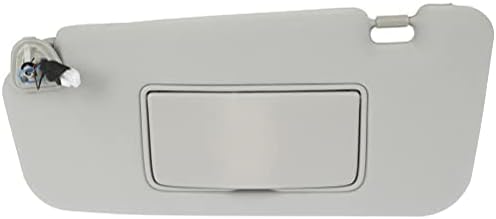
- Disconnect the Electrical Connector (If Applicable): If your visor has a lighted vanity mirror, it will have an electrical connector. Disconnect it carefully. Some connectors have a small release tab that you need to press.
- Install the New Visor:
- Connect the Electrical Connector (If Applicable): If your new visor has a lighted vanity mirror, connect the electrical connector. Make sure it clicks into place securely.
- Align the Visor: Align the new visor with the mounting holes in the headliner.
- Reinstall the Screws or Clips: Reinstall the screws or clips that hold the visor in place. Tighten the screws securely, but don't overtighten them, as this could damage the headliner or the visor.
- Reinstall the Visor Clip: Reinstall the visor clip and secure it with the screw or push-in clip.
- Reinstall the Screw Covers (If Applicable): Snap the screw covers back into place.
- Test the Visor:
- Move the Visor: Move the visor up and down and side to side to make sure it moves freely and stays in position.
- Test the Vanity Mirror Light (If Applicable): If your visor has a lighted vanity mirror, test the light to make sure it works.
Troubleshooting and Tips
Here are some common issues you might encounter and how to deal with them:
- Screws are Stripped: If the screws are stripped, you can try using a rubber band or steel wool to fill the gap between the screwdriver and the screw head. You can also try using a screw extractor tool.
- Plastic Clips are Broken: If the plastic clips are broken, you can purchase replacement clips at an auto parts store.
- Visor Doesn't Stay in Place: Double-check that you've tightened all the screws securely. If the visor still doesn't stay in place, the internal mechanism might be defective. Consider returning the visor for a replacement.
- Electrical Connector is Difficult to Disconnect: Be gentle and look for a release tab on the connector. Don't force it, as you could damage the connector.
- Can't Find the Correct Visor Color: If you're having trouble matching the visor color, take your old visor to an auto parts store or upholstery shop. They might be able to help you find a matching color.
- Headliner Material is Damaged: If the headliner material is damaged around the mounting holes, you can try using a small piece of fabric to reinforce the area.
Important Tip: When working with plastic trim pieces, always use gentle pressure and avoid forcing anything. Plastic can break easily, especially in cold weather.
Final Thoughts
Replacing your 2014 Nissan Murano's sun visor is a straightforward DIY project that can save you money and restore the functionality and appearance of your vehicle. By following these steps and taking your time, you can easily complete the job yourself. Remember to double-check the part number and color code to ensure you get the correct replacement visor. If you're uncomfortable with any of these steps, don't hesitate to seek professional assistance from a qualified mechanic.