2014 Nissan Rogue Battery Replacement
Alright, let's talk about replacing the battery in your 2014 Nissan Rogue. This is a job that, while seemingly straightforward, can have a few nuances. We'll cover everything from identifying the correct battery to proper disconnection and reconnection procedures to avoid common pitfalls. I'm assuming you've got some wrenching experience and know your way around basic hand tools. Let's get started.
Understanding Your 2014 Rogue's Battery Needs
First and foremost, you need the right battery. The 2014 Nissan Rogue typically uses a Group Size 35 battery. However, always double-check your owner's manual or the battery currently installed in your Rogue. Don't just assume. Using the wrong size battery can lead to fitment issues and potentially damage your vehicle.
You'll also want to pay attention to the Cold Cranking Amps (CCA) rating. CCA indicates the battery's ability to deliver a starting current at 0°F (-18°C). Your Rogue needs a battery with sufficient CCA to start reliably in cold weather. Refer to your owner's manual or the specifications on your old battery for the recommended CCA rating. A value of 640 CCA or higher is generally a good starting point, but do not go lower than the minimum specified by Nissan.
AGM (Absorbent Glass Mat) batteries are a popular upgrade choice. They offer several advantages over traditional flooded lead-acid batteries, including:
- Longer Lifespan: AGM batteries are more resistant to vibration and cycling, leading to a longer lifespan.
- Spill-Proof Design: The electrolyte is absorbed in a fiberglass mat, making them spill-proof.
- Better Performance: AGM batteries often provide better starting power and handle deep discharges more effectively.
While AGM batteries are more expensive, the benefits often outweigh the cost, especially if you live in a region with extreme temperatures or frequently use accessories that drain the battery. If you choose an AGM battery, you don't *typically* need to reprogram anything on your Rogue, but it's always a good idea to consult with your local Nissan dealership to confirm. Some vehicles with sophisticated charging systems may benefit from reprogramming to optimize charging for AGM technology.
Tools and Materials Required
Before you even pop the hood, gather your tools. You'll need:
- New Battery (Group Size 35, appropriate CCA rating)
- Socket Wrench Set: A 10mm socket and extension are crucial for removing the battery terminals and hold-down clamp.
- Wrench Set: You may need a wrench, often also 10mm, depending on the battery terminal configuration.
- Battery Terminal Cleaner: This will help remove corrosion and ensure a good connection.
- Battery Terminal Protector: This prevents future corrosion.
- Gloves: Safety first! Battery acid is corrosive.
- Safety Glasses: Protect your eyes from splashes.
- Shop Rags: For cleaning up any spills or messes.
- Memory Saver (Optional): This device plugs into the cigarette lighter or OBDII port and provides a temporary power source to prevent the loss of radio presets, seat memory settings, and other electronic configurations. Highly recommended.
Step-by-Step Battery Replacement Procedure
1. Preparation and Safety
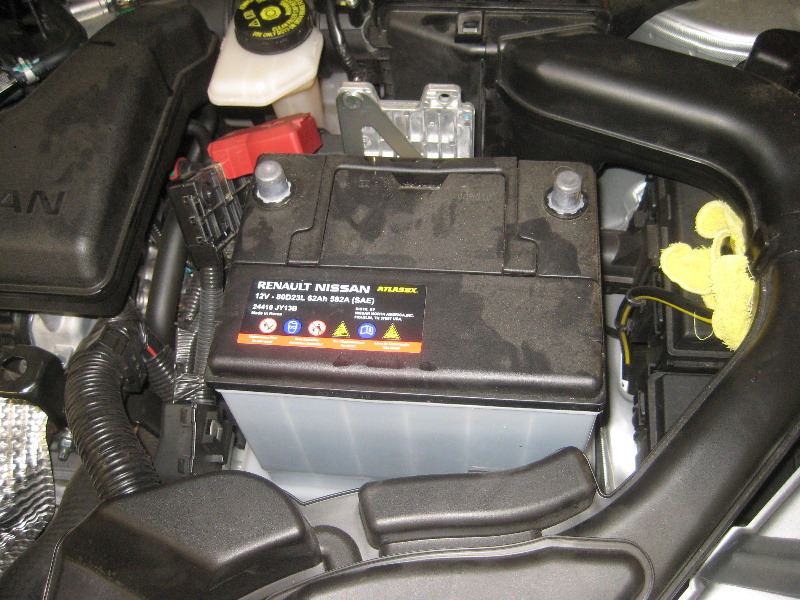
Park your Rogue on a level surface, turn off the ignition, and engage the parking brake. Open the hood and secure it properly. Locate the battery. In the 2014 Rogue, it's typically found under the hood on the driver's side. Put on your gloves and safety glasses.
2. Disconnecting the Battery
This is the most important step, and it needs to be done correctly to avoid electrical issues. Always disconnect the negative (-) terminal first.
- Locate the negative (-) battery terminal. It's usually marked with a "-" symbol and is often black.
- Using your 10mm socket wrench, loosen the nut on the negative terminal clamp. Be careful not to overtighten it.
- Carefully remove the negative terminal clamp from the battery post. You might need to gently wiggle it. Avoid pulling on the cable itself.
- Tuck the negative terminal clamp away from the battery to prevent accidental contact. Some people wrap it in a rag or secure it with tape.
- Repeat the process for the positive (+) terminal. The positive terminal is usually marked with a "+" symbol and is often red.
Important: Avoid touching the positive terminal with your wrench while it's still connected to the negative terminal. This can create a short circuit and damage your vehicle's electrical system.
3. Removing the Battery Hold-Down
The battery is secured by a hold-down clamp, which prevents it from moving around while driving. The design varies slightly between models. It will often have a bolt or a clip to release it. Using your socket wrench, remove the bolt or release the clip securing the hold-down clamp. Carefully remove the clamp.
4. Removing the Old Battery
Carefully lift the old battery out of the battery tray. Batteries can be heavy, so use proper lifting techniques to avoid injury. Keep the battery upright to prevent acid from spilling.
5. Cleaning the Battery Tray and Terminals
Now is the perfect time to clean the battery tray and terminals. Use a battery terminal cleaner and a wire brush to remove any corrosion from the terminals. Corrosion can prevent a good electrical connection, leading to starting problems and other issues.
Inspect the battery tray for any damage or corrosion. Clean it with a mild detergent and water if necessary.
6. Installing the New Battery
Carefully lower the new battery into the battery tray. Make sure it's oriented correctly, with the terminals facing the right direction.
7. Securing the Battery Hold-Down
Reinstall the battery hold-down clamp and tighten the bolt or secure the clip. Make sure the battery is securely held in place.
8. Connecting the Battery Terminals
This is the reverse of the disconnection process, and it's just as important to do correctly. Always connect the positive (+) terminal first.
- Carefully attach the positive (+) terminal clamp to the positive (+) battery post. Ensure it's seated properly.
- Tighten the nut on the positive terminal clamp. Do not overtighten it.
- Repeat the process for the negative (-) terminal.
After connecting the terminals, apply battery terminal protector to prevent future corrosion.
9. Final Checks
Double-check that all connections are tight and secure. Make sure the battery hold-down clamp is properly installed and tightened. Close the hood.
10. Starting the Engine
Start your Rogue and let it run for a few minutes to allow the charging system to recharge the battery. Check for any warning lights on the dashboard. If you used a memory saver, verify that your radio presets and other settings are still intact.
Common Mistakes and Troubleshooting
Here are a few common mistakes to avoid:
- Connecting the Terminals in the Wrong Order: This can damage your vehicle's electrical system. Always disconnect the negative (-) terminal first and connect the positive (+) terminal first.
- Overtightening the Terminal Clamps: This can damage the battery posts or terminal clamps. Tighten them just enough to ensure a secure connection.
- Forgetting to Clean the Terminals: Corrosion can prevent a good electrical connection.
- Using the Wrong Battery Size or CCA Rating: This can lead to fitment issues or starting problems.
If you experience any problems after replacing the battery, such as starting issues or warning lights, consult a qualified mechanic.
Disposing of the Old Battery
Old batteries are hazardous waste and should be disposed of properly. Most auto parts stores and battery retailers will accept old batteries for recycling. Never throw a battery in the trash.
Conclusion
Replacing the battery in your 2014 Nissan Rogue is a manageable task for the experienced DIYer. By following these steps and taking the necessary precautions, you can save money and ensure your Rogue starts reliably. Remember, when in doubt, consult a qualified mechanic. Good luck!
Disclaimer: This guide is for informational purposes only and should not be considered a substitute for professional advice. Always consult your owner's manual and follow safety precautions when working on your vehicle. I am not responsible for any damages or injuries that may occur as a result of following this guide.