2014 Nissan Rogue Blower Motor Resistor
The 2014 Nissan Rogue, like many modern vehicles, relies on a sophisticated climate control system to keep occupants comfortable. At the heart of this system lies the blower motor, responsible for circulating air throughout the cabin, whether it's heated, cooled, or simply fresh air from outside. A critical component in controlling the blower motor's speed is the blower motor resistor, a seemingly simple device that plays a crucial role in regulating the airflow experienced by the driver and passengers. This article will delve into the functionality, diagnosis, and replacement of the blower motor resistor in a 2014 Nissan Rogue, providing a technical understanding suitable for curious readers and amateur engineers alike.
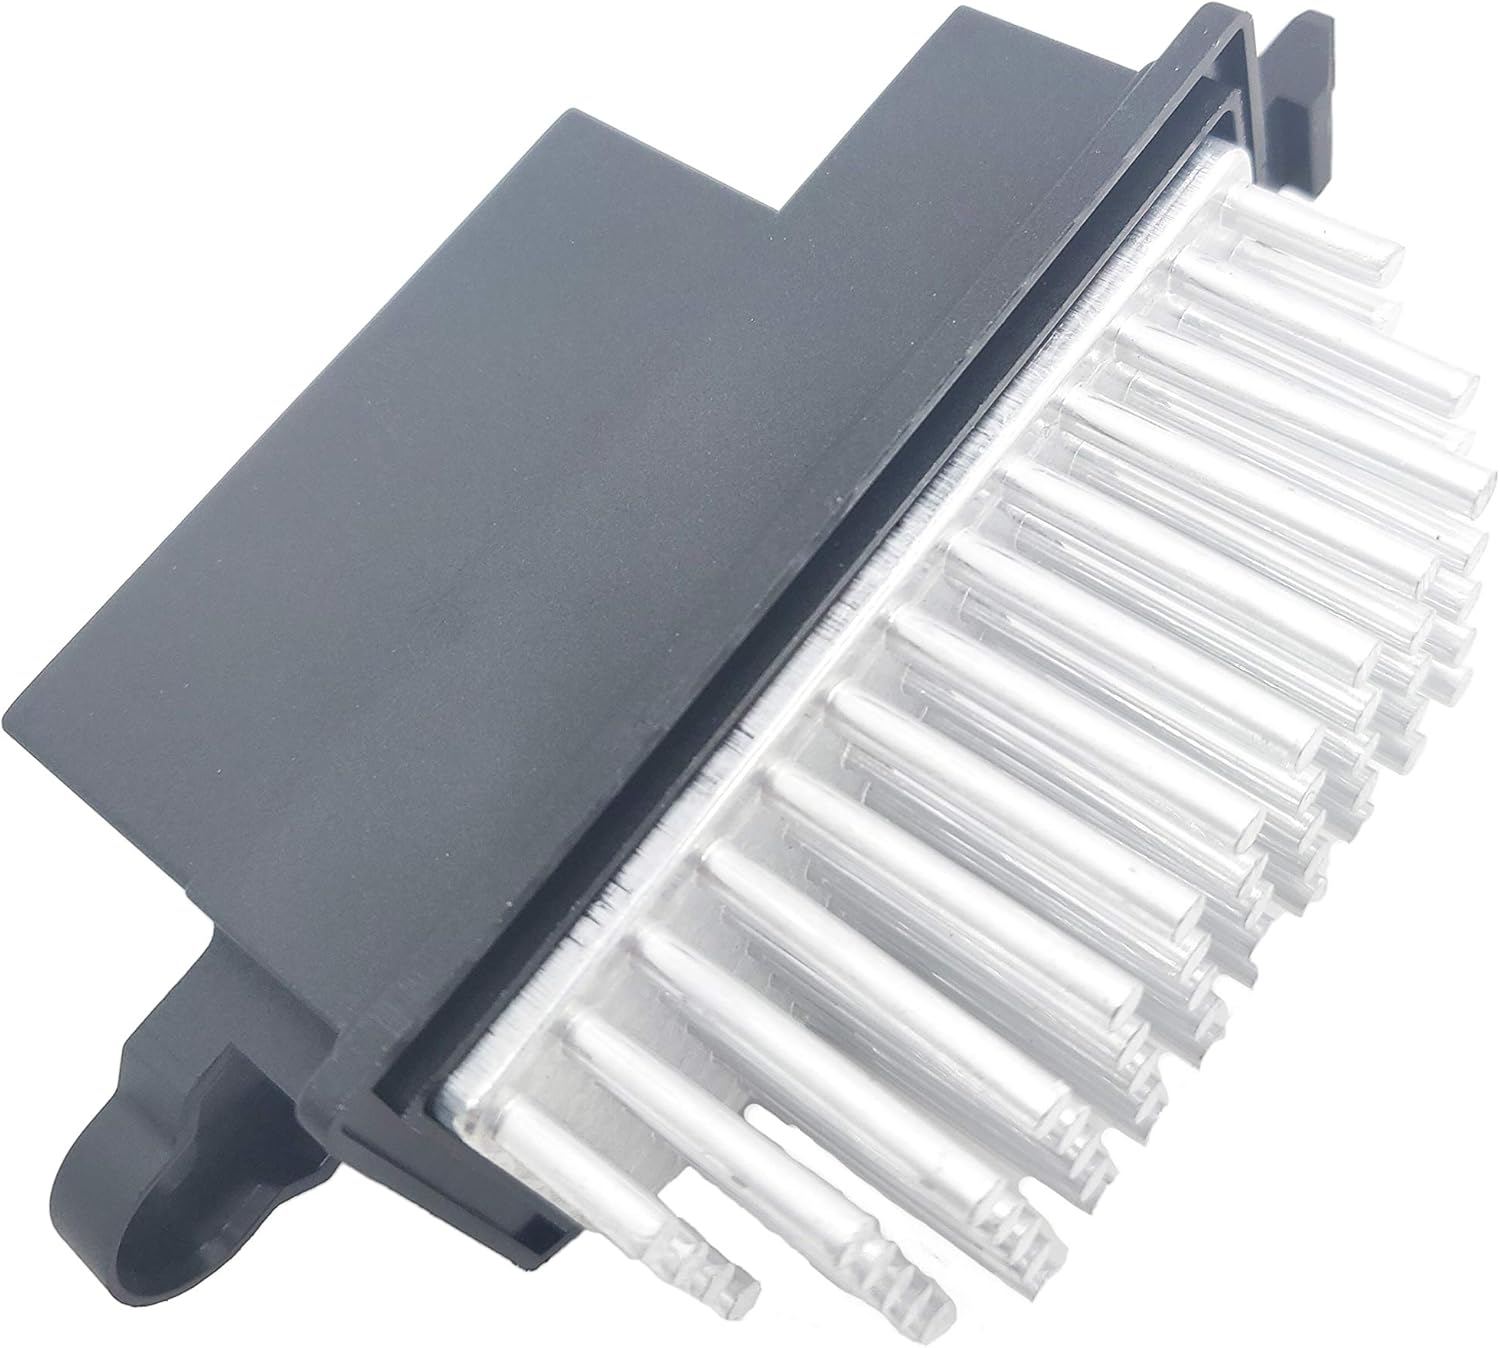
Understanding the Blower Motor Resistor
The blower motor resistor's primary function is to control the voltage supplied to the blower motor. Blower motors are DC motors, and their speed is directly proportional to the voltage they receive. Without a resistor, the blower motor would always run at its maximum speed whenever power is applied. This would be both noisy and inefficient.
The resistor accomplishes this voltage control by introducing varying levels of electrical resistance into the blower motor's circuit. This resistance drops the voltage supplied to the motor, thereby reducing its speed. Most vehicles, including the 2014 Rogue, use a series of resistors, each corresponding to a different blower motor speed setting. The driver selects the desired fan speed using the climate control panel, which in turn selects the appropriate resistor in the circuit.
Imagine a water hose analogy. The blower motor is the sprinkler head, and the water pressure is the voltage. If you fully open the spigot (no resistance), the sprinkler sprays with maximum force. The resistor acts like partially closing the spigot, reducing the water pressure (voltage) and thus the sprinkler's output (blower motor speed).
Construction and Location
The blower motor resistor typically consists of a small circuit board with several wire-wound resistors connected in series. These resistors are often mounted on a heat sink, usually made of aluminum, to dissipate the heat generated as they restrict the flow of electricity. This heat is a byproduct of the voltage drop, a necessary evil for speed control.
In the 2014 Nissan Rogue, the blower motor resistor is typically located near the blower motor housing, usually underneath the dashboard on the passenger side. Its precise location can vary slightly depending on the specific trim level and options package, but it's generally accessible by removing a lower dash panel or kick panel. This location is often chosen because the blower motor resistor relies on the airflow from the blower motor to cool itself, preventing overheating and premature failure.
Symptoms of a Failing Blower Motor Resistor
A failing blower motor resistor can manifest in several ways. Recognizing these symptoms early can help diagnose the problem and prevent further damage to the blower motor or other components of the climate control system.
- No blower motor operation on certain speed settings: This is the most common symptom. For example, the blower motor might work only on the highest setting, while all lower settings produce no airflow. This indicates that the resistors corresponding to those lower speed settings have failed.
- Blower motor only works on high speed: This often indicates a complete failure of all resistors except for the one that provides a direct connection to the blower motor, bypassing the resistors altogether for maximum speed.
- Blower motor operates intermittently: The blower motor might work sometimes and not others, or it might cut out while driving. This can be caused by a loose connection or a resistor that is intermittently failing due to heat or vibration.
- Blower motor stuck on one speed: Regardless of the selected speed on the control panel, the blower motor operates at a constant speed, indicating a short circuit or a failure in the resistor network that prevents speed changes.
- Burning smell coming from the vents: A failing resistor can overheat, potentially causing a burning smell to emanate from the vents. This is a serious warning sign and requires immediate attention. This often means the resistor is drawing excessive current due to a short or a faulty blower motor.
Diagnosing a Faulty Blower Motor Resistor
Diagnosing a faulty blower motor resistor involves a systematic approach, starting with visual inspection and progressing to electrical testing.
- Visual Inspection: Begin by visually inspecting the blower motor resistor. Look for signs of damage, such as burnt or melted wires, corrosion, or a cracked circuit board. Also, inspect the connector for any signs of corrosion or loose pins. Any visible damage is a strong indicator of a faulty resistor.
- Testing with a Multimeter: A multimeter can be used to test the resistance of each resistor in the blower motor resistor network. Disconnect the resistor from the vehicle's wiring harness. Set the multimeter to the ohms setting. Measure the resistance between the common terminal and each of the other terminals. Compare the measured resistance values to the expected values, which can usually be found in the vehicle's service manual or online repair forums. A significant deviation from the expected values indicates a faulty resistor. Infinity resistance generally means the resistor is open, while zero resistance means it is shorted.
- Voltage Drop Test: While the resistor is connected to the vehicle's wiring harness and the blower motor is running, a voltage drop test can be performed. Select the lowest DC voltage setting on the multimeter and place the probes across each of the resistors while the fan is running on the corresponding setting. A significant voltage drop indicates the resistor is functioning. No voltage drop across a specific resistor, while the fan is set to that speed, can mean that the resistor is not working.
- Checking the Blower Motor: Before replacing the blower motor resistor, it's essential to rule out a faulty blower motor. A failing blower motor can draw excessive current, causing the resistor to overheat and fail prematurely. Test the blower motor by directly applying 12V power to it. If the motor runs erratically or makes unusual noises, it might be drawing too much current and need to be replaced. You can also measure the blower motor's current draw with an ammeter to see if it's within the specified range.
Replacing the Blower Motor Resistor
Replacing the blower motor resistor is a relatively straightforward procedure that can be accomplished with basic hand tools. However, always disconnect the negative battery terminal before working on any electrical components in the vehicle.
- Locate the Blower Motor Resistor: As mentioned earlier, the blower motor resistor is usually located under the dashboard on the passenger side, near the blower motor housing. Refer to the vehicle's service manual or online resources for the exact location.
- Disconnect the Wiring Harness: Carefully disconnect the wiring harness from the blower motor resistor. Take note of the orientation of the connector before disconnecting it. Some connectors have a locking mechanism that needs to be released.
- Remove the Old Resistor: The blower motor resistor is typically held in place by one or two screws or clips. Remove the screws or release the clips to detach the resistor from its mounting location.
- Install the New Resistor: Install the new blower motor resistor in the same location as the old one. Secure it with the screws or clips.
- Connect the Wiring Harness: Reconnect the wiring harness to the blower motor resistor. Ensure that the connector is fully seated and locked in place.
- Test the System: Reconnect the negative battery terminal. Turn on the ignition and test the blower motor on all speed settings to ensure that the new resistor is functioning correctly.
Preventative Measures and Considerations
While blower motor resistor failure can be inevitable, several preventative measures can help extend its lifespan and prevent premature failure:
- Ensure Proper Airflow: A blocked cabin air filter can restrict airflow, causing the blower motor to work harder and potentially drawing more current. This can overheat the blower motor resistor. Replace the cabin air filter regularly as recommended by the vehicle's manufacturer.
- Check for Water Leaks: Water leaks into the HVAC system can corrode the blower motor resistor and its connector, leading to failure. Address any water leaks promptly.
- Replace the Blower Motor if Necessary: If the blower motor is drawing excessive current, it can cause the resistor to overheat and fail repeatedly. Consider replacing the blower motor if it's suspected of being faulty.
- Use Quality Replacement Parts: When replacing the blower motor resistor, use a high-quality replacement part from a reputable manufacturer. Cheaper aftermarket parts might not meet the same quality standards and could fail prematurely.
Conclusion: The blower motor resistor, though a relatively simple component, is essential for regulating the airflow in the 2014 Nissan Rogue's climate control system. Understanding its function, recognizing the symptoms of failure, and following proper diagnosis and replacement procedures can help keep the system operating efficiently and comfortably.