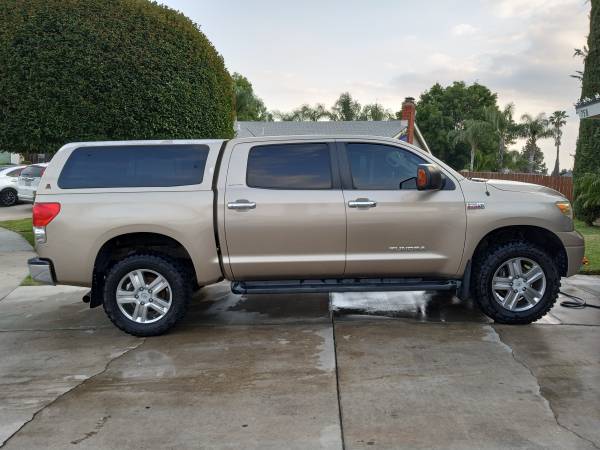
2014 Toyota Tundra Camper Shell For Sale
So, you're looking at a used 2014 Toyota Tundra camper shell for sale, or maybe you already snagged a deal and now you're facing some common issues? Let's talk about it. Camper shells, also known as truck caps or bed toppers, are a fantastic addition to any Tundra, offering security, weather protection, and extra storage. But like any accessory, they can have their quirks. This article will walk you through some potential problems you might encounter with a 2014 Tundra camper shell and, more importantly, how to solve them.
Common Problems and Solutions for 2014 Tundra Camper Shells
Here's a rundown of frequent issues and how to tackle them. Remember, safety first! Always wear appropriate safety glasses and gloves when working on your truck or camper shell.
1. Leaks, Leaks, and More Leaks
This is probably the most common complaint. Water intrusion can damage your cargo and lead to rust. Finding the source of the leak is key.
Possible Causes:
- Poor initial installation: The camper shell wasn't properly sealed to the bed rails.
- Worn or damaged weather stripping: The foam or rubber seal between the shell and the bed has deteriorated.
- Cracks in the shell: Especially around windows or stress points.
- Improperly sealed windows or doors: The seals around the windows and doors on the shell itself are failing.
- Damaged bed rails: Dents or damage to the Tundra's bed rails can prevent a good seal.
- Clogged drain holes: Some shells have drain holes near the windows to remove water, these can clog over time.
Solutions:
- Inspect the Weather Stripping: Carefully examine the weather stripping along the entire perimeter of the shell where it meets the truck bed. Look for cracks, tears, or areas where it's compressed and no longer making good contact. The weather stripping should be soft and pliable. If it's hard and brittle, it needs replacing. You can find replacement weather stripping at most auto parts stores or online. Make sure you get the correct profile (shape) for your shell.
Tool Needed: Utility knife or scraper to remove old adhesive, cleaner (isopropyl alcohol) to prep the surface.
Estimated Cost: $20-$50 for replacement weather stripping. - Seal the Gaps: Even with new weather stripping, you might need to supplement the seal. Use a high-quality silicone sealant specifically designed for automotive or marine use. Apply a bead of sealant along the inside of the shell where it meets the bed rail, paying particular attention to corners and areas where the weather stripping seems thin. Let it cure completely before exposing it to water.
Tool Needed: Caulk gun, putty knife or scraper to smooth the sealant.
Estimated Cost: $10-$20 for sealant. - Address Cracks: Small cracks in the fiberglass shell can be repaired with a fiberglass repair kit. Clean the area thoroughly, apply the fiberglass resin and cloth, and sand it smooth after it cures. For larger cracks or damage, it's best to consult a professional.
Tool Needed: Fiberglass repair kit, sandpaper, mixing tools.
Estimated Cost: $30-$100 for a fiberglass repair kit. Professional repair can range from $100 to several hundred dollars depending on the damage. - Check and Seal Windows and Doors: Inspect the seals around the windows and doors of the shell. If they're leaking, you can try tightening the hardware or replacing the seals. Again, silicone sealant can be used to augment the seal.
Tool Needed: Screwdriver, wrench, sealant.
Estimated Cost: $10-$30 for sealant. Replacement window or door seals can vary widely in price depending on the brand and model of the shell. - Inspect Bed Rails: Dents or damage to your Tundra's bed rails can prevent the shell from sealing properly. Try to smooth out any imperfections with a rubber mallet, or consider using a bed liner or bed rail caps to provide a more even surface.
- Check Drain Holes: Locate the drain holes on the camper shell and use a small wire or pipe cleaner to clear any obstructions.
- Professional Re-installation: If you've tried everything and still have leaks, it might be time to have a professional re-install the shell. They have the experience and tools to ensure a proper seal.
Estimated Cost: $100-$300 for professional installation.
2. Difficulties with Opening and Closing the Rear Door/Window
The rear door or window on the camper shell can become difficult to open or close for a variety of reasons.
Possible Causes:
- Corrosion or rust on hinges or latches: This can cause them to bind.
- Misalignment of the door/window: The shell may have shifted slightly, causing the door/window to rub against the frame.
- Worn or damaged struts (if equipped): Struts assist in opening and closing the door/window. If they're weak, the door/window can be heavy and difficult to operate.
- Debris or ice build-up: Dirt, leaves, or ice can obstruct the movement of the door/window.
Solutions:
- Lubricate Hinges and Latches: Apply a liberal amount of penetrating oil or lubricant to all hinges and latches. Work the door/window back and forth to distribute the lubricant.
Tool Needed: Lubricant spray (WD-40, Liquid Wrench, etc.).
Estimated Cost: $5-$10 for lubricant. - Adjust the Latches: Many camper shells have adjustable latches. Loosen the mounting screws and adjust the position of the latch until the door/window closes smoothly and securely.
Tool Needed: Screwdriver or wrench. - Replace Struts: If the struts are weak or damaged, replace them. You can usually find replacement struts at auto parts stores or online. Make sure you get the correct struts for your shell model.
Tool Needed: Screwdriver or small pry bar.
Estimated Cost: $30-$100 per strut. - Clean the Door/Window and Frame: Remove any debris or ice from the door/window and the surrounding frame. Use a mild detergent and water to clean the surfaces.
- Check Alignment: If the door/window is misaligned, you might need to loosen the bolts that hold the shell to the truck bed and gently shift the shell until the door/window aligns properly. Tighten the bolts back down securely. This is often a two-person job.
3. Electrical Issues (if equipped with lights or wiring)
Some camper shells come with interior lights, brake lights, or other electrical accessories. These can sometimes develop electrical problems.
Possible Causes:
- Loose or corroded wiring connections: This is the most common cause of electrical problems.
- Blown fuses: A short circuit can cause a fuse to blow.
- Faulty wiring: Damaged or frayed wires can cause a short circuit or open circuit.
- Bad ground connection: A poor ground connection can prevent electrical components from working properly.
- Failed light bulb or LED: Lightbulbs and LEDs eventually burn out.
Solutions:
- Inspect Wiring Connections: Carefully inspect all wiring connections for looseness, corrosion, or damage. Clean corroded connections with a wire brush and apply dielectric grease to prevent future corrosion. Tighten any loose connections.
Tool Needed: Wire brush, dielectric grease, pliers, screwdriver.
Estimated Cost: $10-$20 for dielectric grease. - Check Fuses: Check the fuses in the camper shell's wiring harness and in your Tundra's fuse box. Replace any blown fuses with the correct amperage fuse.
Tool Needed: Fuse puller, multimeter (optional).
Estimated Cost: $5-$10 for fuses. - Repair or Replace Faulty Wiring: If you find damaged or frayed wires, repair them with electrical tape or wire connectors. If the wiring is severely damaged, replace it.
Tool Needed: Wire strippers, wire connectors, electrical tape.
Estimated Cost: $10-$30 for wiring supplies. - Check Ground Connection: Ensure that the ground wire from the camper shell is securely connected to a clean, rust-free metal surface on your Tundra.
Tool Needed: Wrench, wire brush. - Replace Light Bulbs or LEDs: Replace any burned-out light bulbs or LEDs. Make sure you get the correct type of bulb or LED for your camper shell.
4. Damage to the Fiberglass Shell
Fiberglass shells are durable, but they can still be damaged by impacts, tree limbs, or other hazards.
Possible Causes:
- Impacts: Collisions or impacts with objects.
- Stress Cracks: Cracks can form over time due to stress on the shell.
- UV Exposure: Prolonged exposure to the sun can cause the fiberglass to become brittle and crack.
Solutions:
- Minor Cracks and Scratches: As mentioned earlier, use a fiberglass repair kit for minor cracks and scratches. Follow the instructions on the kit carefully.
Tool Needed: Fiberglass repair kit, sandpaper, mixing tools.
Estimated Cost: $30-$100 for a fiberglass repair kit. - Professional Repair: For significant damage, it's best to take the shell to a professional fiberglass repair shop. They have the expertise and equipment to repair the shell properly.
Estimated Cost: Varies widely depending on the damage. Get a quote from several shops before proceeding. - Prevention: Park your Tundra in shaded areas to protect the shell from UV exposure. Be careful when driving in wooded areas to avoid hitting tree limbs.
Important Note: Before buying a used 2014 Tundra camper shell, thoroughly inspect it for any of these problems. Check for leaks, test the door/window, and inspect the wiring. Addressing these issues beforehand can save you time and money in the long run.
By understanding these common issues and their solutions, you can keep your 2014 Toyota Tundra camper shell in top condition and enjoy the benefits it provides for years to come. Remember to always prioritize safety when working on your truck. If you're not comfortable performing a repair yourself, don't hesitate to consult a qualified mechanic or camper shell specialist. Good luck!