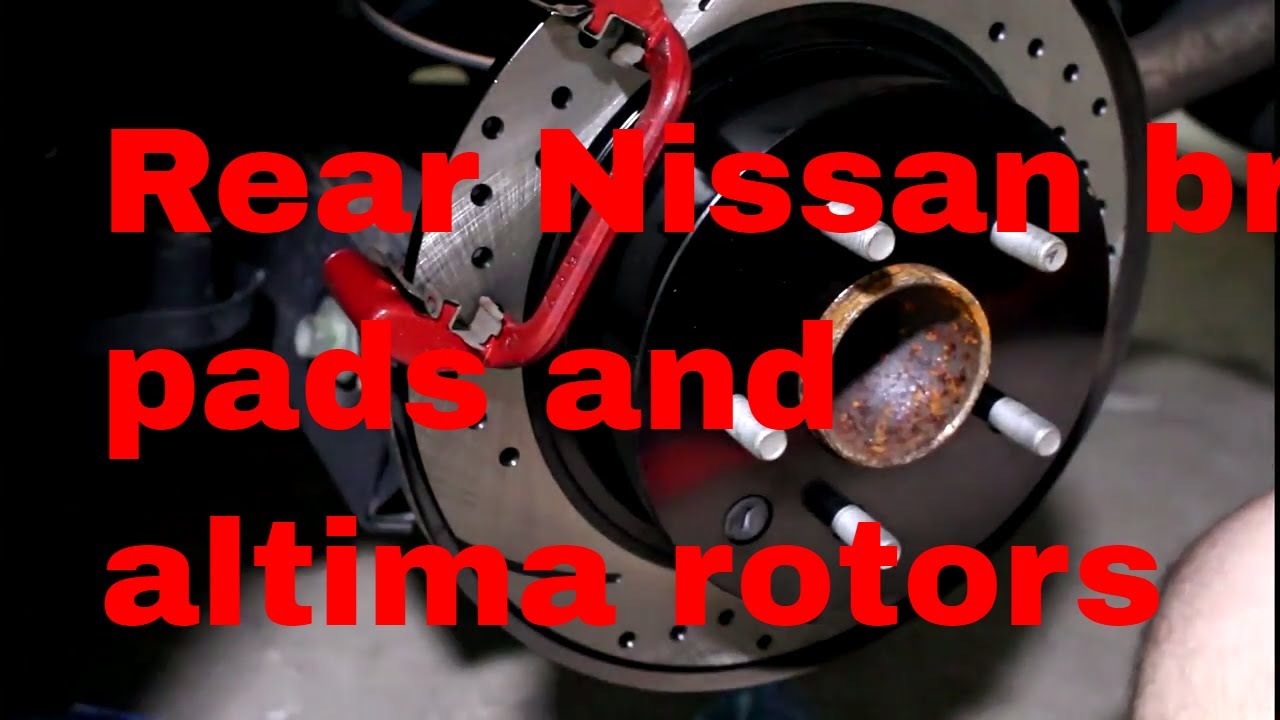
2015 Nissan Altima Brakes And Rotors
Experiencing brake problems with your 2015 Nissan Altima? You're not alone. Brake issues are a common concern for Altima owners, and thankfully, most can be diagnosed and resolved with a bit of knowledge and effort. This article will walk you through common brake problems in the 2015 Altima, potential causes, and steps you can take to fix them.
Common Brake Problems in the 2015 Nissan Altima
Before diving into solutions, let's identify the usual suspects:
- Squealing or Screeching Brakes: This is perhaps the most common complaint.
- Grinding Noises: A more serious sound than squealing.
- Pulsating Brake Pedal: Felt when applying the brakes.
- Spongy or Soft Brake Pedal: The pedal feels soft and doesn't provide firm stopping power.
- Pulling to One Side During Braking: The car veers to the left or right when you brake.
- Brake Light Stays On: Even when the parking brake is disengaged.
Squealing or Screeching Brakes
Cause: Often, this noise is caused by worn brake pads. Many brake pads have a built-in wear indicator – a small piece of metal that rubs against the rotor when the pads are nearing the end of their life. This creates the squealing sound to alert you.
Solution: Replacing your brake pads is the most likely solution. While it's possible the squealing is due to debris or surface rust (especially after the car sits for a while), it's best to inspect the pads. If they're thin (less than 3mm), replacement is necessary.
Tools Needed: Jack, jack stands, lug wrench, socket set, wrench set, brake caliper compressor tool (or C-clamp), brake cleaner, new brake pads, and possibly new brake rotors.
Approximate Cost: Brake pad replacement can range from $150 to $400 per axle (front or rear), depending on the quality of the pads and whether you choose to DIY or have a professional do the work.
Grinding Noises
Cause: Grinding typically indicates that your brake pads are completely worn down, and the metal backing plate of the pad is now rubbing directly against the brake rotor. This is a serious issue as it can damage the rotors and compromise your braking performance.
Solution: Immediate action is required. Continuing to drive with grinding brakes can severely damage your rotors, potentially requiring their replacement as well. Replace both the brake pads and rotors on the affected axle. Ignoring this problem leads to significantly higher repair costs later.
Tools Needed: Same as above for brake pad replacement, plus potentially a penetrating oil to loosen stubborn rotor retaining screws.
Approximate Cost: Replacing brake pads and rotors can range from $300 to $700 per axle, again depending on parts quality and labor costs.
Pulsating Brake Pedal
Cause: A pulsating brake pedal usually points to warped or unevenly worn brake rotors. This unevenness creates a vibration that you feel in the pedal when braking.
Solution: Replacing the brake rotors is the best solution. In some cases, rotors can be resurfaced (turned) by a professional, but this removes material and can make them more prone to warping again in the future. Replacement is often the more cost-effective and reliable long-term solution. Inspect your brake pads as well; uneven rotor wear can sometimes contribute to premature pad wear.
Tools Needed: Same as above for brake pad and rotor replacement.
Approximate Cost: Similar to the cost of replacing pads and rotors, $300 to $700 per axle.
Spongy or Soft Brake Pedal
Cause: This issue can be caused by several factors:
- Air in the brake lines: Air is compressible, unlike brake fluid, so it reduces the effectiveness of the hydraulic system.
- Low brake fluid: This can also introduce air into the system.
- Leaking brake lines or calipers: A leak reduces the hydraulic pressure.
- Failing master cylinder: The master cylinder is responsible for pressurizing the brake fluid.
Solution:
- Check Brake Fluid Level: Ensure the brake fluid reservoir is filled to the proper level. Use the correct type of brake fluid (DOT 3 or DOT 4, as specified in your owner's manual).
- Bleed the Brakes: Bleeding the brakes removes air from the brake lines. This requires a helper to pump the brake pedal while you open and close the bleeder valves on each caliper in the correct sequence (usually starting with the caliper furthest from the master cylinder).
- Inspect for Leaks: Carefully inspect all brake lines, calipers, and the master cylinder for any signs of leaks. Look for dampness or dripping brake fluid.
- Consider Master Cylinder Replacement: If bleeding the brakes doesn't resolve the issue, and you've ruled out leaks, the master cylinder may be failing. This is a more complex repair best left to a professional.
Tools Needed: Jack, jack stands, lug wrench, socket set, wrench set, brake bleeder wrench, clear tubing, container for collecting brake fluid, brake fluid, and potentially a brake bleeder kit (manual or vacuum-assisted).
Approximate Cost: Brake bleeding can cost $75 to $150. Replacing a brake line can range from $100 to $300. Replacing the master cylinder can cost $200 to $500, including labor.
Pulling to One Side During Braking
Cause: This usually indicates a problem with one of the front brake calipers. It could be a sticking caliper piston, a collapsed brake hose on one side, or uneven brake pad wear between the left and right sides.
Solution:
- Inspect Calipers: Check the calipers for any signs of sticking or damage. Try to compress the caliper piston using a caliper compressor tool. If one piston is much harder to compress than the other, the caliper may be sticking.
- Inspect Brake Hoses: Check the brake hoses for any signs of cracks, swelling, or kinks. A collapsed hose can restrict brake fluid flow to one caliper.
- Check Brake Pads: Compare the thickness of the brake pads on both sides. Uneven wear can indicate a problem with one of the calipers.
- Replace the Caliper or Hose: If you suspect a sticking caliper or a collapsed brake hose, replace the affected component. Replacing calipers should be done in pairs for balanced braking.
Tools Needed: Jack, jack stands, lug wrench, socket set, wrench set, brake caliper compressor tool, brake line wrench, brake cleaner, new caliper or brake hose, brake fluid.
Approximate Cost: Replacing a brake caliper can cost $150 to $400, including labor. Replacing a brake hose can cost $80 to $200.
Brake Light Stays On
Cause: This problem can stem from a few possibilities:
- Parking Brake Engaged (Partially): Ensure the parking brake is fully disengaged. Sometimes the cable can become sticky.
- Low Brake Fluid: As mentioned earlier, low brake fluid can trigger warning lights.
- Faulty Brake Light Switch: The brake light switch is located near the brake pedal and activates the brake lights when you press the pedal. If this switch is faulty, it may constantly signal that the brakes are being applied.
- Faulty ABS Sensor: Rarely, a faulty ABS sensor can trigger the brake light.
Solution:
- Check Parking Brake: Fully release and re-engage the parking brake a few times to ensure it's functioning properly.
- Check Brake Fluid Level: Add brake fluid if necessary.
- Test Brake Light Switch: Locate the brake light switch and test its functionality with a multimeter. If it's faulty, replace it.
- Scan for ABS Codes: Use an OBD-II scanner to check for any ABS-related trouble codes. If codes are present, diagnose and repair the underlying ABS problem.
Tools Needed: Multimeter, OBD-II scanner, wrench set, replacement brake light switch.
Approximate Cost: Replacing a brake light switch is typically a simple and inexpensive repair, costing around $20 to $50. Diagnosing and repairing ABS issues can be more complex and costly, ranging from $100 to several hundred dollars, depending on the problem.
Preventative Maintenance Tips
The best way to avoid brake problems is to practice preventative maintenance. Here are some tips:
- Regular Inspections: Have your brakes inspected at every oil change or at least twice a year.
- Brake Fluid Flushes: Brake fluid absorbs moisture over time, which can reduce its effectiveness and corrode brake components. Have your brake fluid flushed every 2-3 years or as recommended in your owner's manual.
- Gentle Braking: Avoid harsh braking whenever possible. Gradual braking extends the life of your brake pads and rotors.
- Listen for Unusual Noises: Pay attention to any unusual noises coming from your brakes and address them promptly.
When to Seek Professional Help
While some brake repairs can be done DIY, it's important to know when to seek professional help. If you're not comfortable working on your brakes, or if you encounter any of the following situations, it's best to take your 2015 Nissan Altima to a qualified mechanic:
- You're not sure what's causing the problem.
- You lack the necessary tools or experience.
- You suspect a problem with the ABS system.
- You're experiencing significant brake problems that affect your safety.
Disclaimer: This article provides general information and should not be considered a substitute for professional automotive advice. Always consult with a qualified mechanic for diagnosis and repair of your vehicle. Improper brake repairs can be dangerous and may void your vehicle's warranty.