2015 Nissan Altima Exterior Accessories
Welcome, fellow Altima enthusiasts! Today, we're diving deep into the world of exterior accessories for the 2015 Nissan Altima. This generation (specifically the L33 facelift) offered a sleek design, and enhancing its exterior is a common goal for many owners. We'll explore a range of options, from purely aesthetic upgrades to performance-enhancing modifications. Consider this your comprehensive guide to sprucing up your 2015 Altima's curb appeal. We'll touch upon installation difficulties, potential pitfalls, and what you should consider before making any modifications.
Body Kits and Lip Kits
Let's start with the big boys: body kits and lip kits. These are probably the most impactful modifications you can make to your Altima's exterior. A body kit typically includes a front bumper, side skirts, and a rear bumper replacement (or sometimes a rear lip). A lip kit, on the other hand, is a less aggressive option, consisting of attachments that bolt onto the existing bumpers and side skirts.
Material Considerations:
Body and lip kits are commonly made from a few different materials, each with its own pros and cons:
- Polyurethane (PU): This is the most common and generally recommended material. PU is flexible, durable, and relatively inexpensive. It can withstand minor impacts without cracking, making it a good choice for a daily driver.
- Fiberglass: Fiberglass is lighter and often more affordable than PU. However, it's significantly more brittle. Even minor bumps can lead to cracks, and it's generally more difficult to repair. Fiberglass kits often require more extensive prep work before painting.
- Carbon Fiber: The premium choice, carbon fiber is incredibly strong and lightweight. It's also the most expensive. Carbon fiber is often used for accent pieces rather than entire body kits due to its cost. Ensure the carbon fiber has a UV-resistant clear coat to prevent yellowing over time.
Installation Notes:
Installing a body kit is a moderately complex DIY project. A lip kit, being less invasive, is generally easier. Here's a breakdown of the common steps and potential challenges:
- Test Fitting: Always test fit all components before painting. Body kits, especially those from aftermarket manufacturers, often require some trimming or modification to achieve a perfect fit. Don't skip this step!
- Preparation: Sanding, priming, and painting are essential for a professional-looking finish. Proper prep work is crucial for paint adhesion. Use a high-quality automotive primer and paint. Consider using a professional paint shop if you're not experienced with automotive painting.
- Removal of Existing Components: You'll likely need to remove your factory bumpers and side skirts. Refer to your Altima's service manual for detailed instructions on removing these components safely.
- Mounting: Body kits typically use a combination of bolts, screws, and adhesive (such as automotive-grade polyurethane adhesive). Ensure all mounting points are secure. Lip kits typically bolt onto the existing bumper using self-tapping screws or existing mounting points.
- Alignment: Proper alignment is critical for a clean look. Take your time and adjust the kit until it sits flush with the body panels.
Potential Pitfalls: Poor fitment is a common issue with aftermarket body kits. Read reviews carefully and choose reputable brands. Ensure you have the necessary tools, including a socket set, wrenches, a drill, and a grinder (for minor trimming). Also, consider the added ground clearance. Lowering your car with a body kit can significantly reduce ground clearance, making it prone to scraping.
Wheels and Tires
Upgrading your wheels and tires is another impactful modification that can dramatically change the appearance and handling of your Altima. Here's what you need to consider:
Wheel Size and Offset:
When choosing new wheels, pay close attention to the size (diameter and width) and offset. The offset is the distance between the wheel's mounting surface and its centerline. A lower offset pushes the wheel further out, while a higher offset pulls it in. Consult online resources and forums to find recommended wheel sizes and offsets for the 2015 Altima. Going too wide or using an incorrect offset can cause rubbing against the fender liners or suspension components.
Tire Size:
The tire size should be chosen to match the wheel size and maintain the overall rolling diameter of the original tires. Changing the rolling diameter can affect your speedometer reading and potentially trigger ABS or traction control issues. Use an online tire size calculator to compare different sizes and ensure they are within an acceptable range.
Tire Type:
Consider your driving needs when choosing tires. Performance tires offer better grip and handling but may wear faster and be noisier than all-season tires. All-season tires provide a good balance of performance, comfort, and tread life. Winter tires are essential in cold climates with snow and ice.
Installation Notes:
Installing wheels and tires is a relatively straightforward process, but it's crucial to use proper torque specifications when tightening the lug nuts. Over-tightening can damage the wheel studs, while under-tightening can lead to the wheels coming loose. Use a torque wrench and refer to your Altima's service manual for the correct torque specifications. Also, consider getting your wheels balanced after installation to ensure a smooth ride.
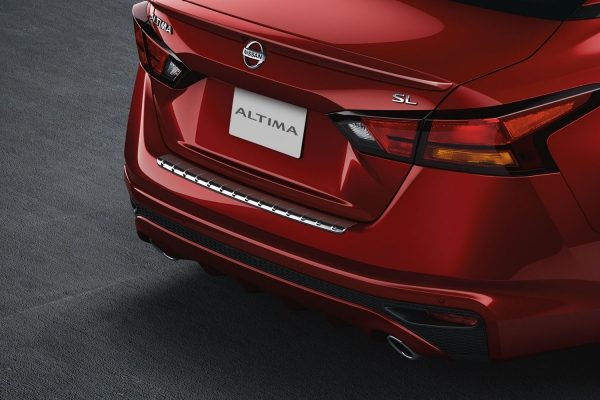
Lighting Upgrades
Upgrading your Altima's lighting can improve both its appearance and safety. Popular options include:
Headlight Upgrades:
- HID (High-Intensity Discharge) Conversion Kits: HID headlights are brighter and more efficient than halogen headlights. However, ensure the kit is designed for your Altima's headlight housings to avoid glare and blinding other drivers. Retrofitting HID kits into housings not designed for them is generally illegal and unsafe.
- LED Headlight Bulbs: LED bulbs are another popular upgrade. They offer a bright, white light and consume less power than halogen bulbs. Choose LED bulbs with a proper beam pattern to ensure good visibility.
- Projector Headlight Housings: These housings use a projector lens to focus the light beam, providing a sharper and more controlled light output. They're a good option if you want to upgrade to HID or LED headlights without causing glare.
Taillight Upgrades:
LED taillights are a common upgrade that can add a modern touch to your Altima's rear end. They're brighter and more responsive than traditional incandescent bulbs.
Fog Light Upgrades:
Adding or upgrading fog lights can improve visibility in foggy or snowy conditions. LED fog lights are a popular choice for their brightness and efficiency.
Installation Notes:
Replacing headlight and taillight bulbs is a relatively simple process. However, be careful not to touch the glass of halogen bulbs with your bare hands, as this can shorten their lifespan. Installing HID conversion kits or projector headlight housings may require more extensive wiring and modification. Ensure you follow the manufacturer's instructions carefully.
Other Exterior Accessories
Beyond the major modifications, there are many other exterior accessories that can enhance your Altima's appearance:
- Window Tint: Window tint can improve privacy, reduce glare, and protect the interior from UV damage. Check your local laws regarding tint darkness.
- Spoiler: A rear spoiler can add a sporty touch to your Altima. Choose a spoiler that complements the car's design.
- Roof Spoiler: This smaller spoiler on the rear windshield can add a unique touch.
- Grille Upgrades: Replacing the factory grille with an aftermarket grille can change the front end's look. Mesh grilles and billet grilles are popular options.
- Side Window Deflectors/Visors: these accessories allow you to crack your windows open even on rainy days, while preventing the rain to pour inside.
- Mud Flaps/Splash Guards: Installing mud flaps can protect your Altima's paint from rocks and debris.
- Chrome Delete: Wrapping or painting chrome trim pieces to match the body color can give your Altima a cleaner, more modern look.
- Vinyl Wraps: A full or partial vinyl wrap can completely transform your Altima's appearance. It's a good option if you want to change the color without a permanent paint job.
Important Considerations: Before making any modifications, research local laws and regulations. Some modifications, such as window tint or certain lighting upgrades, may not be legal in your area. Also, consider the impact of your modifications on your Altima's resale value. While some modifications may increase its value to certain buyers, others may decrease it.
Remember, the key to a successful exterior modification project is planning, research, and attention to detail. Good luck, and happy modding!