2015 Nissan Altima Front Brakes And Rotors
Alright, let's dive into replacing the front brakes and rotors on your 2015 Nissan Altima. This is a fairly straightforward job, but it's crucial to do it right for safety and performance. I'm going to walk you through the process assuming you're comfortable with basic hand tools and understand fundamental automotive safety practices. Always remember to use jack stands – never work under a car supported only by a jack!
Tools and Materials You'll Need
Before you start, gather everything you'll need to avoid mid-job frustrations. Here's a comprehensive list:
- New brake pads (Specific to your 2015 Altima's trim level)
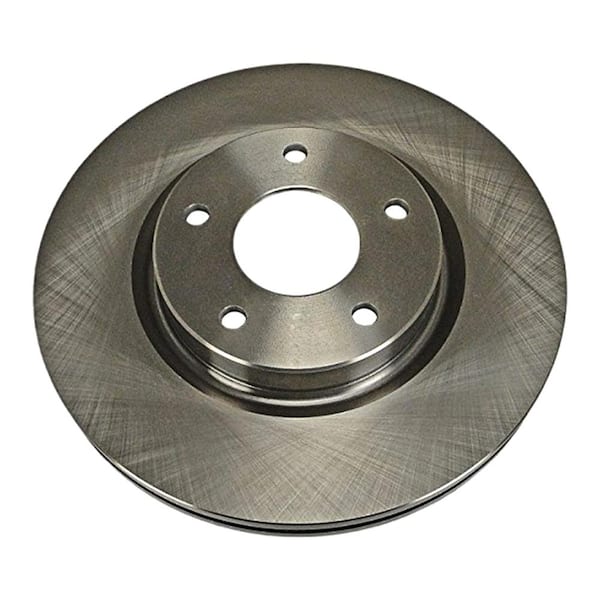
- New brake rotors (Again, ensure compatibility with your Altima)
- Brake cleaner spray
- Caliper grease (Specifically for brake components)
- High-temperature brake lubricant (For contact points)
- Socket set (Metric – typically 14mm, 17mm, 19mm)
- Wrench set (Matching sizes to your socket set)
- Torque wrench
- C-clamp or brake caliper compressor tool
- Screwdrivers (Various sizes, including a flathead for prying)
- Hammer (Rubber mallet is preferred)
- Jack and jack stands
- Wheel chocks
- Gloves (To protect your hands)
- Safety glasses
- Shop towels or rags
- Brake fluid (DOT 3 or DOT 4, check your owner's manual)
- Brake bleeder wrench (Optional, but highly recommended)
- Clear tubing and a container for bleeding brakes (Optional, if you open the brake lines)
Step-by-Step Disassembly
Now for the fun part! Let's get those old brakes off.
- Safety First: Chock the rear wheels to prevent the car from rolling. Loosen the lug nuts on the front wheels you'll be working on, but don't remove them completely yet.
- Lifting the Vehicle: Position the jack under the designated jacking point on the frame (refer to your owner's manual). Raise the vehicle until the front wheel is off the ground. Place a jack stand securely under the frame near the jacking point. Never work under a car supported only by a jack. Repeat for the other side if you're doing both front brakes.
- Wheel Removal: Completely remove the lug nuts and carefully remove the wheel. Set it aside.
- Caliper Inspection: Before you start wrenching, take a look at the brake caliper assembly. Identify the caliper mounting bolts. These usually have 14mm or 17mm heads. Also, inspect the brake lines for any signs of leaks or damage. If you see anything concerning, address it before proceeding.
- Loosening the Caliper: Locate the two caliper bolts that secure the caliper to the caliper bracket. Loosen these bolts. Sometimes they can be tight, so use a penetrating oil if necessary.
- Caliper Removal: Remove the caliper bolts completely. Now, carefully slide the caliper off the rotor. Be mindful of the brake line; don't let the caliper dangle by the brake line. You can support the caliper with a bungee cord or wire tied to the suspension to prevent strain on the brake line.
- Pad Removal: With the caliper removed, you can now remove the old brake pads from the caliper bracket. Note their position for reassembly. They usually just slide out, but may require a little prying.
- Caliper Bracket Removal: The caliper bracket is the metal piece that holds the brake pads and is bolted to the steering knuckle. Remove the bolts securing the caliper bracket to the steering knuckle. These bolts are usually larger than the caliper bolts (often 17mm or 19mm) and can be quite tight.
- Rotor Removal: With the caliper and bracket removed, the rotor should now be exposed. Sometimes the rotor can be rusted to the hub. If this is the case, try tapping the rotor hat (the center part) with a rubber mallet. Avoid hitting the rotor's braking surface directly. You can also try spraying penetrating oil around the hub-rotor interface. If it's really stuck, you might need a specialized rotor removal tool, but gentle persuasion with a hammer usually works.
Cleaning and Inspection
Now's a good time to clean everything up and inspect for wear or damage.
- Hub Cleaning: Use a wire brush to thoroughly clean the hub surface where the new rotor will mount. This ensures proper rotor seating and prevents runout (wobbling).
- Bracket Inspection: Inspect the caliper bracket for any signs of damage or wear. Pay close attention to the areas where the brake pads slide. If the bracket is excessively worn, it should be replaced.
- Caliper Inspection: Carefully inspect the caliper piston and dust boot. The piston should move freely within the caliper. If the dust boot is torn or the piston is seized, the caliper needs to be rebuilt or replaced.
- Brake Line Inspection: Double-check the brake lines for any cracks, leaks, or bulges. Replace any damaged brake lines immediately.
Reassembly and Installation
Time to put everything back together with the new parts.
- Rotor Installation: Carefully install the new rotor onto the hub. Make sure it sits flush against the hub surface. You can use a lug nut to temporarily secure the rotor while you work.
- Bracket Installation: Reinstall the caliper bracket onto the steering knuckle. Torque the bracket bolts to the manufacturer's specified torque (refer to a repair manual or online resources for your specific model year and trim). Torquing to the correct specification is critical.
- Pad Preparation: Apply a thin layer of high-temperature brake lubricant to the contact points on the back of the brake pads and on the caliper bracket where the pads slide. This helps prevent brake squeal.
- Pad Installation: Install the new brake pads into the caliper bracket. Ensure they are properly seated.
- Piston Retraction: Before reinstalling the caliper, you need to retract the caliper piston to make room for the new, thicker brake pads. Use a C-clamp or a dedicated brake caliper compressor tool to slowly push the piston back into the caliper bore. Be careful not to damage the piston or the dust boot. If you're struggling, double-check that the brake fluid reservoir isn't overfilled, as this can make retraction difficult.
- Caliper Installation: Carefully slide the caliper over the new brake pads and onto the rotor. Align the caliper mounting holes with the holes in the caliper bracket.
- Caliper Bolt Tightening: Install the caliper bolts and torque them to the manufacturer's specified torque. Again, refer to a repair manual or online resource for the correct torque specification.
- Repeat: Repeat steps 2-7 on the other side of the vehicle if you're doing both front brakes.
- Wheel Reinstallation: Reinstall the wheels and hand-tighten the lug nuts.
- Lowering the Vehicle: Carefully lower the vehicle to the ground.
- Lug Nut Torque: Torque the lug nuts to the manufacturer's specified torque using a torque wrench. Torque in a star pattern to ensure even pressure.
Brake Bleeding (If Necessary)
If you opened the brake lines at any point during the process (e.g., if you replaced a caliper), you will need to bleed the brakes to remove air from the system. Air in the brake lines can make the brakes feel spongy and reduce braking performance.
- Locate Bleeder Screws: Locate the bleeder screws on each brake caliper.
- Attach Tubing: Attach a clear tube to the bleeder screw and submerge the other end of the tube in a container filled with a small amount of brake fluid. This prevents air from being drawn back into the system.
- Bleeding Procedure: Have a helper slowly depress the brake pedal. While the pedal is depressed, open the bleeder screw briefly to allow fluid and air to escape. Then, close the bleeder screw before your helper releases the brake pedal. Repeat this process until no more air bubbles are visible in the clear tube.
- Fluid Level: Check and maintain the brake fluid level in the master cylinder reservoir throughout the bleeding process. Never let the reservoir run dry, as this will introduce more air into the system.
- Bleeding Order: Typically, you should bleed the brakes starting with the caliper farthest from the master cylinder and working your way closer. For most cars, this means starting with the rear passenger side, then rear driver side, then front passenger side, and finally front driver side.
Bedding In Your New Brakes
Bedding in the new brakes is crucial for optimal performance and longevity. This process transfers a thin layer of brake pad material onto the rotor surface, creating a consistent friction surface.
- Initial Gentle Stops: After installing the new brakes, perform several gentle stops from low speeds (e.g., 30 mph to 10 mph) to allow the pads to mate with the rotors.
- Progressive Stops: Gradually increase the intensity of the stops. Perform several medium-pressure stops from moderate speeds (e.g., 45 mph to 15 mph).
- Avoid Hard Stops Initially: Avoid hard or panic stops during the initial bedding-in period.
- Cooling Period: Allow the brakes to cool down completely after the bedding-in process.
Final Checks
Before you hit the road, perform these final checks:
- Brake Pedal Feel: Check the brake pedal feel. It should be firm and responsive. If the pedal feels spongy, there may still be air in the brake lines.
- Brake Fluid Level: Double-check the brake fluid level in the master cylinder reservoir.
- Leaks: Inspect all brake lines and connections for any leaks.
- Test Drive: Take the car for a short test drive in a safe area. Listen for any unusual noises and observe the braking performance.
By following these steps carefully, you can successfully replace the front brakes and rotors on your 2015 Nissan Altima and save yourself some money. Remember, safety is paramount, so if you're ever unsure about any part of the process, consult a qualified mechanic. Happy wrenching!