2015 Nissan Altima Fuse Box Location
Finding the correct fuse box and identifying the right fuse is crucial for diagnosing and resolving electrical issues in your 2015 Nissan Altima. This guide provides a comprehensive overview of the 2015 Nissan Altima fuse box locations and helpful tips for fuse replacement.
Understanding Fuse Boxes in Your 2015 Nissan Altima
Modern vehicles like the 2015 Nissan Altima utilize multiple fuse boxes to protect various electrical circuits. These boxes house numerous fuses, each responsible for safeguarding a specific component, such as lights, the radio, the power windows, or the engine control unit (ECU). When an electrical component malfunctions, the first step in troubleshooting should be to check the corresponding fuse. A blown fuse indicates an overcurrent situation, preventing further damage to the electrical system. Identifying the correct fuse is paramount, and knowing the location of your fuse boxes is the first step.
Primary Fuse Box Location: Inside the Cabin
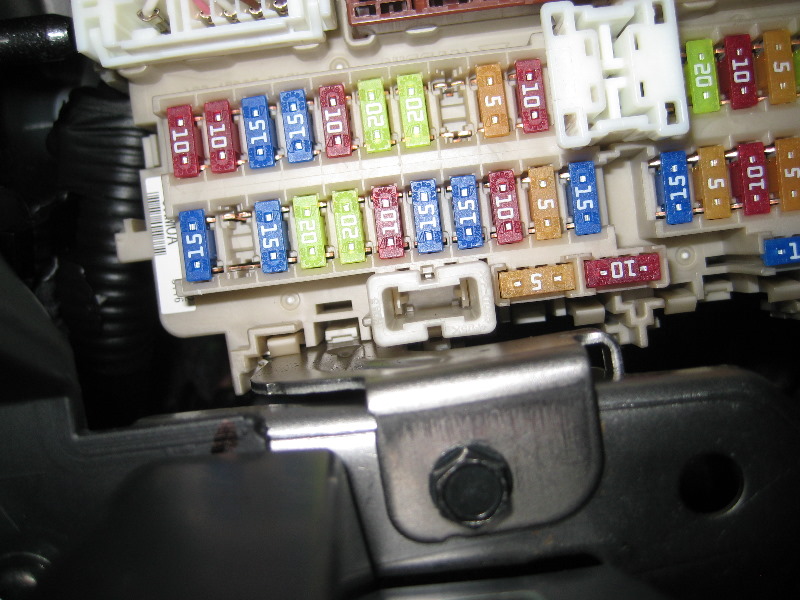
The primary fuse box in the 2015 Nissan Altima is typically located inside the passenger cabin. It's usually found on the driver's side, often beneath the dashboard, near the steering column. You may need to crouch down and look for a small access panel. In some models, it might be behind a small storage compartment. The panel is usually held in place by clips or screws, so you'll need a small flathead screwdriver or your fingers to gently pry or unscrew it open.
Once you've located the access panel, carefully remove it. Behind the panel, you'll find the fuse box itself. It's a rectangular plastic box with a diagram showing the location of each fuse and its corresponding amperage rating. This diagram is essential for identifying the correct fuse related to your electrical problem. Keep this diagram handy for future reference.
Secondary Fuse Box Location: Under the Hood
In addition to the primary fuse box inside the cabin, the 2015 Nissan Altima also has a secondary fuse box located under the hood, in the engine compartment. This fuse box typically houses fuses for more critical engine and drivetrain components. It's usually a black plastic box and can be easily identified by its size and the wiring harnesses connected to it.
The under-hood fuse box is generally situated near the battery, on either the driver's side or the passenger's side of the engine bay. Look for a rectangular black box with a secure lid. Before opening the box, ensure the engine is turned off and the ignition is in the "off" position. Opening the fuse box lid usually requires releasing clips or latches located on the sides of the box.
Similar to the interior fuse box, the under-hood fuse box also contains a diagram indicating the location and amperage of each fuse. This diagram is usually printed on the underside of the fuse box lid. Refer to this diagram to identify the fuse related to the component you're troubleshooting.
Identifying and Replacing a Blown Fuse
Once you've located the correct fuse box and identified the fuse related to the malfunctioning component, you need to inspect the fuse for damage. A blown fuse typically has a broken filament visible through the clear plastic window. Sometimes, the plastic housing itself may be discolored or melted. If you're unsure whether a fuse is blown, you can use a multimeter to test its continuity. A good fuse will show continuity, while a blown fuse will not.
Tools you'll need:
- Fuse puller (usually located inside one of the fuse boxes)
- Replacement fuse with the correct amperage rating
- Multimeter (optional, for testing continuity)
Steps for replacing a blown fuse:
- Turn off the ignition: Ensure the vehicle's ignition is turned off before working on the electrical system.
- Locate the blown fuse: Use the fuse box diagram to identify the fuse related to the malfunctioning component.
- Remove the fuse: Use the fuse puller to carefully remove the blown fuse from the fuse box. Avoid using pliers or other metal tools, as this could damage the fuse box terminals.
- Inspect the fuse: Visually inspect the fuse for a broken filament or other signs of damage.
- Replace the fuse: Insert a new fuse with the exact same amperage rating into the fuse box. Using a fuse with a higher amperage rating can overload the circuit and cause further damage or even a fire.
- Test the component: Turn on the ignition and test the component that was malfunctioning to ensure it's now working properly.
- If the fuse blows again: If the new fuse blows immediately or shortly after replacement, there is likely a more significant problem in the electrical circuit. Consult a qualified mechanic to diagnose and repair the underlying issue.
Fuse Amperage Ratings: Why They Matter
Each fuse in the 2015 Nissan Altima is designed to handle a specific amount of electrical current, measured in amperes (amps). The amperage rating is clearly marked on the fuse itself, usually as a number followed by the letter "A" (e.g., 10A, 15A, 20A). It's crucial to replace a blown fuse with a fuse that has the exact same amperage rating. Using a fuse with a lower amperage rating will cause it to blow prematurely, while using a fuse with a higher amperage rating can overload the circuit and cause damage to the wiring or components.
The fuse box diagrams will clearly indicate the correct amperage rating for each fuse. Always double-check the diagram and the markings on the fuse itself to ensure you're using the correct replacement. If you're unsure, consult the owner's manual or a qualified mechanic.
Common Fuse-Related Issues in the 2015 Nissan Altima
Several common electrical issues in the 2015 Nissan Altima can be traced back to blown fuses. These include:
- Headlights not working: A blown fuse in the headlight circuit can cause one or both headlights to fail.
- Tail lights not working: Similarly, a blown fuse in the tail light circuit can cause the tail lights to stop working.
- Radio not working: A blown fuse in the radio circuit can prevent the radio from turning on.
- Power windows not working: A blown fuse in the power window circuit can cause one or more power windows to stop functioning.
- Cigarette lighter/power outlet not working: A blown fuse in the cigarette lighter or power outlet circuit can prevent these outlets from providing power.
- Windshield wipers not working: A blown fuse in the wiper circuit can cause the windshield wipers to fail.
If you experience any of these issues, checking the corresponding fuse should be one of the first steps in troubleshooting.
Consulting the Owner's Manual
Your 2015 Nissan Altima owner's manual is a valuable resource for information about the fuse boxes and fuses in your vehicle. The manual will provide detailed diagrams of the fuse box locations, a list of fuses and their corresponding amperage ratings, and instructions on how to replace a blown fuse. Refer to the owner's manual for specific information about your vehicle's fuse boxes.
When to Seek Professional Help
While replacing a blown fuse is a relatively simple task, it's essential to recognize when the problem requires professional attention. If you repeatedly experience blown fuses, even after replacing them with the correct amperage rating, it indicates a more significant underlying electrical issue. Common causes of repeated fuse blowing include short circuits, wiring damage, or faulty components. In these situations, it's best to consult a qualified mechanic to diagnose and repair the problem.
Disclaimer: This information is provided for general guidance only and should not be considered a substitute for professional advice. Always consult your owner's manual or a qualified mechanic for specific instructions and safety precautions related to your 2015 Nissan Altima.