2015 Nissan Altima Starter Relay Location
Alright, let's dive into locating the starter relay in your 2015 Nissan Altima. Finding this component is crucial when troubleshooting starting issues, as it's a common point of failure. This article will guide you through the process, providing a clear and technical explanation of where to look.
Understanding the Starter Relay's Role
Before we get our hands dirty, it's important to understand what the starter relay actually does. The starter motor requires a significant amount of current to crank the engine. Your ignition switch can't handle that directly. The starter relay acts like a high-current switch, using a small current from the ignition switch to control a larger current flow to the starter solenoid. The solenoid then engages the starter motor with the engine's flywheel or flexplate.
So, when you turn the key, you're actually energizing the starter relay coil. This creates a magnetic field that pulls the relay's contacts together, completing the circuit to the starter solenoid. A faulty relay can prevent the starter from engaging, even if the battery and starter motor are perfectly fine.
Locating the Starter Relay: The Fuse Box is Key
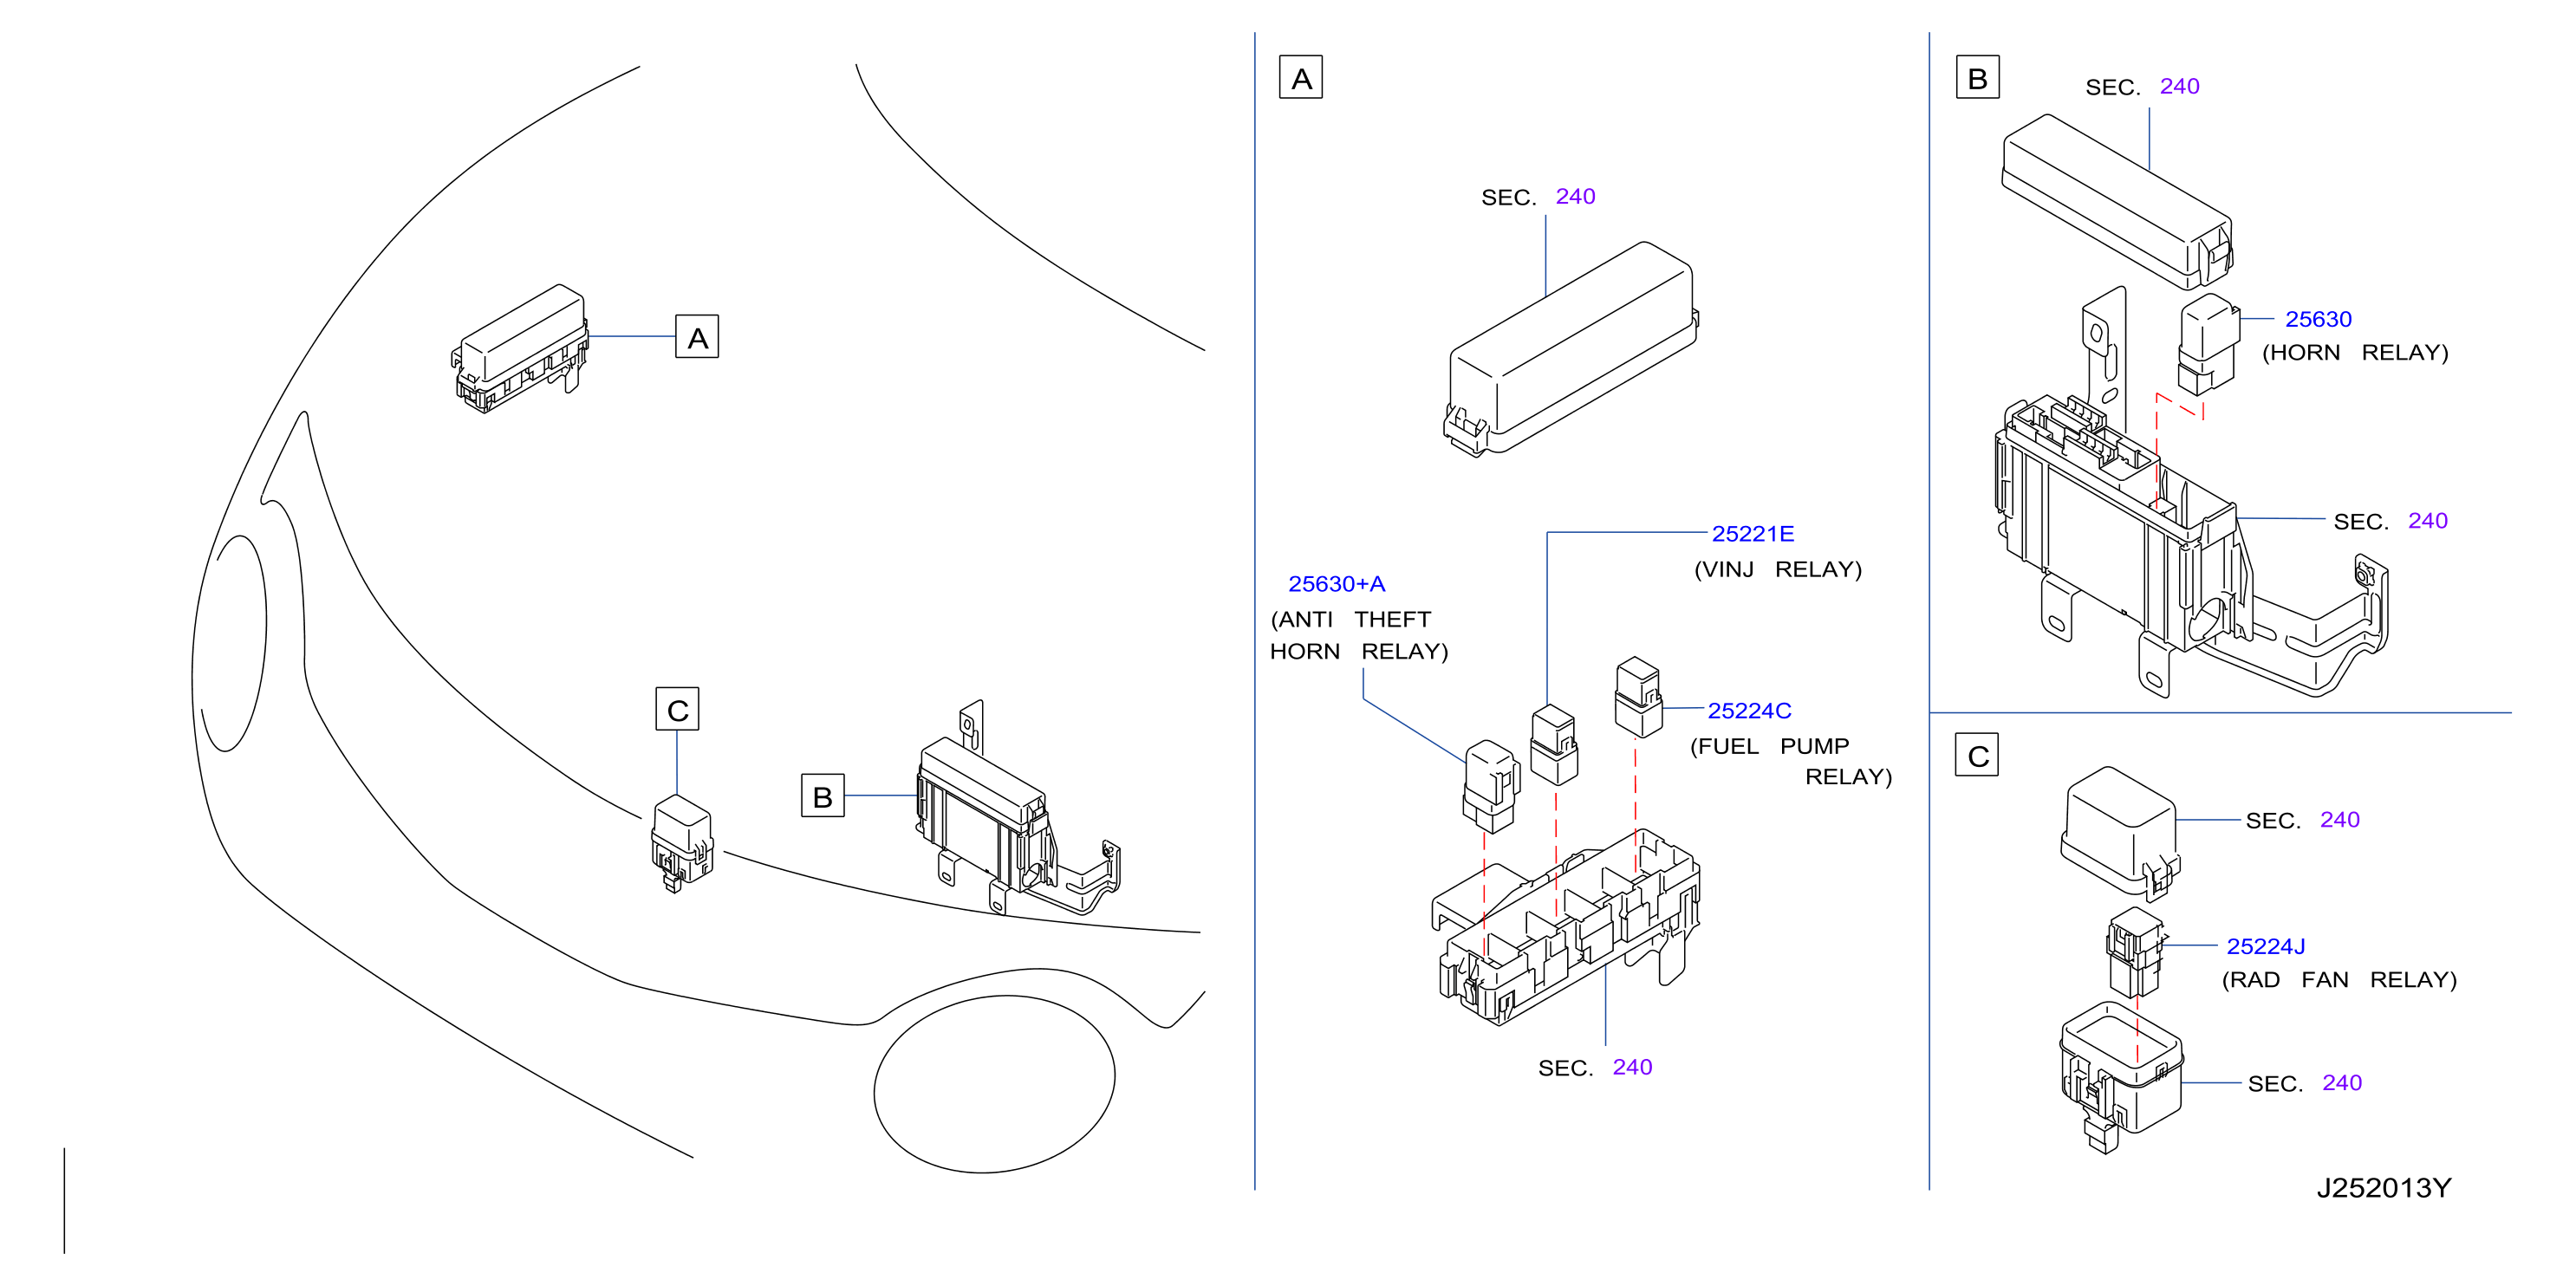
In the 2015 Nissan Altima, the starter relay is typically located within one of the vehicle's fuse boxes. Most commonly, it's found in the Intelligent Power Distribution Module (IPDM) E/R, which is Nissan's fancy name for the main engine compartment fuse box.
Step-by-Step Guide to Finding the IPDM E/R
- Pop the Hood: Obviously, first, you need to open the hood of your Altima. Secure it properly using the hood prop rod.
- Locate the IPDM E/R: The IPDM E/R is usually situated on the passenger side of the engine compartment, near the battery. It's a black plastic box with a removable cover.
- Identify the Starter Relay: This is where it gets a little tricky. The exact location of the starter relay within the IPDM E/R can sometimes vary slightly depending on the specific trim level and options of your Altima. However, the fuse box cover should have a diagram printed on its underside, indicating the function of each relay and fuse. This diagram is your best friend.
- Consult the Diagram: Carefully examine the diagram on the fuse box cover. Look for a relay labeled "Starter Relay," "ST Relay," or something similar. The diagram will show its specific location within the fuse box.
- Verify the Relay: Once you've identified the relay on the diagram, compare it to the actual relays in the fuse box. The physical relay will have markings on it – a part number, for example – that you can potentially cross-reference with your Altima's repair manual or online resources to confirm it's the correct one. Relays are generally plug-in devices that look like small black or gray cubes.
Important Note: Some Altimas might have a second fuse box located inside the cabin, often under the dashboard on the driver's side. While the primary starter relay is almost always in the IPDM E/R, it's good practice to check the diagram for the interior fuse box as well, just in case there's a secondary relay or fuse related to the starting system. However, the 2015 Altima usually only has the main relay in the IPDM E/R. It's exceedingly rare to find it elsewhere. This interior fuse box is more likely to contain fuses for accessories and other vehicle systems.
Troubleshooting and Testing the Starter Relay
Now that you've located the starter relay, you can proceed with troubleshooting if you suspect it's faulty. Here are a few methods you can use:
Visual Inspection
Remove the relay from the fuse box and visually inspect it. Look for any signs of damage, such as:
- Cracks or breaks in the relay housing
- Burn marks or discoloration
- Corrosion on the terminals
Even if the relay looks okay, it could still be faulty internally. A visual inspection alone is not definitive.
Relay Swapping (The Easiest Test)
The easiest way to test a suspect starter relay is to swap it with a relay of the same type from another non-critical circuit in the fuse box. For example, you might be able to swap it with the horn relay or the rear window defogger relay (provided they have the same part number and pin configuration). Note: Consult your fuse box diagram to confirm both are the same type (same pinout and amperage rating). If the problem resolves after the swap (i.e., the car starts, but the horn no longer works), then the original relay is definitely bad.
Testing with a Multimeter
A multimeter is an invaluable tool for electrical diagnostics. You can use it to test the starter relay in a few different ways:
- Continuity Test:
- Identify the relay's coil terminals (usually labeled 85 and 86).
- Set your multimeter to the continuity setting (often indicated by a diode symbol or a sound).
- Touch the multimeter probes to the coil terminals. You should read low resistance (a few hundred ohms or less). If you read infinite resistance (an open circuit), the coil is likely broken.
- Contact Test (Normally Open):
- Identify the relay's normally open (NO) contacts (usually labeled 30 and 87).
- With the relay de-energized (not powered), set your multimeter to the continuity setting.
- Touch the multimeter probes to the NO contacts. You should read infinite resistance (an open circuit).
- Contact Test (Energized):
- Apply 12V DC power to the relay coil (terminals 85 and 86). Be sure to observe polarity!
- Set your multimeter to the continuity setting.
- Touch the multimeter probes to the NO contacts. You should now read low resistance (a closed circuit). If you still read infinite resistance, the contacts are not closing properly.
Professional Testing
Some auto parts stores offer free relay testing services. They have specialized equipment that can thoroughly test the relay's functionality under load. This is a convenient option if you don't have a multimeter or are unsure about performing the tests yourself.
Replacing the Starter Relay
If you've determined that the starter relay is faulty, replacing it is a straightforward process:
- Purchase a Replacement Relay: Ensure you purchase a relay that is identical to the original in terms of part number, pin configuration, and amperage rating. Using the wrong relay can damage your vehicle's electrical system.
- Disconnect the Battery (Recommended): While not strictly necessary, it's always a good idea to disconnect the negative battery terminal before working on electrical components to prevent accidental shorts.
- Remove the Old Relay: Carefully pull the old relay out of the fuse box. It should come out with a firm, steady pull. Avoid using excessive force.
- Install the New Relay: Align the pins of the new relay with the corresponding slots in the fuse box and push it in firmly until it is fully seated.
- Reconnect the Battery (If Disconnected): Reconnect the negative battery terminal.
- Test the Vehicle: Start the engine to verify that the new relay has resolved the starting issue.
Final Thoughts
Locating and troubleshooting the starter relay is a fundamental skill for any DIY mechanic. By following these steps, you should be able to diagnose and resolve many common starting problems with your 2015 Nissan Altima. Remember to always consult your vehicle's repair manual for specific information related to your model and trim level. If you're uncomfortable working with electrical systems, it's always best to consult a qualified mechanic.
Good luck, and happy wrenching!