2015 Nissan Rogue Windshield Replacement
The 2015 Nissan Rogue, a popular compact SUV, relies heavily on its windshield for structural integrity, occupant safety, and, of course, visibility. While windshield replacement might seem like a simple swap, a closer examination reveals a carefully orchestrated process involving adhesives, precise placement, and critical calibrations. This guide delves into the technical aspects of replacing a 2015 Nissan Rogue windshield, offering insights for the curious and aspiring amateur engineers.
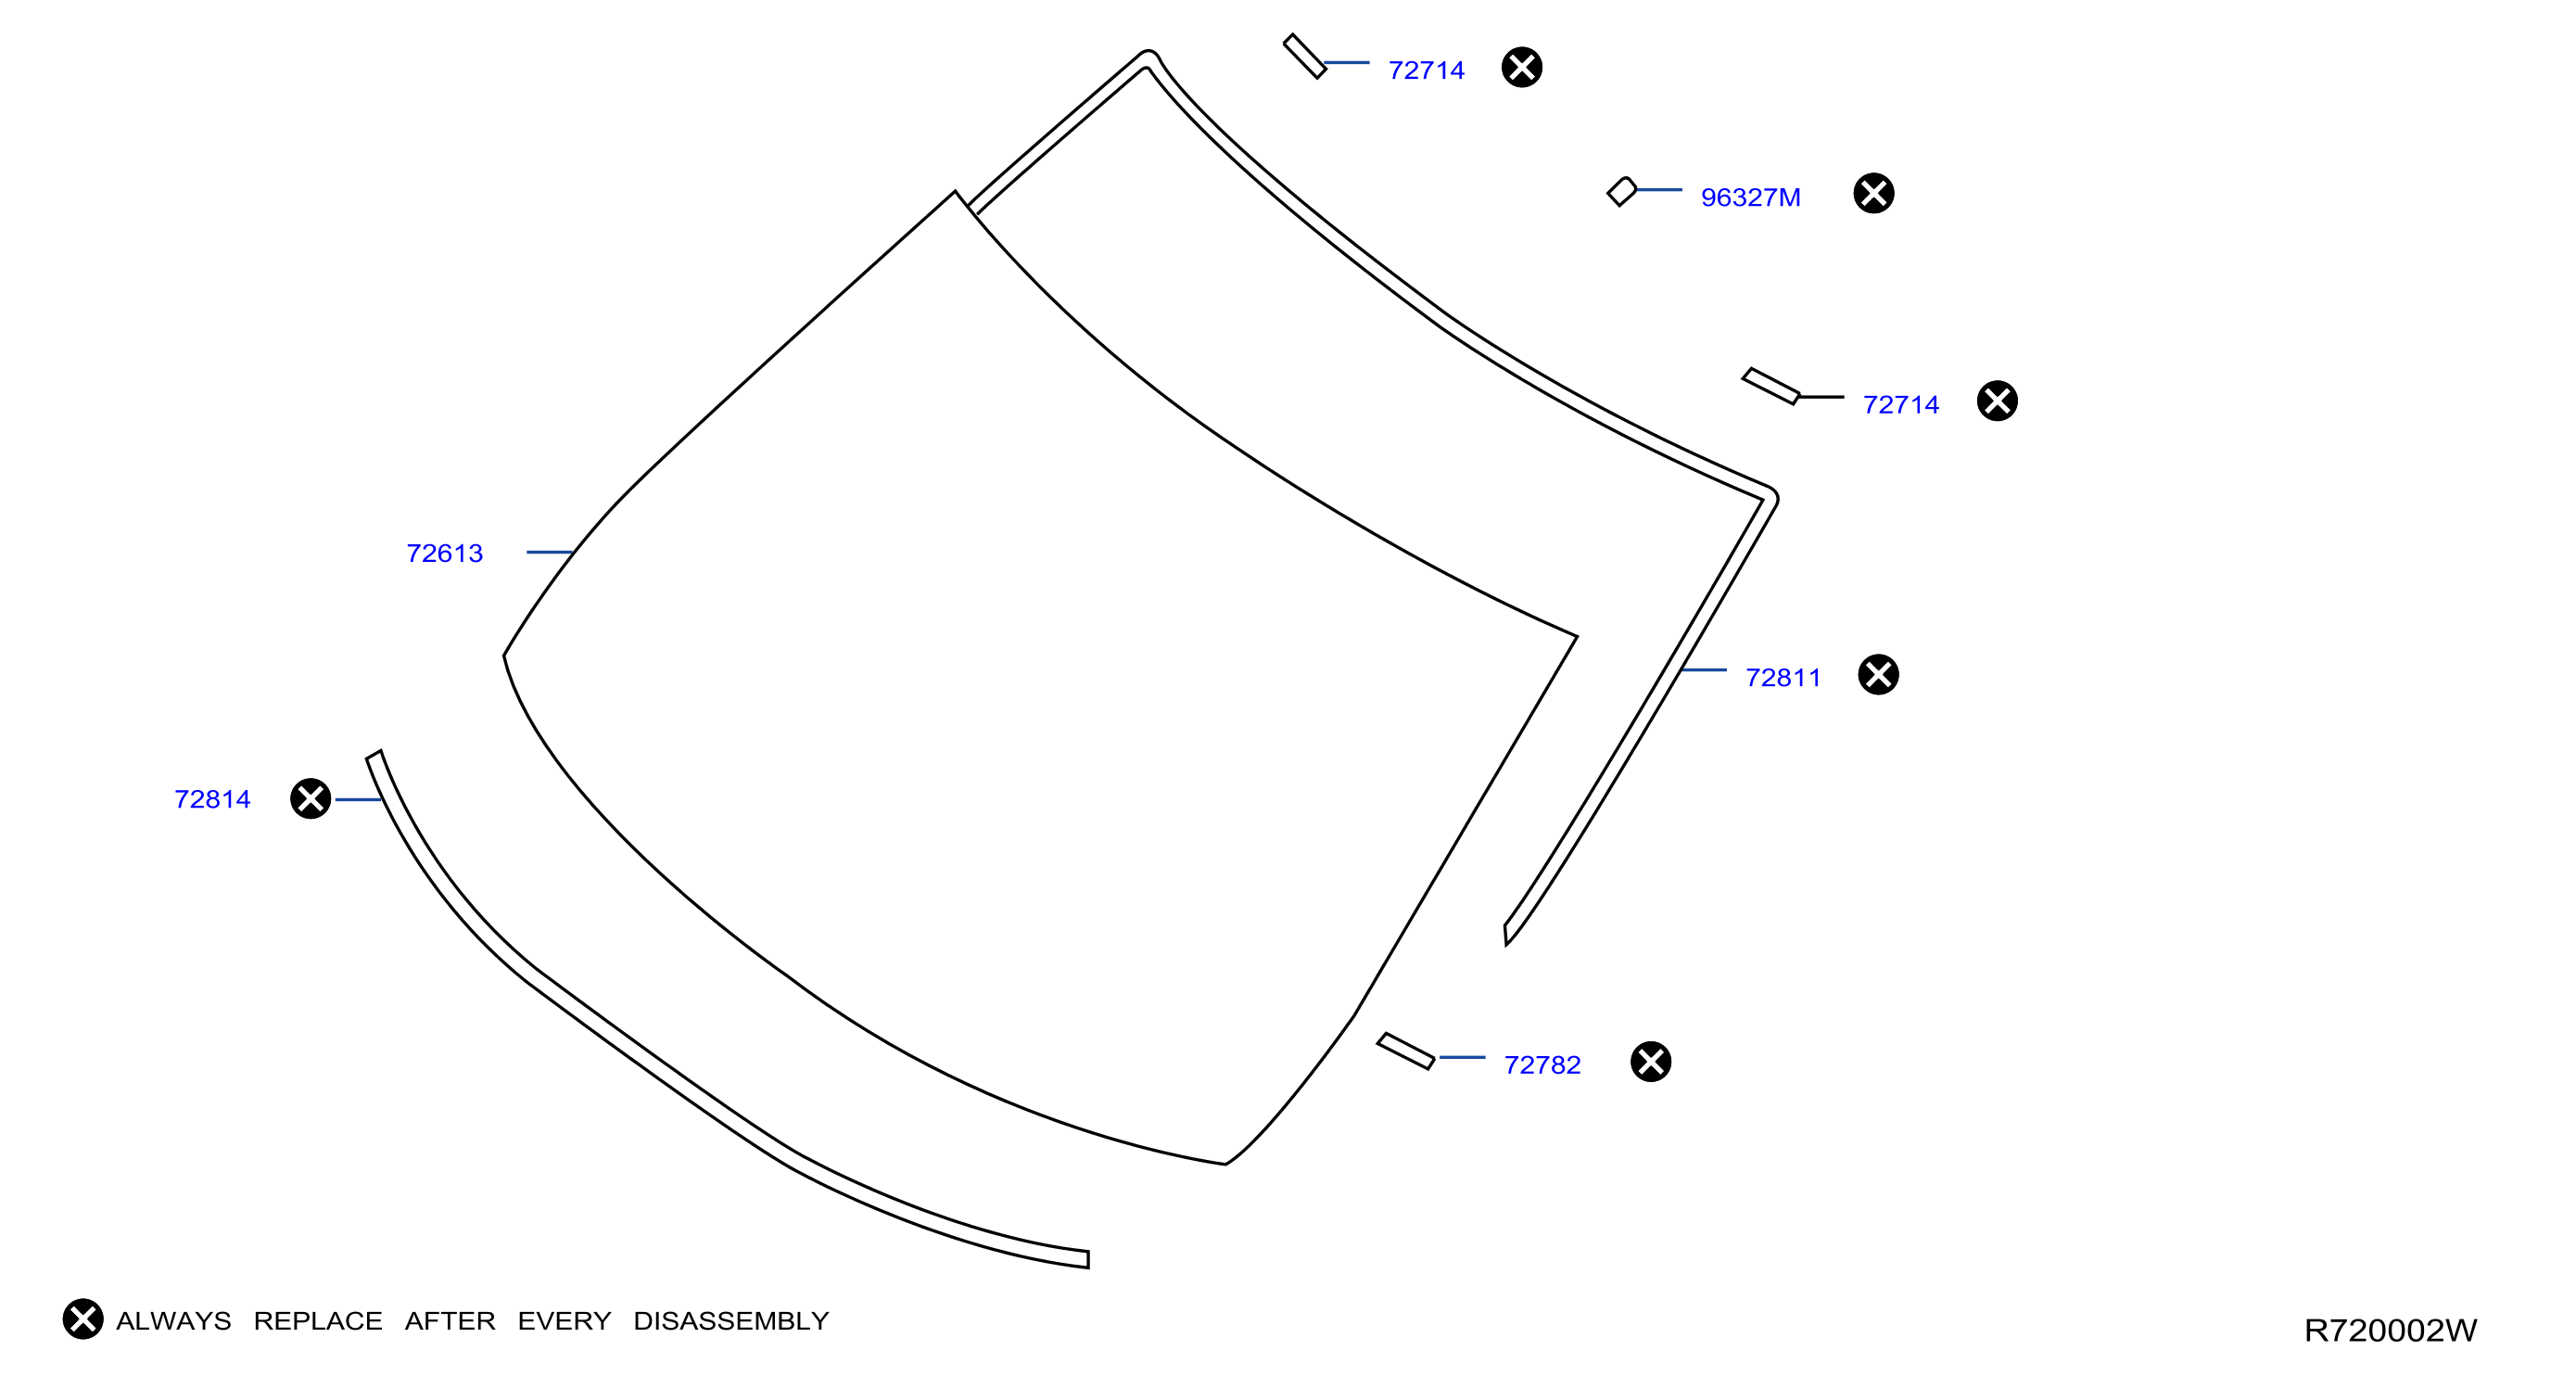
Understanding the Windshield's Role
Beyond just keeping the elements out, the windshield is a crucial component of the vehicle's safety system. In a rollover accident, it provides significant roof support. During a front-end collision, it acts as a backstop for the airbags, ensuring they deploy effectively and direct force properly. Modern windshields, like those in the 2015 Rogue, are typically laminated safety glass, composed of two sheets of glass with a layer of polyvinyl butyral (PVB) in between. This PVB layer prevents shattering, holding the glass together and minimizing sharp projectiles in an accident. The exact type of glass and its thickness are carefully specified to meet safety regulations and contribute to the vehicle's overall structural rigidity.
The integrity of the 2015 Nissan Rogue's windshield directly impacts the effectiveness of its safety features. A properly installed windshield is essential for optimal protection.
Preparing for the Replacement
Before commencing the replacement, it's crucial to gather the necessary tools and materials. Safety is paramount, so eye protection (safety glasses), gloves, and appropriate work clothes are non-negotiable. You'll need a windshield removal tool (cold knife, wire knife, or powered oscillating tool), a urethane adhesive gun, urethane adhesive primer, urethane adhesive sealant (specifically formulated for automotive windshields – using the correct type is critical), glass cleaner, suction cups (for lifting the windshield), a razor scraper, and possibly a heat gun or hairdryer (for softening old adhesive). It's also essential to have a clean, dust-free workspace. Temperature and humidity can affect the curing time of the urethane, so working in a controlled environment is beneficial.
Safety First: Disconnecting the Battery
Before working on any electrical components, disconnect the negative terminal of the battery. This prevents accidental activation of the wipers, sensors, or other systems that could interfere with the replacement process or cause injury.
The Removal Process: A Delicate Operation
The removal process requires patience and precision. Begin by carefully removing any interior trim pieces surrounding the windshield. This often includes the rearview mirror (if attached directly to the glass), sun visors, and A-pillar trim. These components are typically held in place by clips or screws, which should be handled with care to avoid damage. The next step involves cutting through the urethane adhesive that bonds the windshield to the vehicle's frame. This is where the windshield removal tool comes into play.
A cold knife involves manually pushing a blade through the urethane. A wire knife uses a thin, strong wire pulled back and forth to cut through the adhesive. Powered oscillating tools are generally considered the fastest and most efficient, using a vibrating blade to slice through the urethane. Regardless of the tool used, it's vital to maintain a consistent depth and angle to avoid damaging the pinch weld (the metal frame surrounding the windshield). Applying heat (using a heat gun or hairdryer) to soften the adhesive can make the cutting process easier.
Pay close attention to the depth and angle when cutting the urethane adhesive. Damage to the pinch weld can compromise the integrity of the new windshield installation.
Once the urethane is cut completely around the perimeter, carefully lift the windshield out using suction cups. Having an assistant can be helpful for this step, especially with the larger windshield of the Rogue. Dispose of the old windshield properly and safely.
Preparing the Pinch Weld
With the old windshield removed, the pinch weld needs thorough preparation. Use a razor scraper to remove any remaining urethane adhesive. Aim for a clean, smooth surface, free of debris or corrosion. If there's any rust present on the pinch weld, it's crucial to address it before proceeding. Sand down the rust and apply a rust-inhibiting primer to prevent further corrosion. Clean the pinch weld thoroughly with a glass cleaner and allow it to dry completely.
The urethane adhesive primer is then applied to the pinch weld. This primer promotes adhesion between the urethane sealant and the metal frame. Follow the manufacturer's instructions carefully regarding application method and drying time. Failure to prime the pinch weld properly can lead to poor adhesion and a leaking windshield.
Installing the New Windshield
Before applying the urethane sealant, dry-fit the new windshield to ensure proper alignment. Check for any gaps or interference and make any necessary adjustments. Clean the inside surface of the new windshield thoroughly with glass cleaner.
The application of the urethane sealant is perhaps the most critical step in the entire process. Using the urethane adhesive gun, apply a consistent, continuous bead of sealant around the perimeter of the pinch weld. The bead should be of the correct size and shape, as specified by the adhesive manufacturer. Gaps or inconsistencies in the bead can lead to leaks or structural weaknesses. The height of the bead is very important to have the windshield sit at the correct level. Too little, and the windshield will sit low, too much, and it will sit too high.
The consistency and continuity of the urethane adhesive bead are paramount for a successful windshield installation.
With the urethane applied, carefully lift the new windshield into place using suction cups. Align it precisely with the pinch weld and press it firmly into the sealant. Ensure that the windshield is flush with the surrounding body panels. Use masking tape to secure the windshield in place while the urethane cures. The curing time will vary depending on the adhesive used, ambient temperature, and humidity, but typically ranges from a few hours to overnight. Avoid driving the vehicle during the curing process to prevent premature movement of the windshield.
Post-Installation and Calibration
Once the urethane has fully cured, remove the masking tape and reinstall the interior trim pieces. Reconnect the rearview mirror and any other components that were removed. If the 2015 Rogue is equipped with advanced driver-assistance systems (ADAS) that rely on a camera or sensors mounted on the windshield (such as lane departure warning or automatic emergency braking), these systems will need to be recalibrated after the windshield replacement. Calibration ensures that these systems function correctly and accurately. This often requires specialized equipment and may need to be performed by a qualified technician.
Finally, check for leaks by spraying water around the perimeter of the windshield. Inspect the interior for any signs of water intrusion. If any leaks are detected, they will need to be addressed promptly to prevent further damage.
Conclusion
Replacing a 2015 Nissan Rogue windshield is a technically demanding process that requires careful attention to detail. While it can be a DIY project for experienced enthusiasts, it's often best left to professionals who have the necessary tools, expertise, and training. A properly installed windshield is essential for safety, structural integrity, and the proper functioning of the vehicle's advanced driver-assistance systems. By understanding the intricacies of the replacement process, one can appreciate the critical role that the windshield plays in modern vehicle design and safety.