2015 Nissan Sentra Fuse Box Location
The 2015 Nissan Sentra, a popular compact sedan, relies on a complex electrical system to operate various components, from the headlights to the engine control unit. Protecting this intricate network are fuses, the unsung heroes that prevent catastrophic damage from overcurrents. Understanding the fuse box locations and their associated functions is crucial for troubleshooting electrical problems and performing basic maintenance. This guide provides an in-depth look at the fuse box locations in the 2015 Nissan Sentra.
Understanding the Role of Fuses
Before diving into the specifics of the 2015 Sentra, let's briefly review the function of a fuse. A fuse is a safety device containing a thin wire that melts and breaks an electrical circuit if the current exceeds a specified limit. This "blowing" of the fuse interrupts the flow of electricity, preventing damage to the connected component and potentially preventing a fire. Fuses are typically rated in amps (amperes), indicating the maximum current they can handle. Using a fuse with a higher amperage rating than specified can be extremely dangerous, as it may not blow in time to protect the circuit.
Fuses are typically grouped together in fuse boxes, or power distribution boxes, strategically located throughout the vehicle. Each fuse protects a specific circuit, and a diagram (fuse allocation chart) is usually provided to identify the function of each fuse. This diagram is invaluable when diagnosing electrical issues.
2015 Nissan Sentra Fuse Box Locations
The 2015 Nissan Sentra has two primary fuse box locations:
1. Interior Fuse Box (Dashboard Fuse Box)
The primary fuse box, often referred to as the interior or dashboard fuse box, is located inside the vehicle, typically on the driver's side. Its precise location is usually behind a small access panel, either to the left of the steering wheel or underneath the dashboard, near the driver's left knee. You'll need to use a small flathead screwdriver or a trim removal tool to carefully pry open the access panel. Be gentle to avoid damaging the surrounding trim.
Once the access panel is removed, you'll see a rectangular box with rows of fuses and relays. Inside the access panel door, or sometimes on the side of the fuse box itself, you should find a fuse allocation chart. This chart is essential for identifying which fuse corresponds to which circuit. Without this chart, you're essentially operating blind. Note that the chart may be in the form of a diagram or a list, with each fuse labeled with a number or description. The abbreviations used on the chart can sometimes be cryptic (e.g., "IGN" for ignition, "BCM" for body control module), so familiarize yourself with common automotive electrical abbreviations.
This interior fuse box typically protects circuits related to:
- Interior lighting (dome light, map lights)
- Audio system (radio, speakers)
- Power windows and door locks
- Windshield wipers and washers
- Instrument panel and gauges
- Air conditioning and heating system
- Body Control Module (BCM)
- Supplemental Restraint System (SRS, airbags) components. Note: Working on SRS components should only be done by qualified technicians due to the risk of accidental airbag deployment.
- Other accessory circuits
2. Engine Compartment Fuse Box
The second fuse box is located in the engine compartment, usually near the battery or on one of the inner fender wells. It's typically housed in a black plastic box to protect it from the elements. To access this fuse box, you'll need to unlatch or unscrew the cover. The cover is usually labeled with warnings and the words "FUSE" or "POWER DISTRIBUTION."
Like the interior fuse box, the engine compartment fuse box also contains a fuse allocation chart, typically affixed to the inside of the cover. This chart identifies the functions of the fuses and relays in that box.
The engine compartment fuse box primarily protects circuits related to:
- Engine control unit (ECU)
- Fuel pump
- Ignition system
- Headlights and taillights
- Radiator fan
- Horn
- Anti-lock braking system (ABS)
- Power steering system
- Starting system (starter motor)
Inspecting and Replacing Fuses
When troubleshooting an electrical problem, the first step is usually to check the relevant fuse. Here's how:
- Consult the fuse allocation chart. Identify the fuse that corresponds to the circuit you're investigating.
- Locate the fuse. Use the diagram on the fuse allocation chart to find the physical location of the fuse within the fuse box.
- Visually inspect the fuse. Most fuses have a clear plastic body, allowing you to see the internal filament. If the filament is broken or melted, the fuse is blown and needs to be replaced. Sometimes, a fuse can appear intact but still be faulty.
- Use a fuse tester. For a more reliable test, use a fuse tester or a multimeter. A fuse tester is a simple device that lights up if the fuse is good. A multimeter can be used to measure the continuity across the fuse; a good fuse will have very low resistance (close to zero ohms).
- Replace the fuse. If the fuse is blown, replace it with a new fuse of the same amperage rating. Never use a fuse with a higher amperage rating.
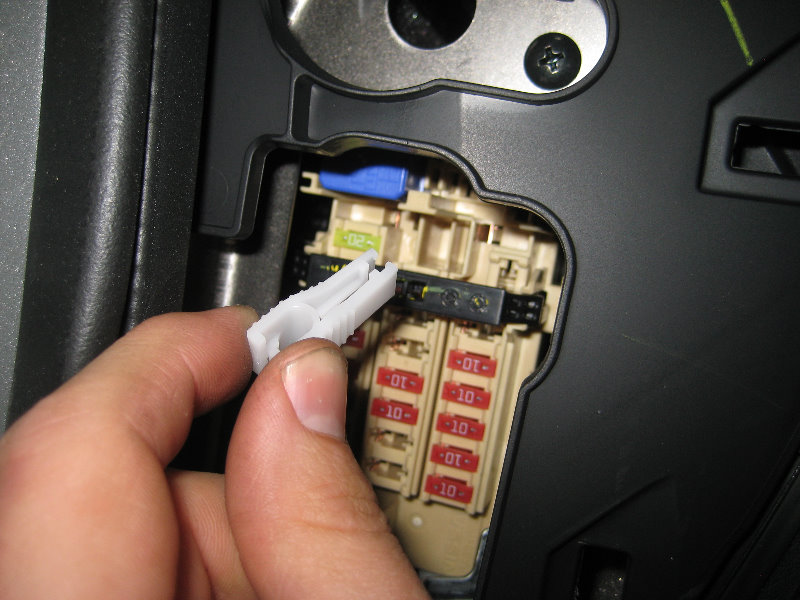
- Use a fuse puller. Most fuse boxes include a small plastic fuse puller, which makes it easier to grip and remove the fuses without damaging them.
Troubleshooting Tips
- Repeatedly blown fuses indicate a problem. If a fuse blows repeatedly after being replaced, there is likely a short circuit or an overload in the circuit it protects. Further diagnosis is needed to identify and repair the underlying problem. Do not simply keep replacing the fuse with a higher amperage fuse, as this could lead to a fire or damage to other components.
- Consult a professional if needed. If you are not comfortable working with electrical systems or if you cannot identify the cause of a blown fuse, consult a qualified mechanic. Electrical problems can be complex and require specialized knowledge and equipment to diagnose and repair safely.
- Keep spare fuses on hand. It's always a good idea to keep a selection of spare fuses in your vehicle, especially the commonly used ones. This will allow you to quickly replace a blown fuse in an emergency.
- Document your findings. When diagnosing electrical problems, keep a record of the fuses you've checked, the results of your tests, and any repairs you've made. This will help you track your progress and avoid repeating steps.
- Check the grounds. Poor grounding can cause a variety of electrical problems, including blown fuses. Make sure that all ground connections are clean and tight.
Fuse Allocation Charts: A Critical Resource
As mentioned earlier, the fuse allocation chart is your key to understanding the fuse box layout. Here are some important points to remember about these charts:
- Location. They're usually inside the fuse box cover or on the side of the fuse box itself.
- Accuracy. While generally accurate, there can be slight variations depending on the vehicle's specific trim level or options package.
- Legibility. The charts can sometimes be small and difficult to read. Use a flashlight and magnifying glass if needed.
- Language. The charts are usually in English, but some may have abbreviations or symbols that require some interpretation.
- Replacement. If the chart is missing or damaged, you may be able to find a replacement online or at a Nissan dealership.
In conclusion, understanding the location and function of the fuse boxes in your 2015 Nissan Sentra is a valuable skill for any car owner. By following the steps outlined in this guide, you can diagnose and resolve simple electrical problems, saving time and money on repairs. However, always remember to exercise caution when working with electrical systems and consult a qualified technician if you are unsure about any aspect of the repair.