2016 Nissan Altima Battery Terminal
Alright, let's talk about the battery terminals on a 2016 Nissan Altima. It might seem straightforward, but understanding the details of these connections is crucial for maintaining your Altima's electrical system and preventing headaches down the road. We're going to dive into the specifics, from identifying the terminals to troubleshooting common issues.
Identifying the Terminals and Their Function
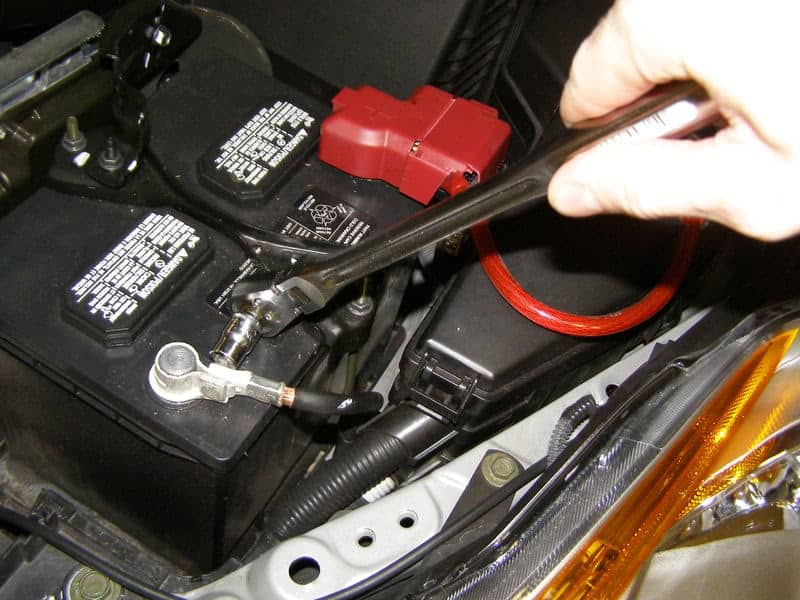
First and foremost, let's nail down what we're dealing with. Your 2016 Altima, like most cars, has two main battery terminals: a positive (+) terminal and a negative (-) terminal. These are easily identifiable by their markings and size. Typically, the positive terminal is slightly larger in diameter than the negative terminal and is often covered by a red protective cap. The negative terminal is usually black or bare metal.
Why the size difference? This is a safety feature designed to prevent accidental polarity reversal – connecting the positive cable to the negative terminal or vice-versa. Reversing the polarity can cause serious damage to your Altima's electrical system, potentially frying sensitive electronics like the ECM (Engine Control Module), audio system, and other modules.
Each terminal serves a distinct purpose. The positive terminal is the source of electrical power for your car. It's the connection point that feeds electricity from the battery to the various components that require it – the starter motor, headlights, ignition system, and so on. The negative terminal, on the other hand, provides the electrical ground. It's the return path for the electricity, completing the circuit and allowing current to flow. The chassis of your Altima acts as the primary ground path, so the negative terminal is directly connected to the vehicle's frame.
Battery Terminal Construction and Materials
The battery terminals on your Altima are generally made from lead or a lead alloy. Lead offers good electrical conductivity and resistance to corrosion, making it a suitable material for this application. However, lead is also soft and can be susceptible to corrosion over time, especially in harsh environments.
The terminal design typically involves a post-type connection. The battery has a cylindrical post protruding from its top, and the terminal connector clamps onto this post. The connector itself is usually secured by a bolt and nut, allowing for a tight and secure connection. Quality aftermarket terminals often use brass or copper alloys, which offer even better conductivity than lead but may require more frequent cleaning to prevent corrosion.
Common Issues with Altima Battery Terminals
Several problems can arise with your Altima's battery terminals, impacting your car's starting ability and overall electrical performance. Here are some of the most common:
Corrosion: The Silent Killer
Corrosion is the most frequent issue. It's the build-up of oxidation and sulfates on the terminal surface, creating a barrier that impedes the flow of electricity. This corrosion often appears as a white, blue, or green powdery substance around the terminals and cable connectors.
Corrosion can be caused by several factors, including:
- Acid Leaks: Battery acid can leak from the battery, especially around the terminal posts.
- Electrolyte Vapor: The battery produces hydrogen gas and other vapors during charging, which can react with the terminal material and air.
- Environmental Factors: Humidity, road salt, and other contaminants can accelerate corrosion.
The symptoms of corrosion include:
- Slow Cranking: The engine cranks slowly or struggles to start.
- Clicking Noise: A rapid clicking sound from the starter solenoid when trying to start.
- Dim Headlights: Headlights appear dimmer than usual.
- Electrical System Problems: Intermittent issues with the radio, power windows, or other electrical components.
To address corrosion, disconnect the battery (negative terminal first!), clean the terminals and cable connectors with a battery terminal cleaner or a mixture of baking soda and water. Use a wire brush to scrub away the corrosion. After cleaning, apply a battery terminal protectant or dielectric grease to help prevent future corrosion. Always reconnect the negative terminal last.
Loose Connections: A Simple Fix with Big Impact
A loose battery terminal connection can also cause starting problems and electrical issues. The connection needs to be tight and secure to ensure proper current flow. Over time, the terminal bolts can loosen due to vibration or temperature changes.
The symptoms of a loose connection are similar to those of corrosion: slow cranking, clicking noise, and intermittent electrical problems. To fix a loose connection, simply tighten the terminal bolts. Be careful not to overtighten them, as this can damage the terminals or strip the threads. A good rule of thumb is to tighten until snug, then give it a quarter turn more.
Damaged Terminals or Cables: When Replacement is Necessary
In some cases, the battery terminals or cables themselves may be damaged. This can be due to physical damage, severe corrosion, or repeated over-tightening of the terminal bolts. A cracked terminal or frayed cable can significantly reduce the current-carrying capacity and cause starting problems. Signs of damage include:
- Visible cracks or breaks in the terminal.
- Excessive corrosion that cannot be removed with cleaning.
- Frayed or damaged battery cables.
- Melting or discoloration of the insulation on the battery cables.
If you suspect damaged terminals or cables, it's best to replace them. Replacing battery terminals is a relatively straightforward process. Disconnect the battery, remove the old terminals, and install the new ones, ensuring a tight and secure connection. Battery cables can be slightly more involved, as they may require routing through the engine compartment. When replacing cables, make sure to use the correct gauge (thickness) to ensure proper current flow. Using a cable that is too thin can lead to voltage drop and overheating.
Troubleshooting Steps for Battery Terminal Issues
If you're experiencing starting problems or electrical issues with your 2016 Altima, here's a step-by-step troubleshooting guide:
- Visual Inspection: Start by visually inspecting the battery terminals and cables for signs of corrosion, damage, or looseness. Look for any white, blue, or green deposits on the terminals, cracks in the plastic, or frayed cables.
- Terminal Tightness Check: Try to wiggle the battery terminals. If they move easily, the connections are likely loose. Tighten the terminal bolts, but avoid over-tightening.
- Voltage Test: Use a multimeter to measure the voltage at the battery terminals. A fully charged battery should read around 12.6 volts. If the voltage is significantly lower (e.g., below 12 volts), the battery may be discharged or damaged.
- Load Test: A load test measures the battery's ability to deliver current under load. Most auto parts stores offer free battery load testing. This test will help determine if the battery is capable of providing enough power to start the engine.
- Continuity Test: Use a multimeter to check the continuity of the battery cables. This test verifies that the cables are not broken or damaged internally. Disconnect the battery before performing a continuity test.
- Cleaning and Protection: If you find corrosion, clean the terminals and cable connectors thoroughly and apply a battery terminal protectant.
Upgrading Your Altima's Battery Terminals
While the stock battery terminals on your 2016 Altima are generally adequate, upgrading to aftermarket terminals can offer several benefits, particularly if you've added aftermarket electronics or frequently experience corrosion. Upgraded terminals are often made from higher-quality materials like brass or copper, which provide better conductivity and corrosion resistance. They may also feature a more robust design for a more secure connection.
When selecting aftermarket battery terminals, consider the following:
- Material: Look for terminals made from brass or copper for optimal conductivity.
- Design: Choose a design that provides a secure and tight connection. Some terminals feature multiple connection points for accessories.
- Compatibility: Ensure that the terminals are compatible with your Altima's battery and cable size.
- Quality: Opt for reputable brands known for producing high-quality automotive parts.
Upgrading your battery terminals can improve your Altima's electrical performance, reduce the risk of corrosion, and provide a more reliable connection for your aftermarket accessories. Remember to always disconnect the battery before working on the terminals, and follow the manufacturer's instructions for installation.
Understanding your 2016 Nissan Altima's battery terminals and maintaining them properly is crucial for the reliable operation of your vehicle. By following these guidelines, you can diagnose and address common issues, prevent corrosion, and ensure a strong and consistent electrical connection. Don't underestimate the importance of these small components – they play a vital role in keeping your Altima running smoothly.