2016 Nissan Maxima Windshield Pillar Trim
Okay, so you're here because you're having trouble with the windshield pillar trim on your 2016 Nissan Maxima. You're not alone! It's a fairly common issue, especially as these cars age. Whether it's become loose, detached, cracked, or simply looks faded, it can be frustrating. Let's break down the problem and, more importantly, talk about how to fix it.
Understanding the Issue: Why is My Maxima's Windshield Pillar Trim Acting Up?
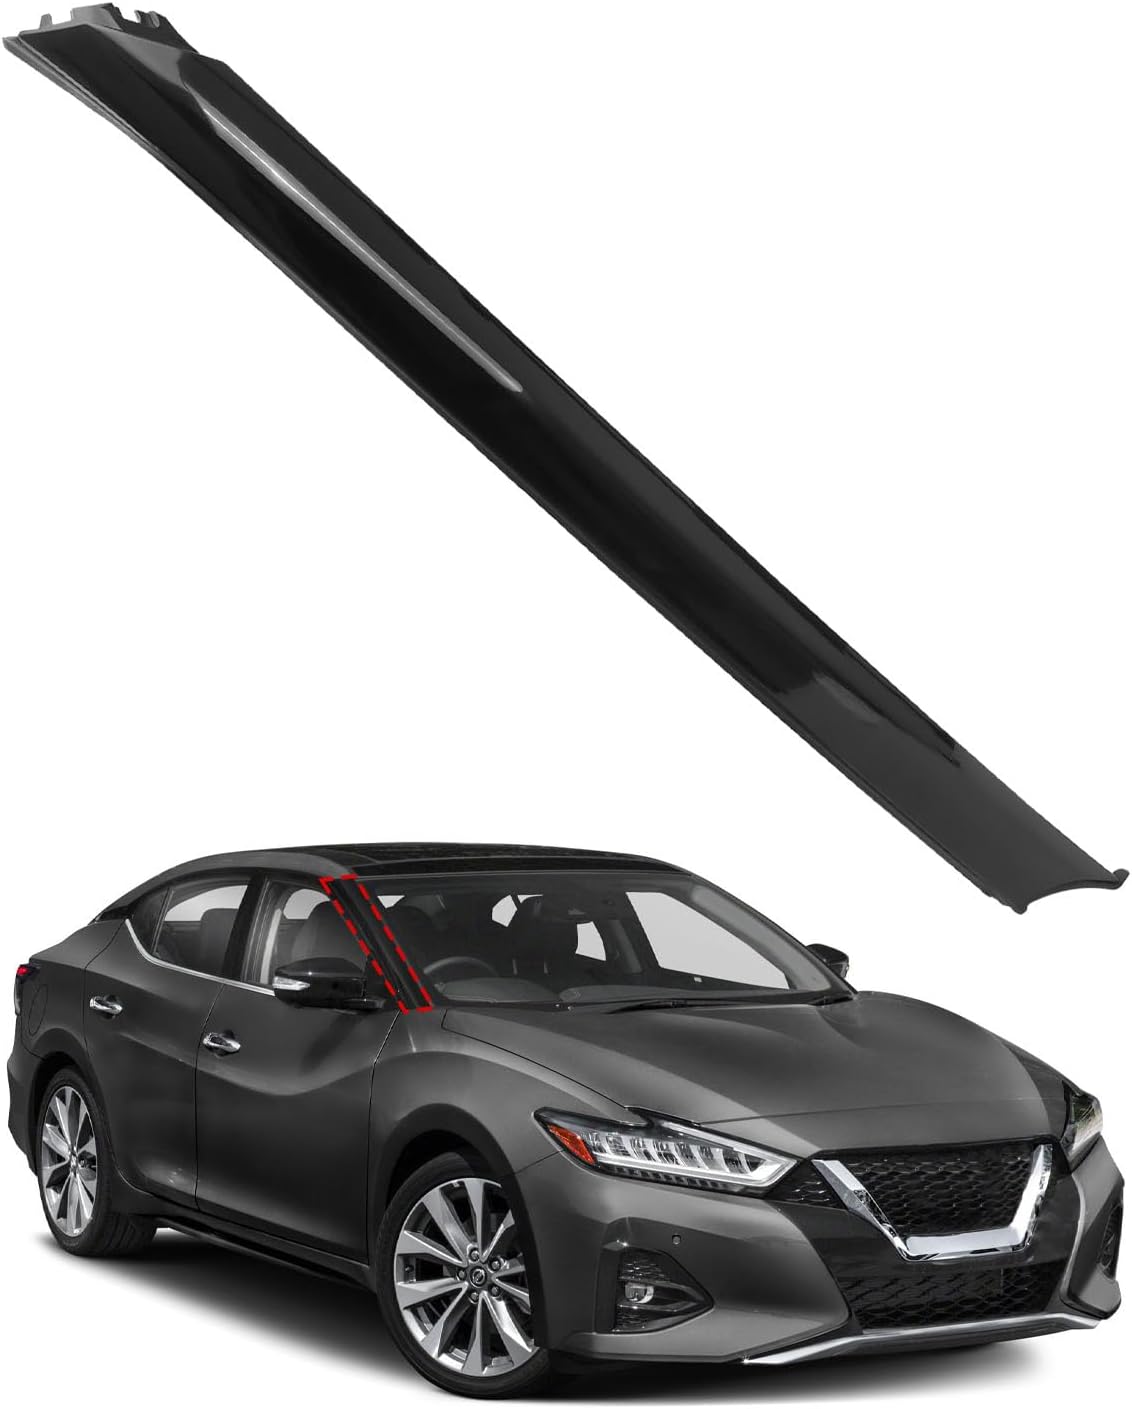
The windshield pillar trim (also sometimes called A-pillar trim) on your 2016 Maxima is designed to serve several purposes. Primarily, it's there for aesthetics, providing a clean, finished look to the vehicle's exterior. It also helps to protect the underlying metal from the elements, preventing rust and corrosion around the windshield frame. Furthermore, in some vehicles (including the Maxima), it can contribute to aerodynamics and even play a role in noise reduction inside the cabin.
But why does it fail? Here are a few common culprits:
- Sun Exposure: Harsh UV rays are a major enemy of plastics and adhesives. Over time, the sun can degrade the trim material, causing it to become brittle and crack. It can also weaken the adhesive that holds it in place.
- Temperature Fluctuations: Repeated expansion and contraction due to temperature changes can also stress the trim and its adhesive, leading to loosening or detachment.
- Poor Adhesive Quality: Sometimes, the original adhesive used at the factory wasn't the best. This is a less common cause, but certainly possible.
- Accidental Damage: Car washes (especially touchless ones with high-pressure sprayers), tree branches, or even just leaning against the pillar while washing your car can damage the trim.
- Previous Windshield Replacement: If your windshield has been replaced, there's a chance the trim wasn't reinstalled properly, or the original clips and adhesive weren't used, making it more prone to failure.
Diagnosing the Problem: What to Look For
Before diving into a repair, accurately identify the extent of the problem. Here are some things to look for:
- Loose Trim: Can you easily wiggle the trim piece? Does it feel like it's not securely attached?
- Detached Trim: Is the trim piece partially or completely separated from the vehicle?
- Cracked or Broken Trim: Are there visible cracks, chips, or breaks in the plastic?
- Faded or Discolored Trim: Has the trim lost its original color and luster? While this doesn't necessarily affect its functionality, it can detract from the car's appearance.
- Missing Clips: If the trim is detached, check if any of the retaining clips are broken or missing.
Solutions: Repairing or Replacing Your Maxima's Windshield Pillar Trim
The best course of action depends on the severity of the damage. Here are a few options:
Minor Repairs: Re-Adhering Loose Trim
If the trim is simply loose but not cracked or broken, you might be able to re-adhere it. This is the most cost-effective solution.
Tools and Materials Needed:
- Automotive adhesive (specifically designed for exterior trim – 3M Automotive Attachment Tape is a good choice).
- Rubbing alcohol or a wax and grease remover.
- Clean microfiber cloths.
- Painter's tape.
- Possibly plastic trim removal tools (to gently pry the trim away if needed).
Procedure:
- Clean the Surfaces: Thoroughly clean both the back of the trim piece and the area on the vehicle where it attaches. Use rubbing alcohol or wax and grease remover to remove any dirt, wax, or old adhesive residue. Let it dry completely.
- Apply New Adhesive: Apply a thin, even layer of automotive adhesive to the back of the trim piece. Follow the adhesive manufacturer's instructions. If you're using adhesive tape, apply it to the entire perimeter of the trim piece and in a few strategic locations in the center.
- Reattach the Trim: Carefully align the trim piece with its original position and press it firmly against the vehicle. Hold it in place for the recommended time (usually a few minutes).
- Secure with Tape: Use painter's tape to secure the trim piece in place while the adhesive cures. This will prevent it from shifting.
- Allow to Cure: Let the adhesive cure for the recommended time (usually 24-48 hours) before removing the tape.
Replacing Damaged or Broken Trim
If the trim is cracked, broken, or severely damaged, replacement is the best option. This will ensure a proper fit and a long-lasting repair.
Tools and Materials Needed:
- New windshield pillar trim (purchase from a Nissan dealer or a reputable online auto parts retailer). Make sure you order the correct side (left or right).
- Plastic trim removal tools.
- Socket set (for removing any screws).
- Possibly a heat gun (to soften adhesive if needed).
- Gloves.
- Safety glasses.
Procedure:
- Remove the Old Trim: This is often the trickiest part. Use plastic trim removal tools to gently pry the old trim away from the vehicle. Be careful not to damage the surrounding paint. Some trim pieces are held in place by clips, while others are glued. If glued, you may need to use a heat gun to soften the adhesive. Work slowly and carefully to avoid breaking the trim or damaging the vehicle. Start from the top or bottom and work your way along.
- Clean the Area: Once the old trim is removed, thoroughly clean the area to remove any old adhesive residue or dirt. Use rubbing alcohol or wax and grease remover.
- Install the New Trim: Align the new trim piece with its mounting points and press it firmly into place. Make sure all the clips are engaged. Some trim pieces may require screws to be tightened. Ensure the new trim sits flush with the surrounding panels.
- Test the Fit: Double-check that the new trim is securely attached and that there are no gaps or loose areas.
Professional Repair
If you're not comfortable tackling the repair yourself, or if you're concerned about damaging your vehicle, it's always best to take it to a professional. A qualified mechanic or body shop technician will have the tools and experience to properly diagnose and repair the problem.
Cost Considerations
The cost of repairing or replacing your windshield pillar trim will vary depending on several factors, including:
- The cost of the replacement trim: Genuine Nissan parts tend to be more expensive than aftermarket parts. Expect to pay anywhere from $50 to $150+ for a new trim piece, depending on the source.
- The cost of labor: If you're having a professional do the work, labor costs will vary depending on the shop's hourly rate. Expect to pay anywhere from $50 to $200+ for labor, depending on the complexity of the job.
- The cost of materials: If you're doing the repair yourself, you'll need to factor in the cost of adhesive, cleaning supplies, and any other materials you need.
Estimated Total Costs:
- DIY Repair (Re-Adhering): $10 - $30 (for adhesive and cleaning supplies)
- DIY Replacement: $50 - $200 (for the trim piece)
- Professional Repair/Replacement: $100 - $400+ (depending on parts and labor)
Preventative Measures
To help prevent future problems with your windshield pillar trim, consider the following:
- Park in the Shade: When possible, park your Maxima in the shade to protect the trim from direct sunlight.
- Use a Car Cover: A car cover can provide additional protection from the sun and other elements.
- Regularly Clean Your Car: Washing your car regularly can help to remove dirt and grime that can damage the trim.
- Avoid Harsh Chemicals: When washing your car, avoid using harsh chemicals that can damage the trim.
- Be Careful When Washing: Be mindful of the pillar trim when washing your car, especially with high-pressure sprayers.
- Inspect Regularly: Periodically inspect your windshield pillar trim for any signs of damage or loosening. Catching problems early can prevent them from becoming more serious.
Important Considerations
- Airbag System: Be *extremely* careful when working near the windshield pillar, as the side curtain airbag system components are often located in this area. Disconnecting the battery before beginning any work is *highly* recommended to prevent accidental airbag deployment. Consult your vehicle's repair manual for specific instructions and warnings related to the airbag system. If you are uncomfortable working around the airbag system, *always* seek professional assistance.
- Matching Paint: If you choose to paint the new trim piece, ensure you use the correct paint code for your vehicle to achieve a perfect color match.
By understanding the problem, diagnosing the issue correctly, and following the appropriate repair procedures, you can get your 2016 Nissan Maxima looking its best again. Whether you choose to tackle the repair yourself or take it to a professional, hopefully, this guide has provided you with the information you need to make an informed decision.